Configure SCIM - JumpCloud
This guide describes how to configure Row Zero with JumpCloud using SCIM (System for Cross-domain Identity Management). Once set up, any users or groups assigned to the application in JumpCloud will automatically sync to Row Zero.
NOTE: Before configuring SCIM, configure the SSO solution first (SSO - SAML (JumpCloud) or SSO - OIDC (JumpCloud)).
Here is the information that you will need to configure a Row Zero SCIM application in JumpCloud:
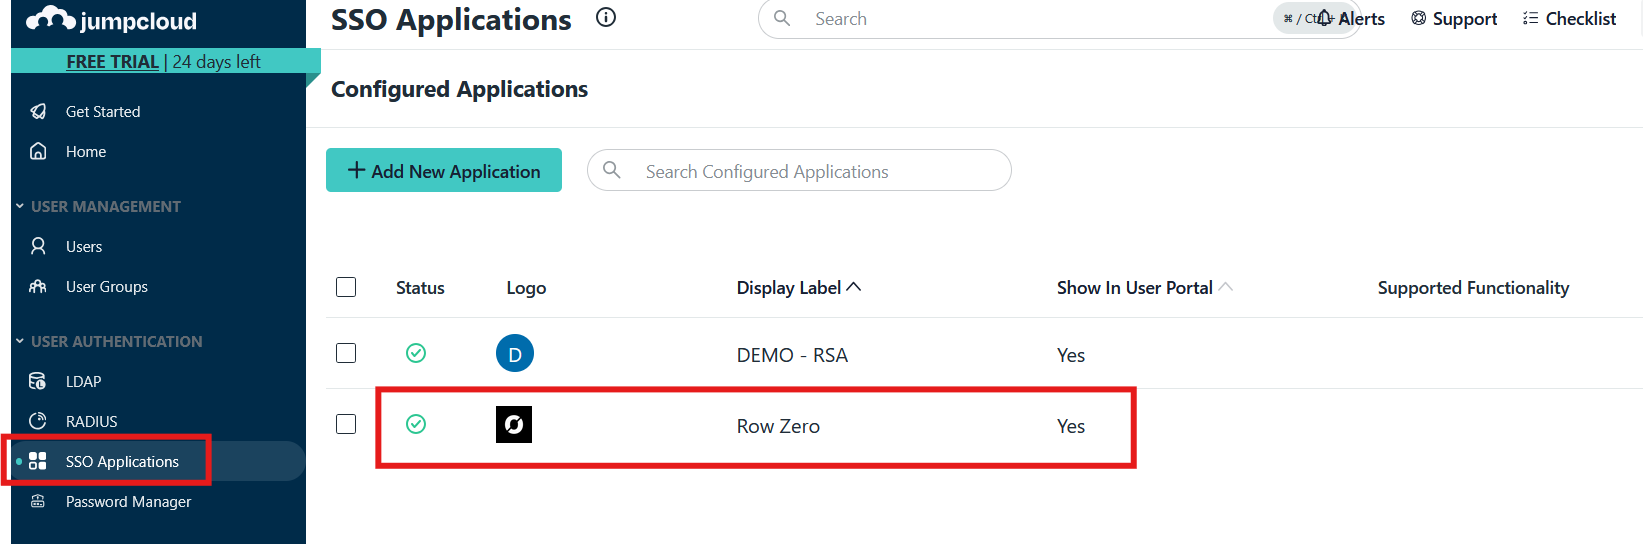
- In JumpCloud under the "SSO Applications" tab, click on the "Row Zero" application:
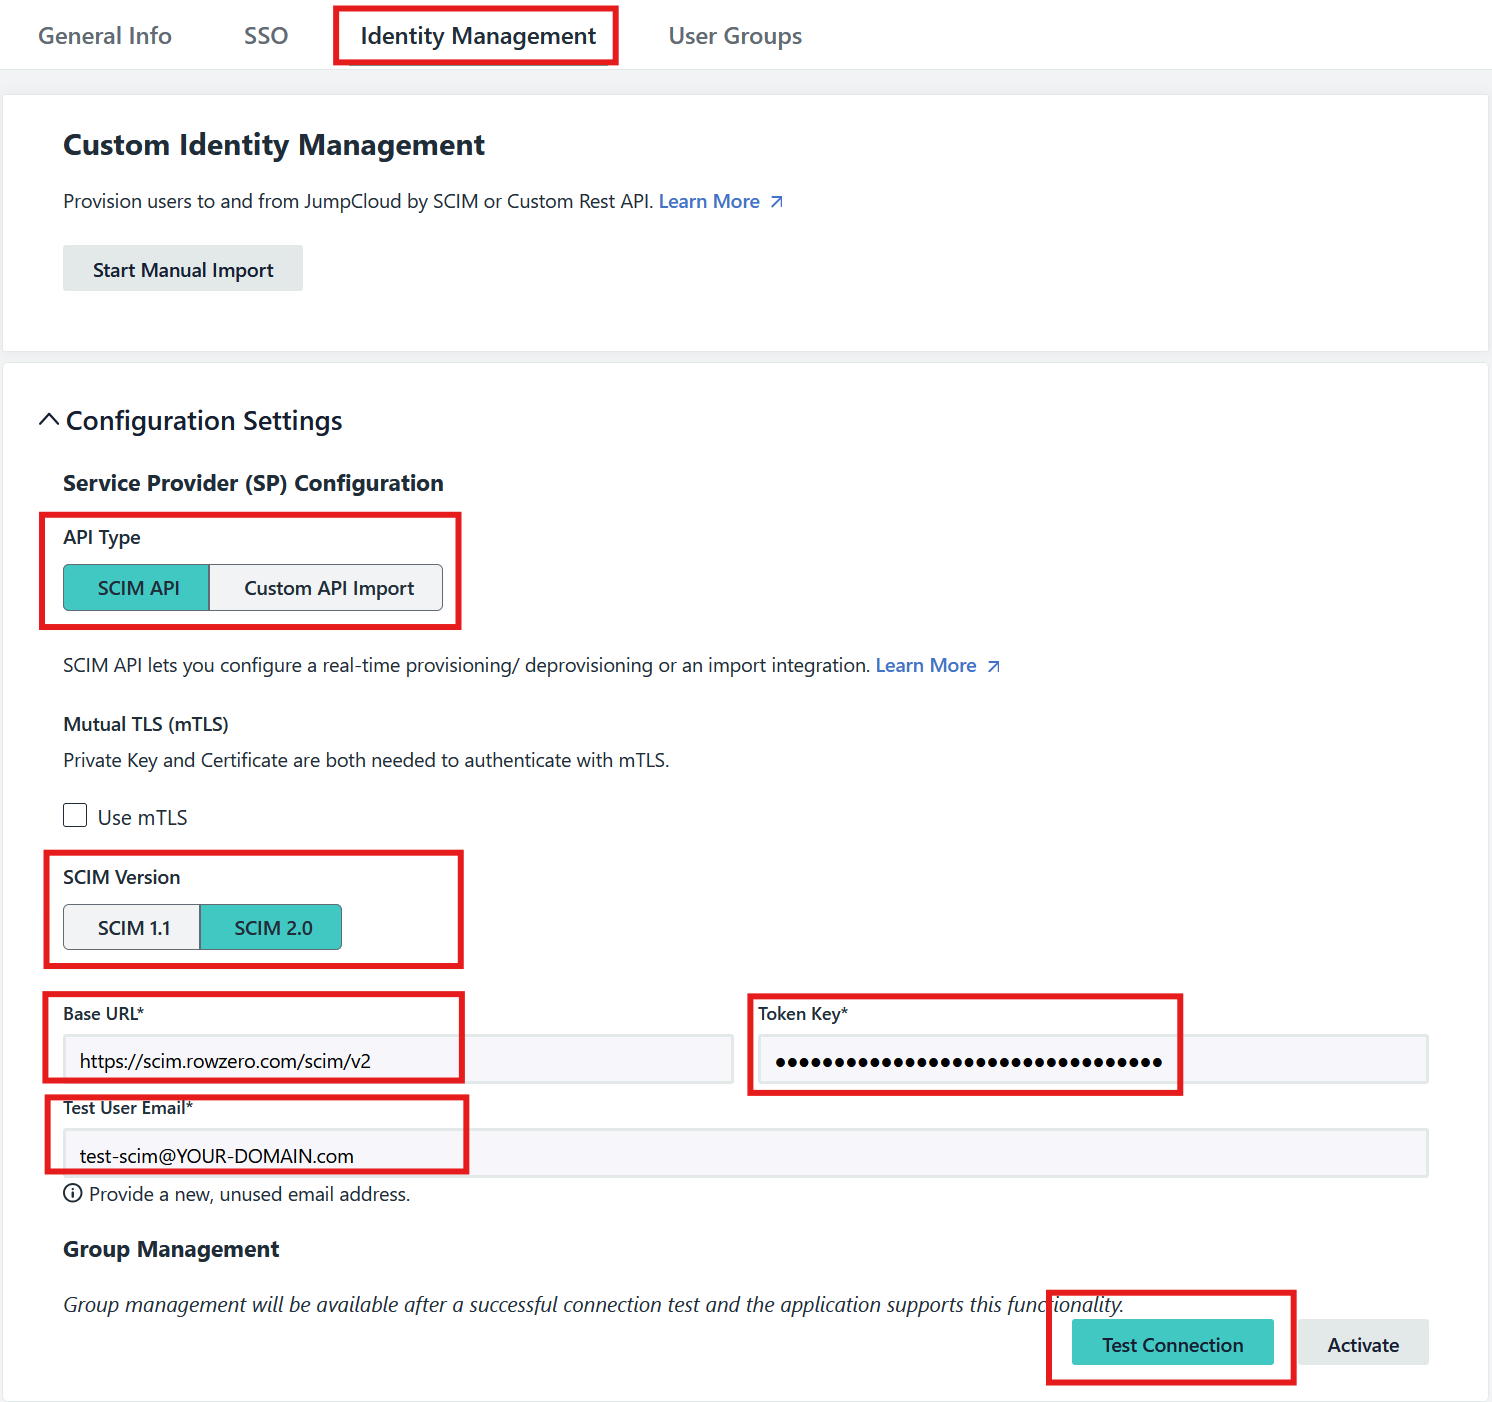
- On the "Identity Management" tab, under "Configuration Settings" configure the following:
- For API Type select
SCIM API - For SCIM Version select
SCIM 2.0 - For Base URL enter
https://scim.rowzero.com/scim/v2 - For Token Key contact Row Zero Support for your unique token
- For Test User Email enter
test-scim@YOUR-DOMAIN.com(replaceYOUR-DOMAINwith your enterprise domain) - Click the "Test Connection" button
- For API Type select
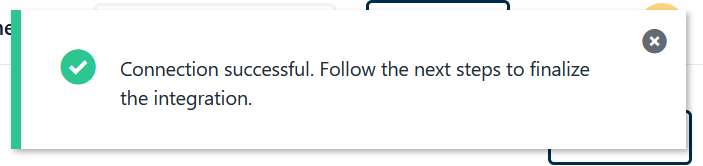
- Verify that the "Test Connection" was successful:
- Under "Group Management", check "Enable management of User Groups and Group Membership in this application.":

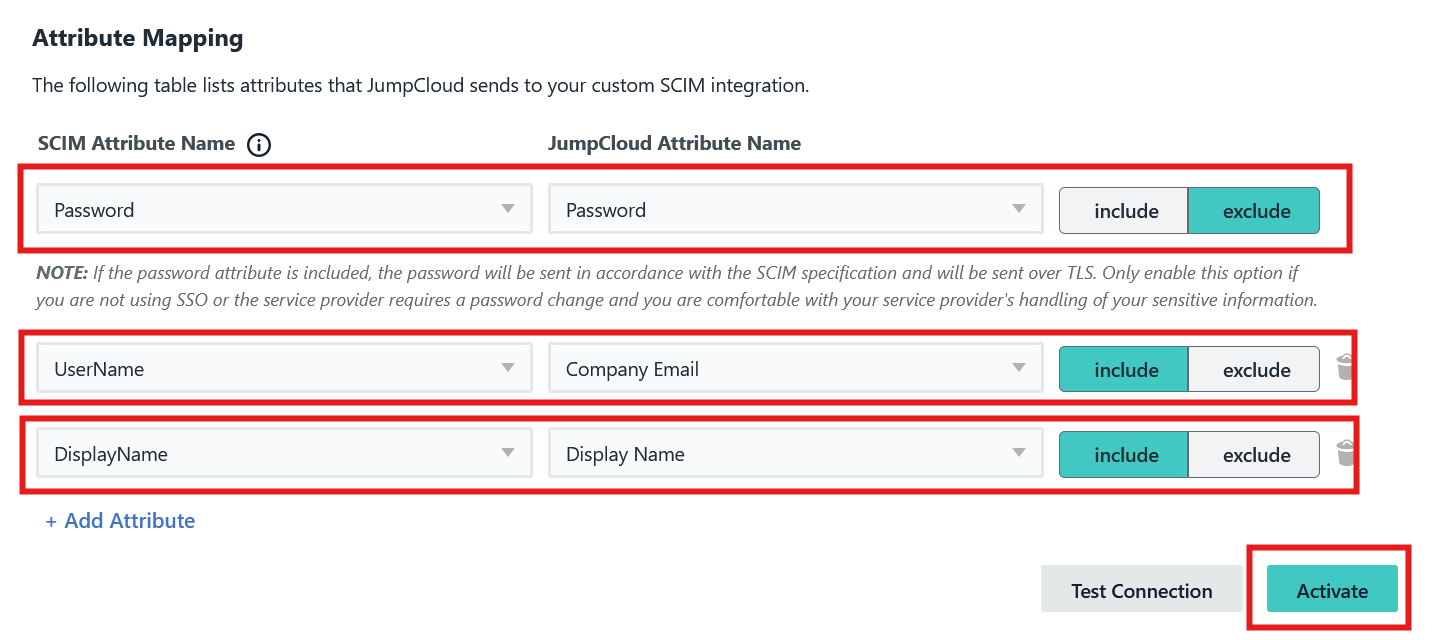
- Under "Attribute Mapping", configure the following:
- For the "Password" mapping, select "Exclude"
- Add a "Username" mapping, select "Include"
- Add a "DisplayName" mapping, select "Include"
- Click the "Activate" button:
- Click the "Start Manual Import" button:

- If you've already assigned users for SSO, select those users and click the "Import" button. Any users added to the applicaiton moving forward will automatically be imported through the SCIM endpoints.