Slicers in Row Zero
A slicer is an interactive filter that can be moved anywhere in the workbook and makes it easy to quickly filter multiple pivot tables and charts at once. Slicers filter the underlying source data, which dynamically filters everything that references the source data. You can place the slicer next to your charts and pivot tables to make it easy to filter underlying data on another sheet. The documentation below shows how to create and work with slicers in Row Zero.
- How to create a slicer
- How to add pivot table slicers
- Moving and deleting slicers
- How to add chart slicers
- Slicers connected to multiple pivot tables and charts
- Filtering formulas with slicers
- Slicers vs filters
- Replacing deleted slicer columns
- Slicers video tutorial
How to create a slicer
You can add slicers to pivot tables, charts, data tables, and cell ranges. To add a slicer, select your data and go to 'Insert' in the header navigation and select 'Slicer'. 
How to add pivot table slicers
You can add a slicer to pivot table source data and then place the slicer next to the pivot table to make it easy to slice the pivot table data further. Here's how:
- Create a pivot table from a data table or a cell range with filters applied.
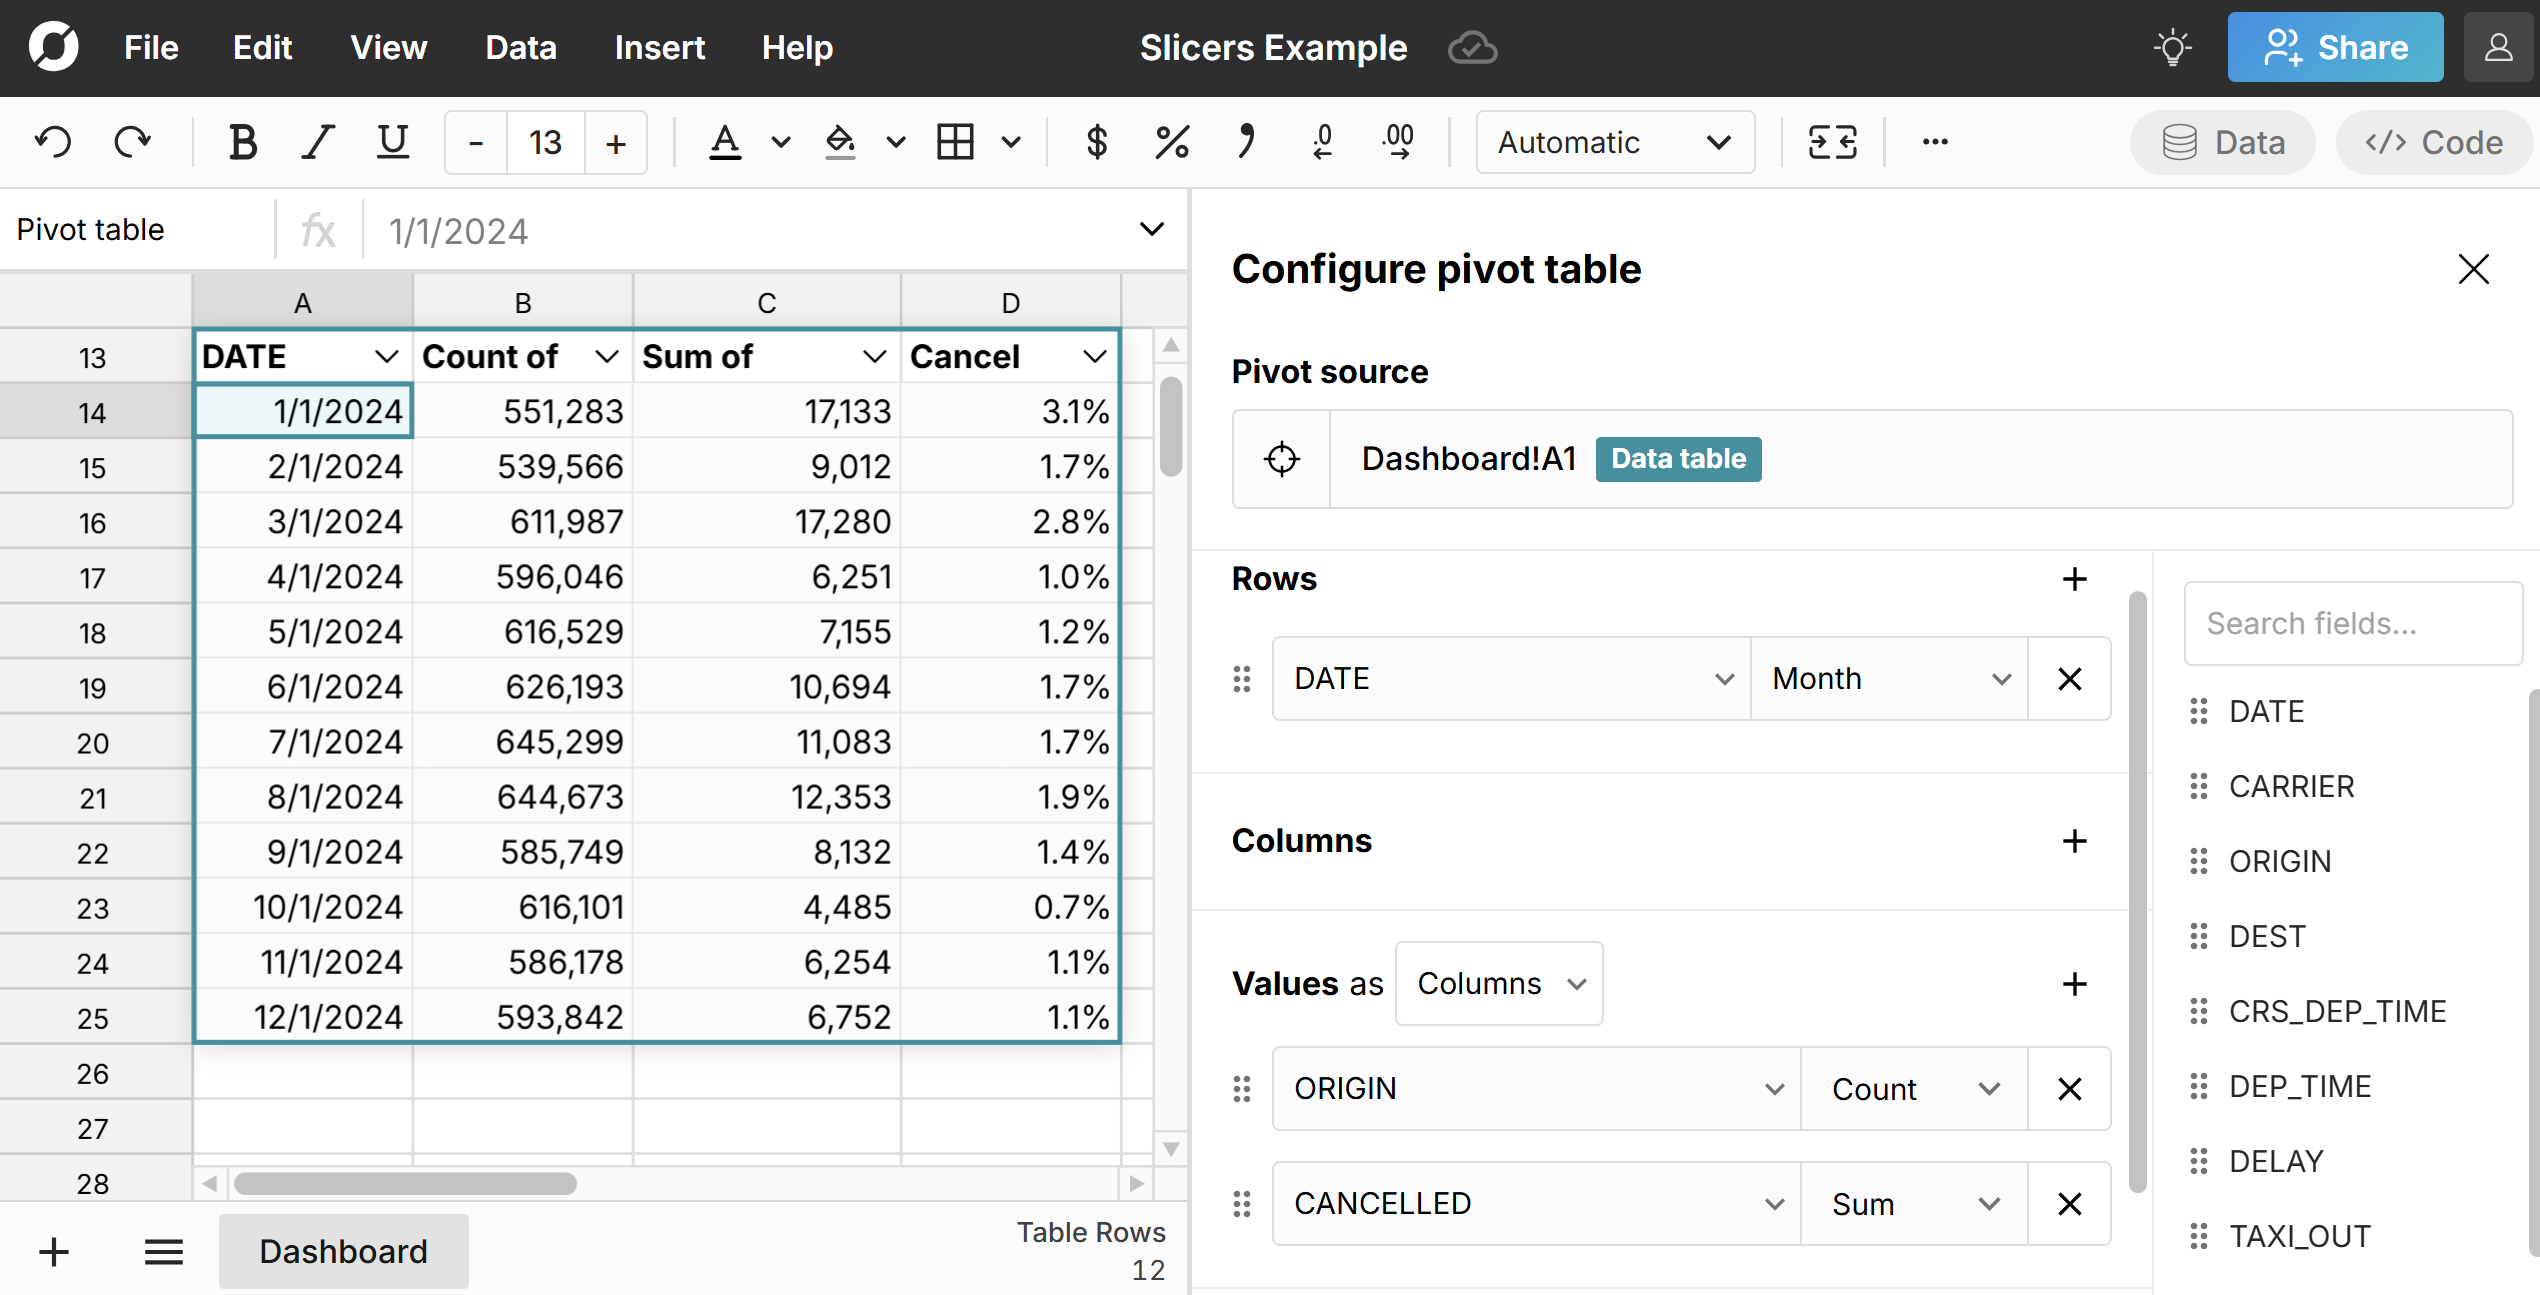
- Navigate to your source data, click on a cell and go to 'Insert', 'Slicer', and select the columns you'd like to create a slicer for. Click 'Apply'.
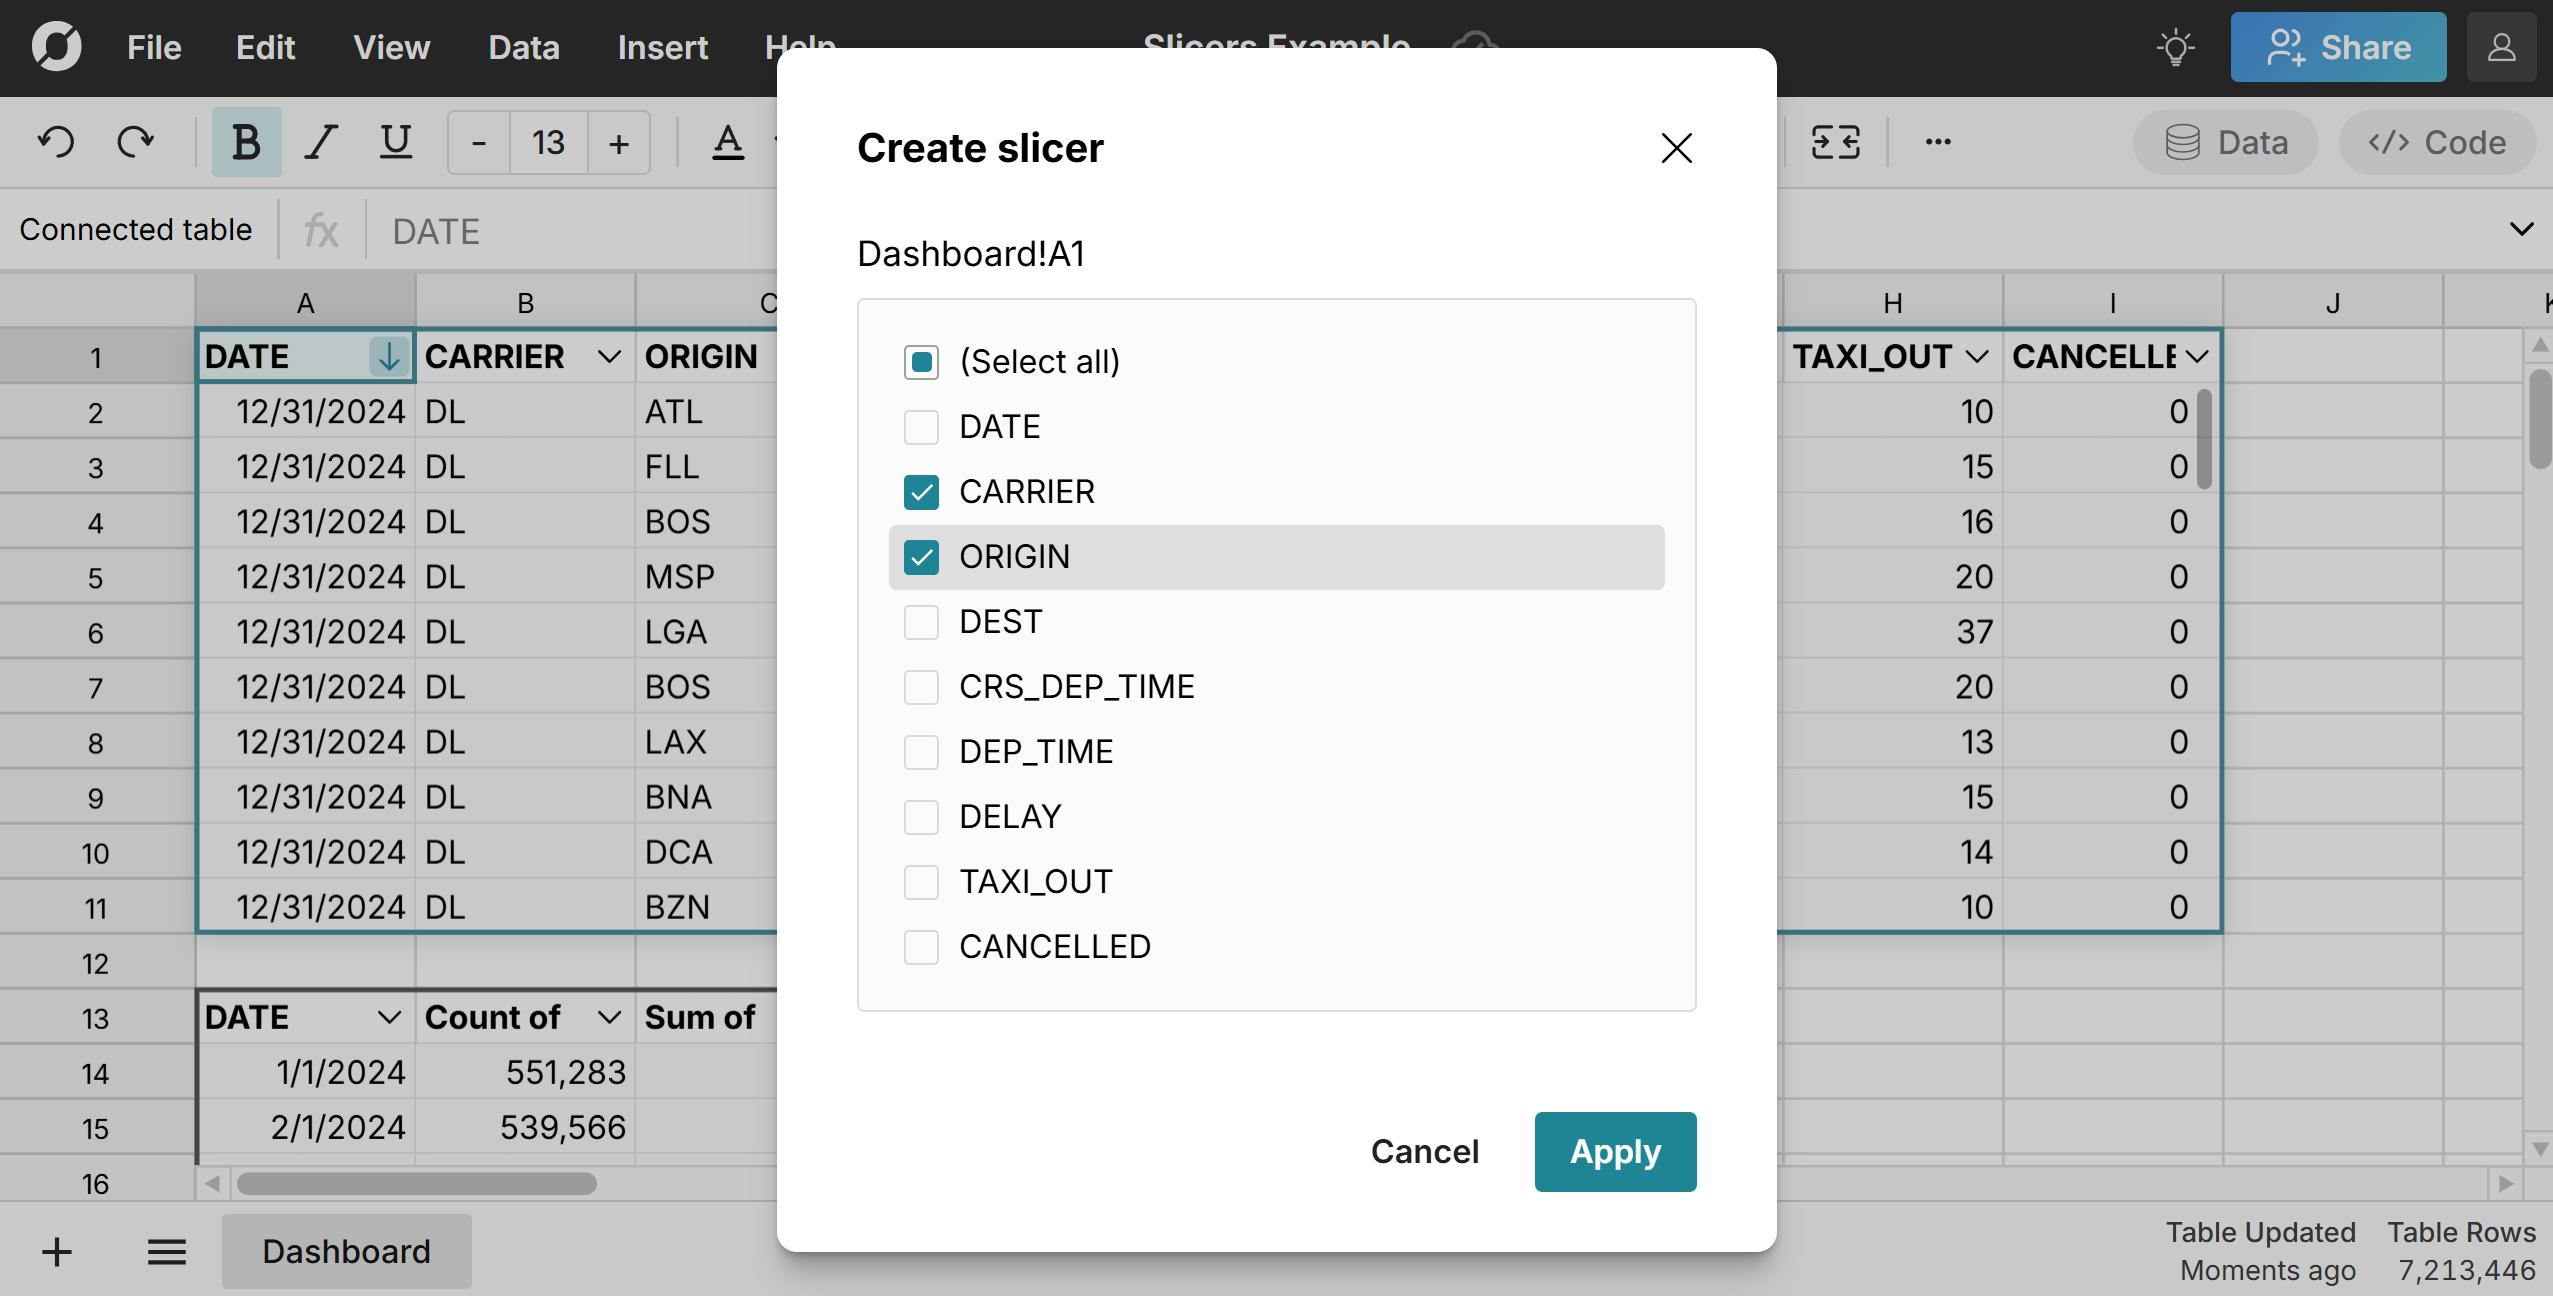
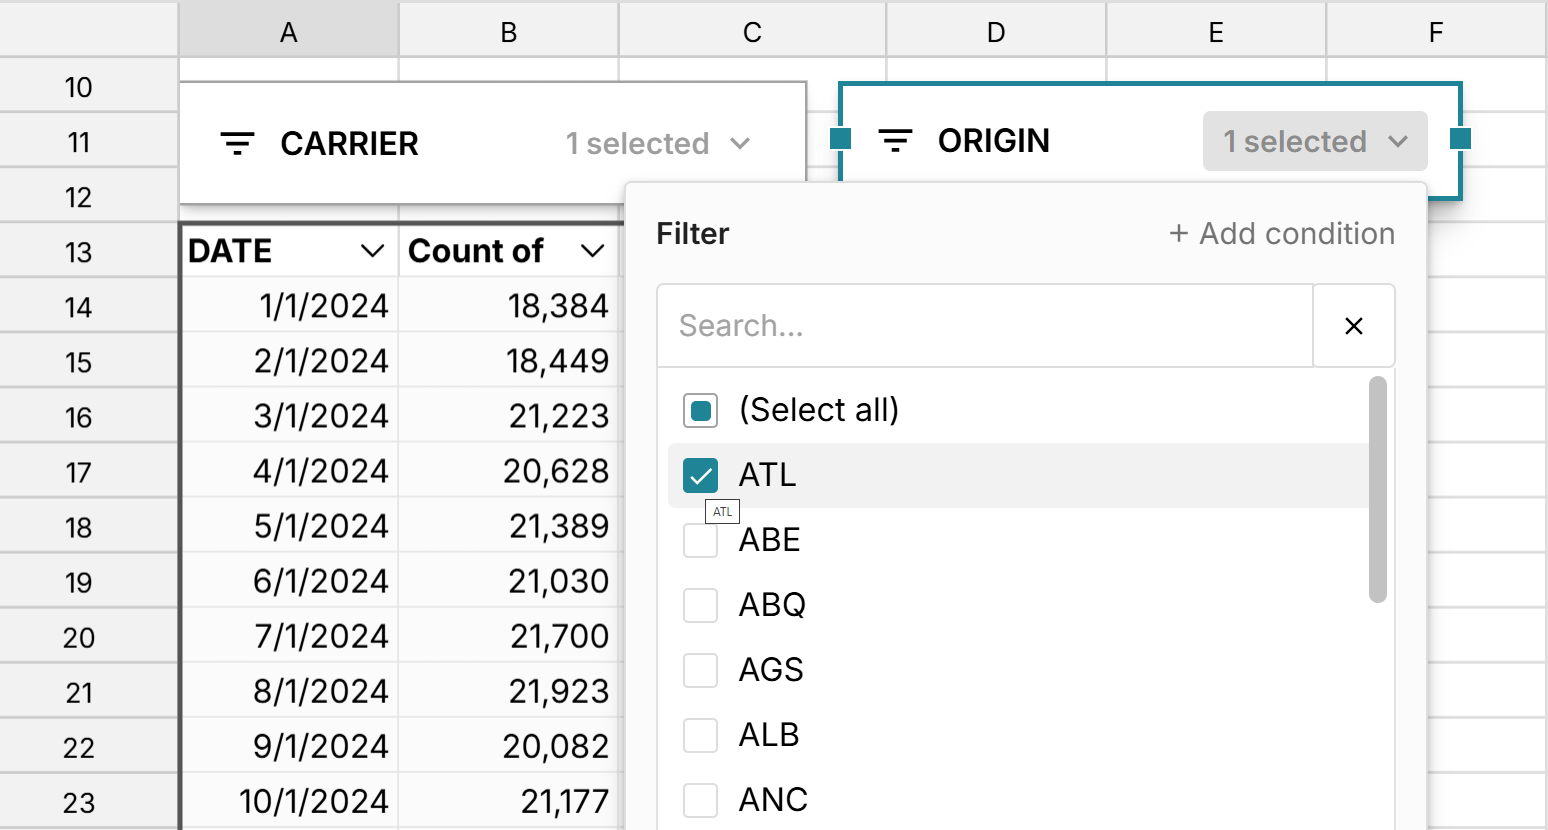
- A slicer is created for each column selected. Click the slicer dropdown to open the filter. You can select from the list of values, search for a value, or filter by one or more conditions (e.g. >=5). Click 'Apply' and the source data will filter accordingly. The pivot table dynamically updates to reflect the filters applied to the source data.
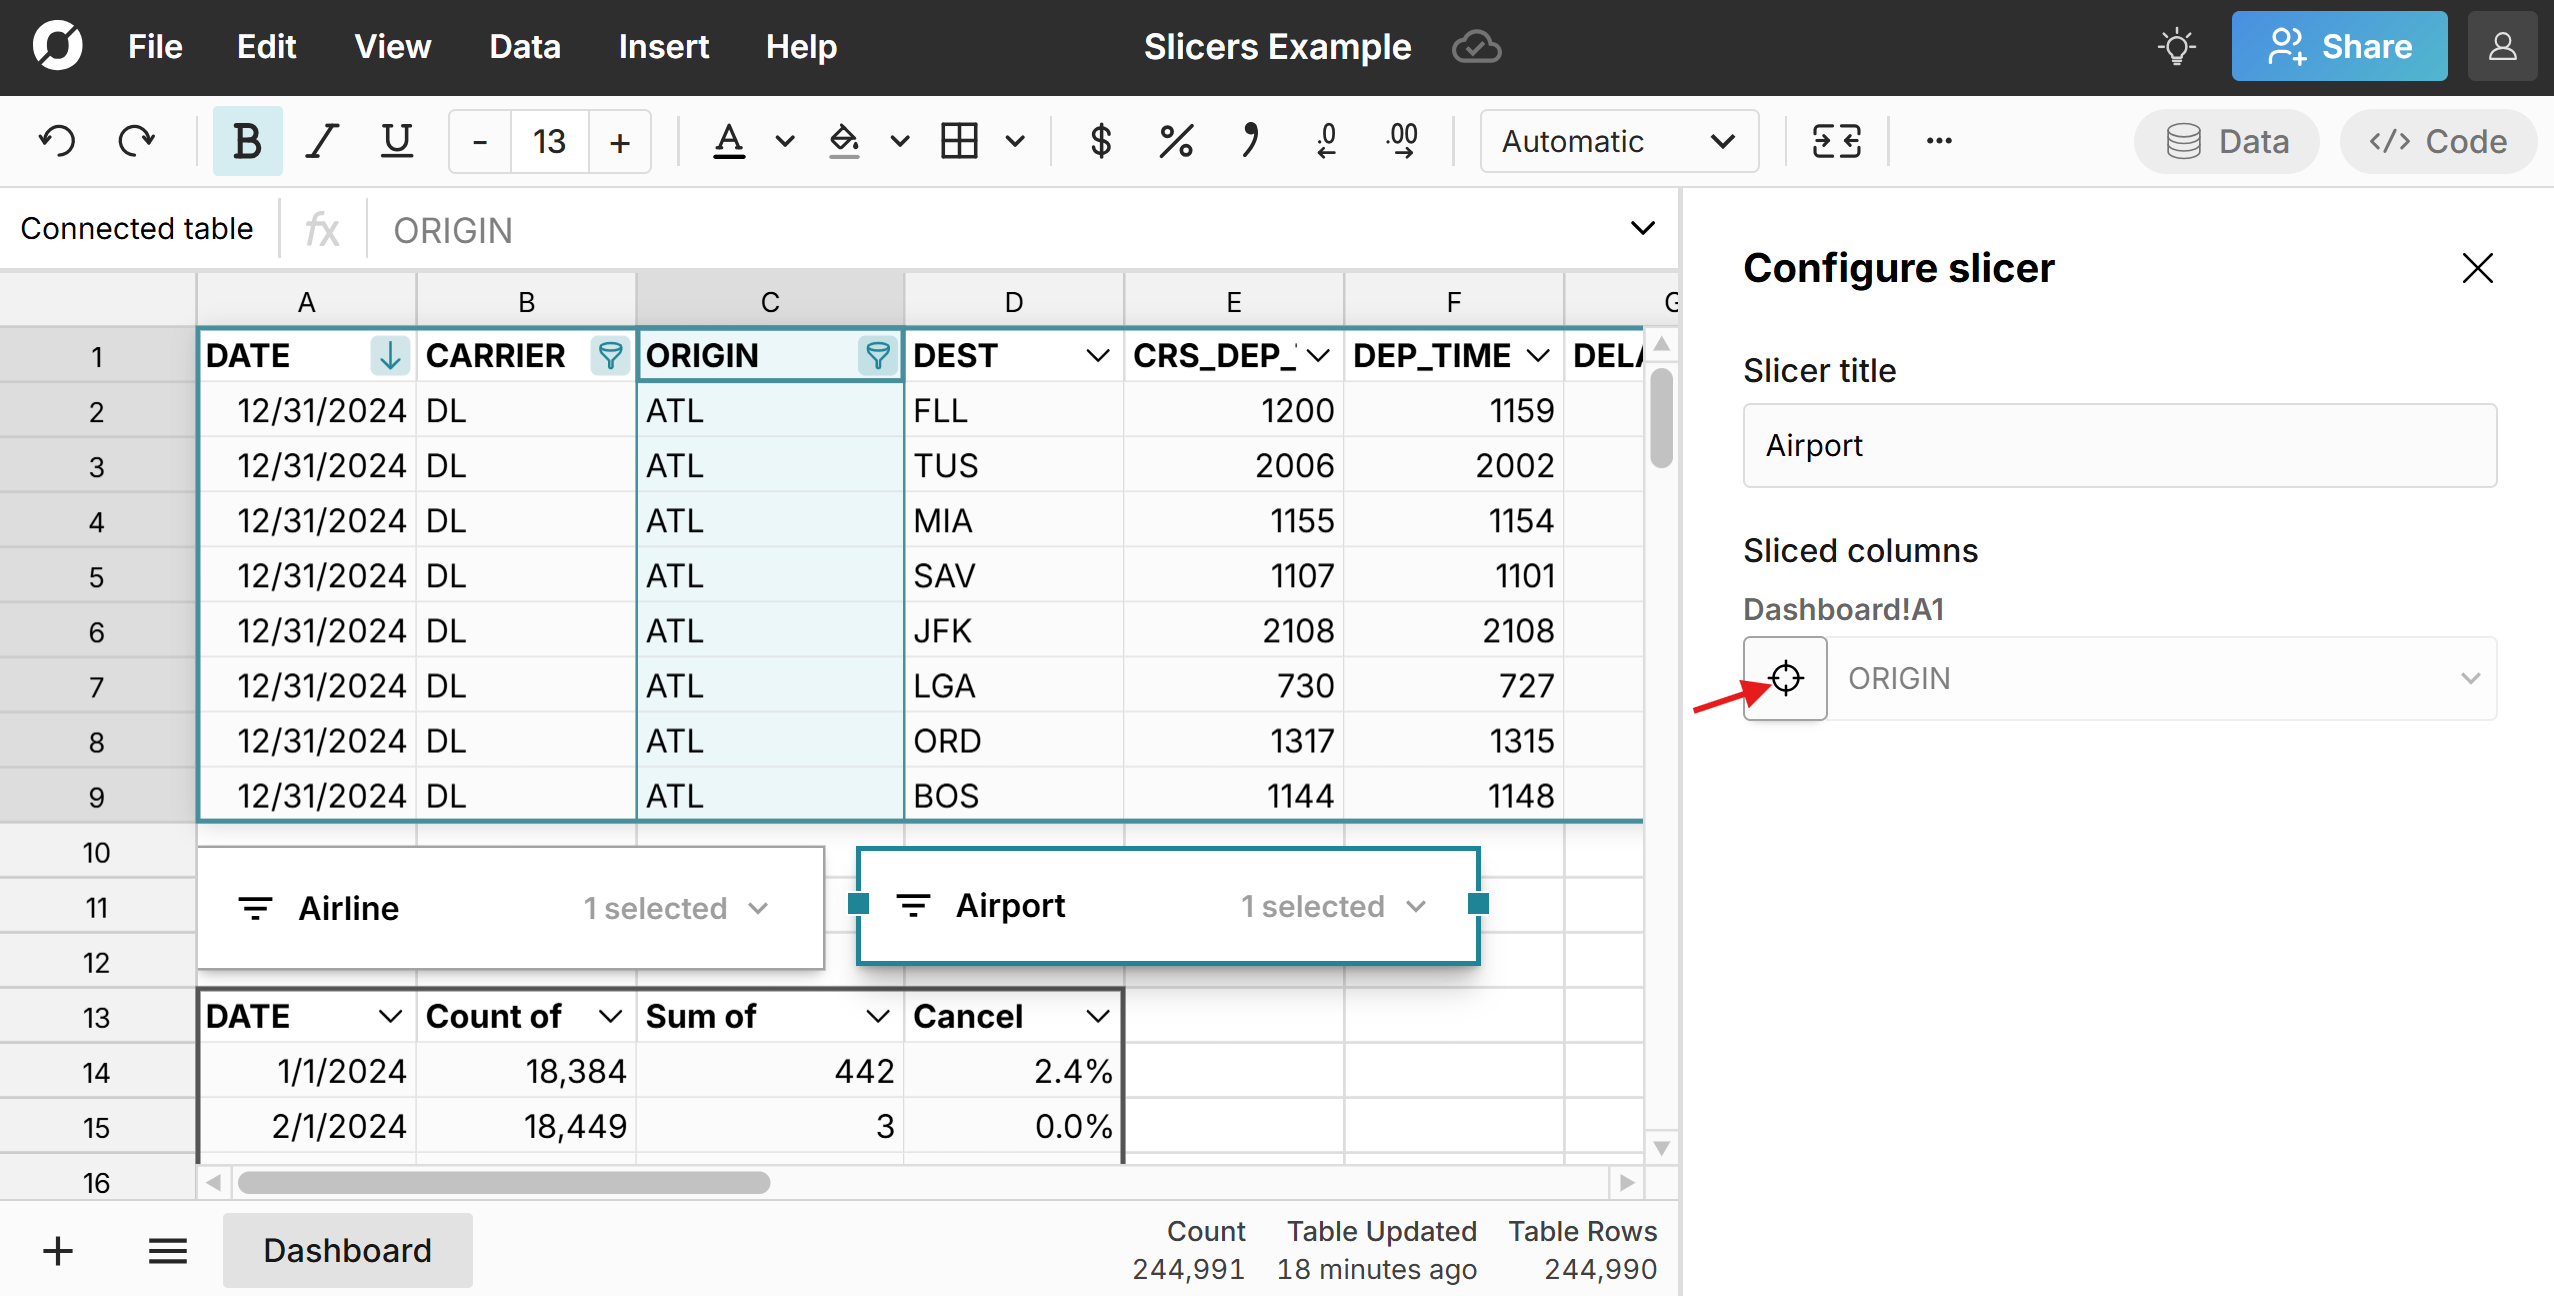
- You can further configure your slicer by double clicking on it. You can rename the slicer and also click on the source icon next to the sliced column to go back to the source range.
Note: You can also add slicers to the pivot table results to make it easy to filter pivot table results from another location.
Moving and deleting slicers
You can move your slicer anywhere in the workbook. You can drag it around the sheet and right-click to open a context menu where you can configure your slicer, delete your slicer, or cut and paste your slicer to another sheet. 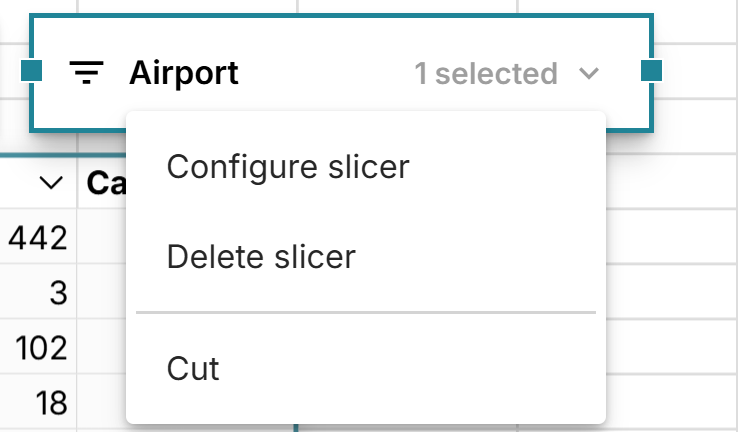 Typically slicers are moved to dashboard sheets or next to charts and pivot tables where summary data is presented.
How to add chart slicers
Adding slicers to a chart is just as simple. If you've already added a slicer to your pivot table, the slicer will also control any charts you create from the pivot table data. 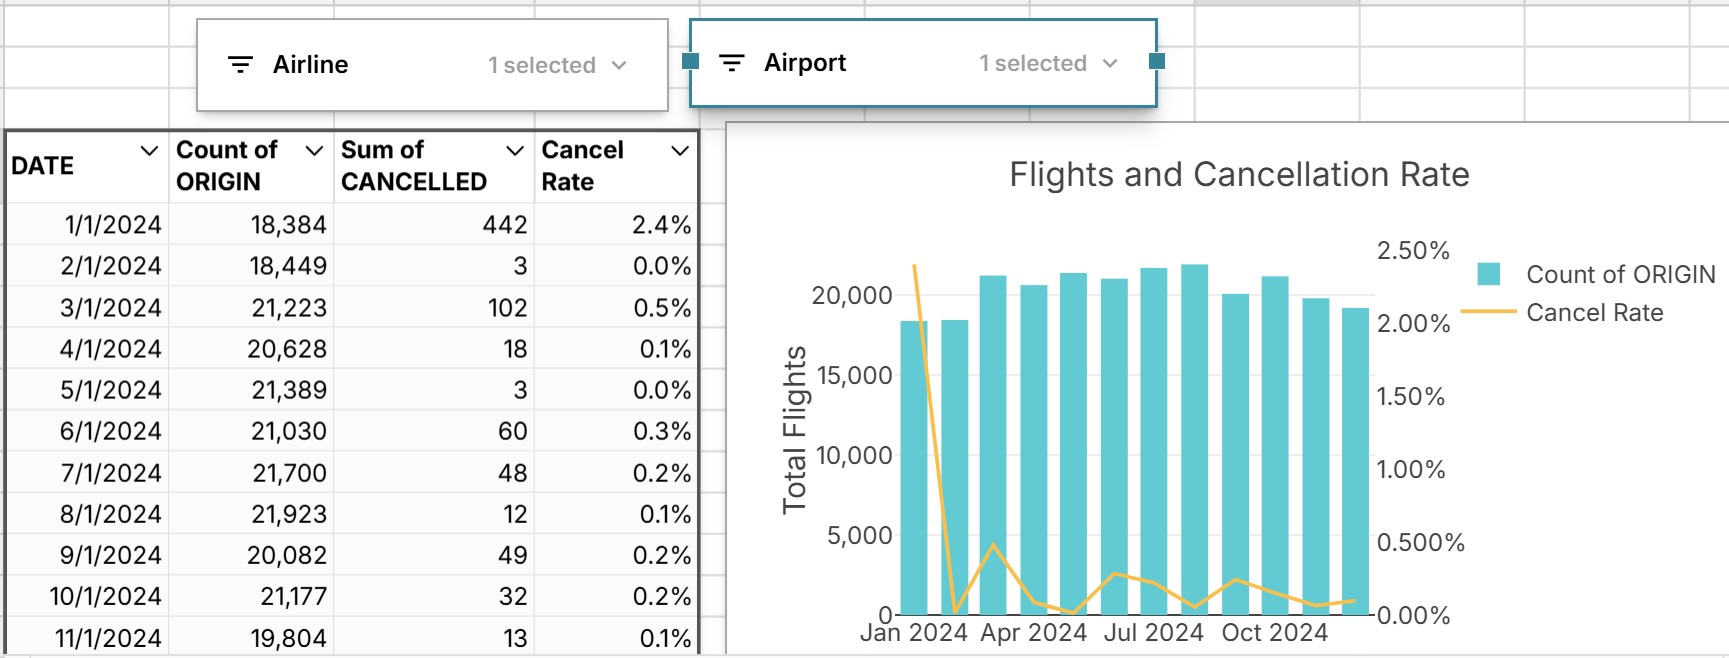 If you haven't yet created a slicer, you can add a chart slicer by adding a slicer to the source data for the chart. If your source data is a cell range, just be sure to first add filters to the range.
How to connect slicers to multiple pivot tables and charts
You can connect slicers to multiple pivot tables and charts if they have the same source data. Simply add a slicer to the source data and it will control everything that references the source data. You can use this to build a dashboard sheet that controls multiple pivot tables and charts at once. 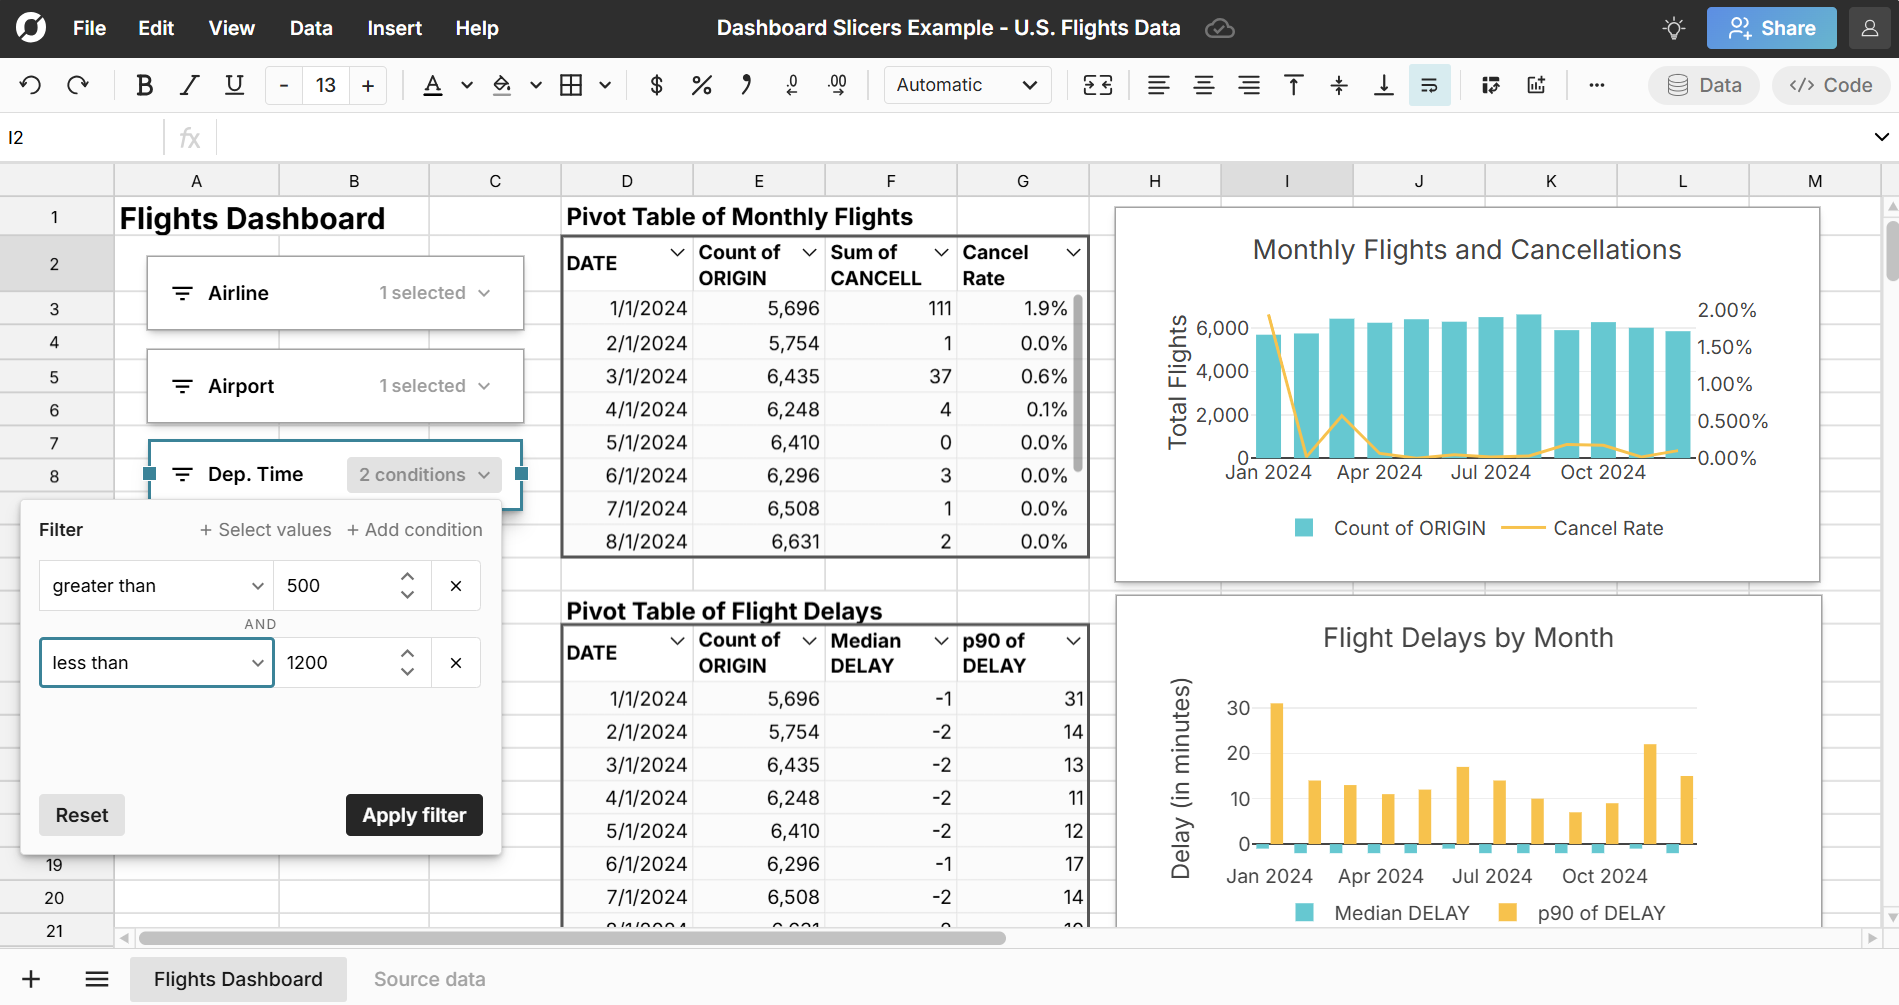
If your source data is a connected table, then any slicers added to the connected table will work in sync as your source data updates. You can manually re-run connected tables or schedule auto-refresh to automate updates with slicers applied.
Note, slicers can only control multiple pivot tables when each of those pivot tables use the same source data.
Filtering formulas with slicers
By default, slicers do not filter formula functions. However, you can use the tilde operator "~" in formulas that reference data with slicers applied to also have formulas filter in sync with slicers (see screenshot below). The ~ is added right before the cell reference in the formula. 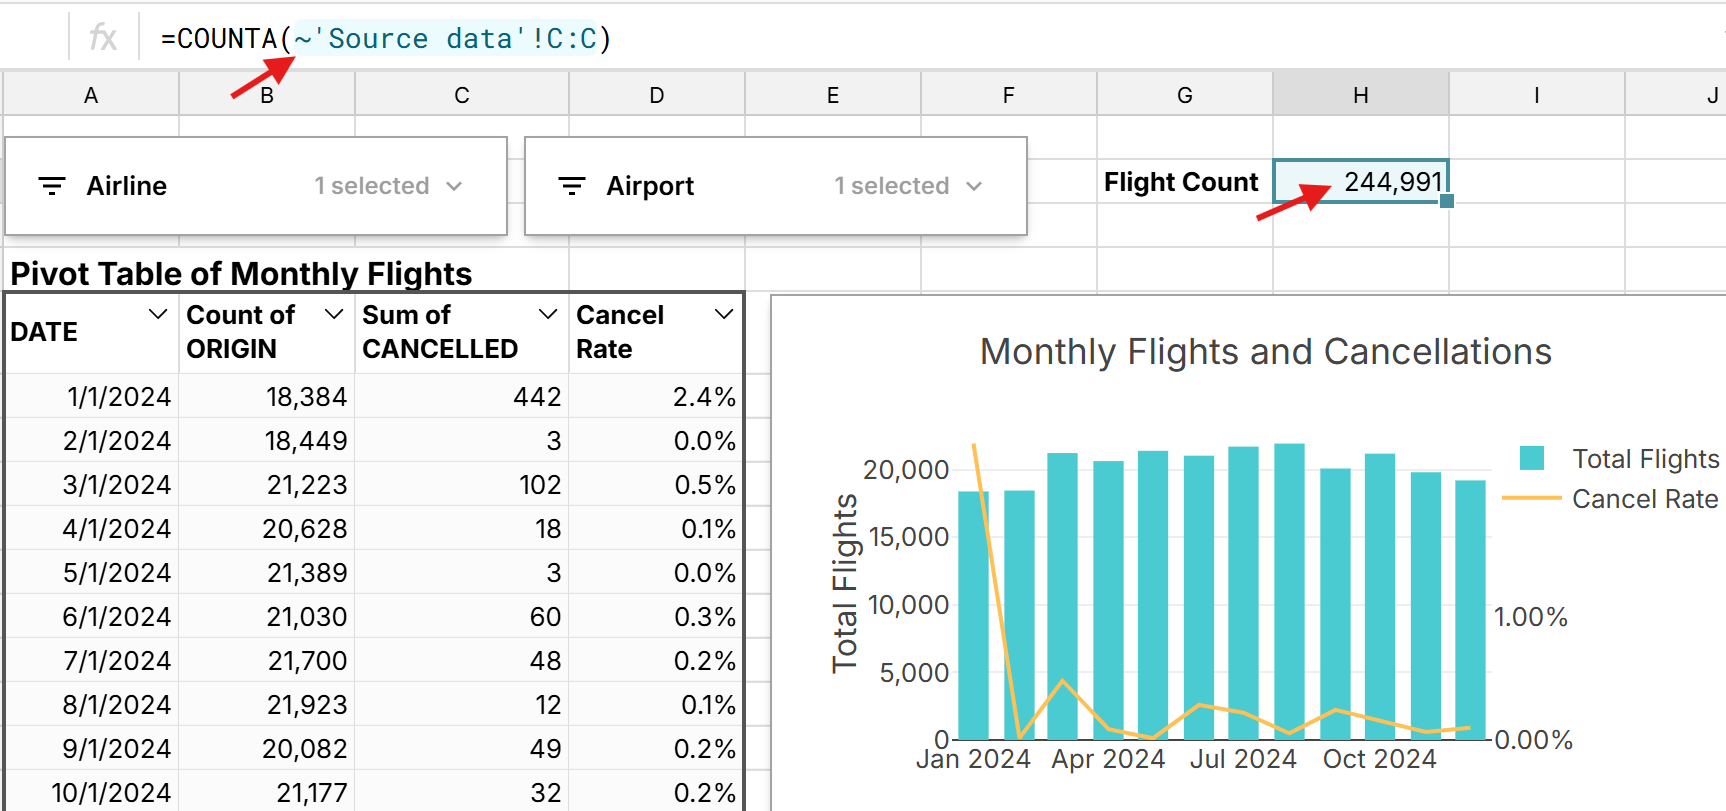
Slicers vs filters
Slicers are full-featured, portable filters. Slicers are connected to their underlying filters and actively change the filters applied to the data. 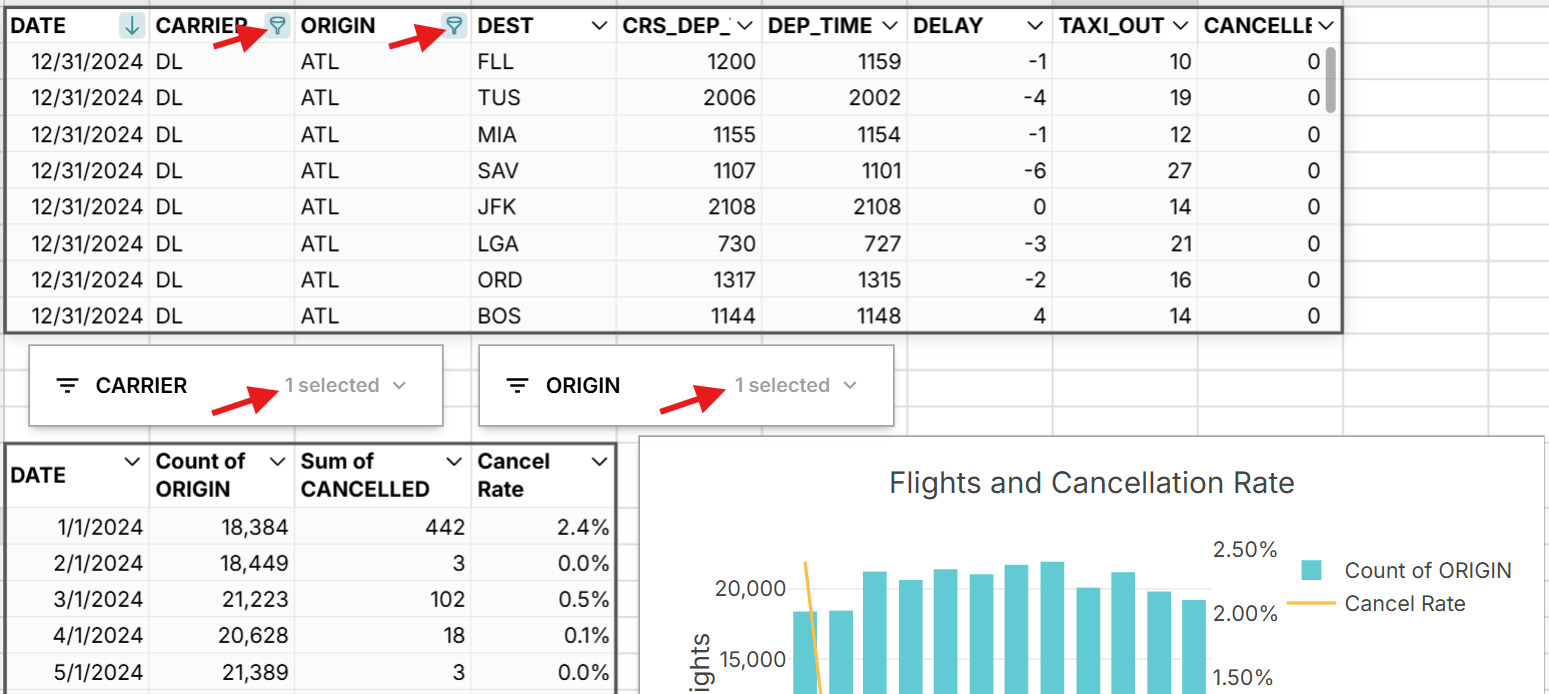
As a result, slicers can do everything filters can do. You easily filter on one or more conditions (e.g. >=0), search values, select all, unselect all, and filter datetime groupings like day, week, month, etc. 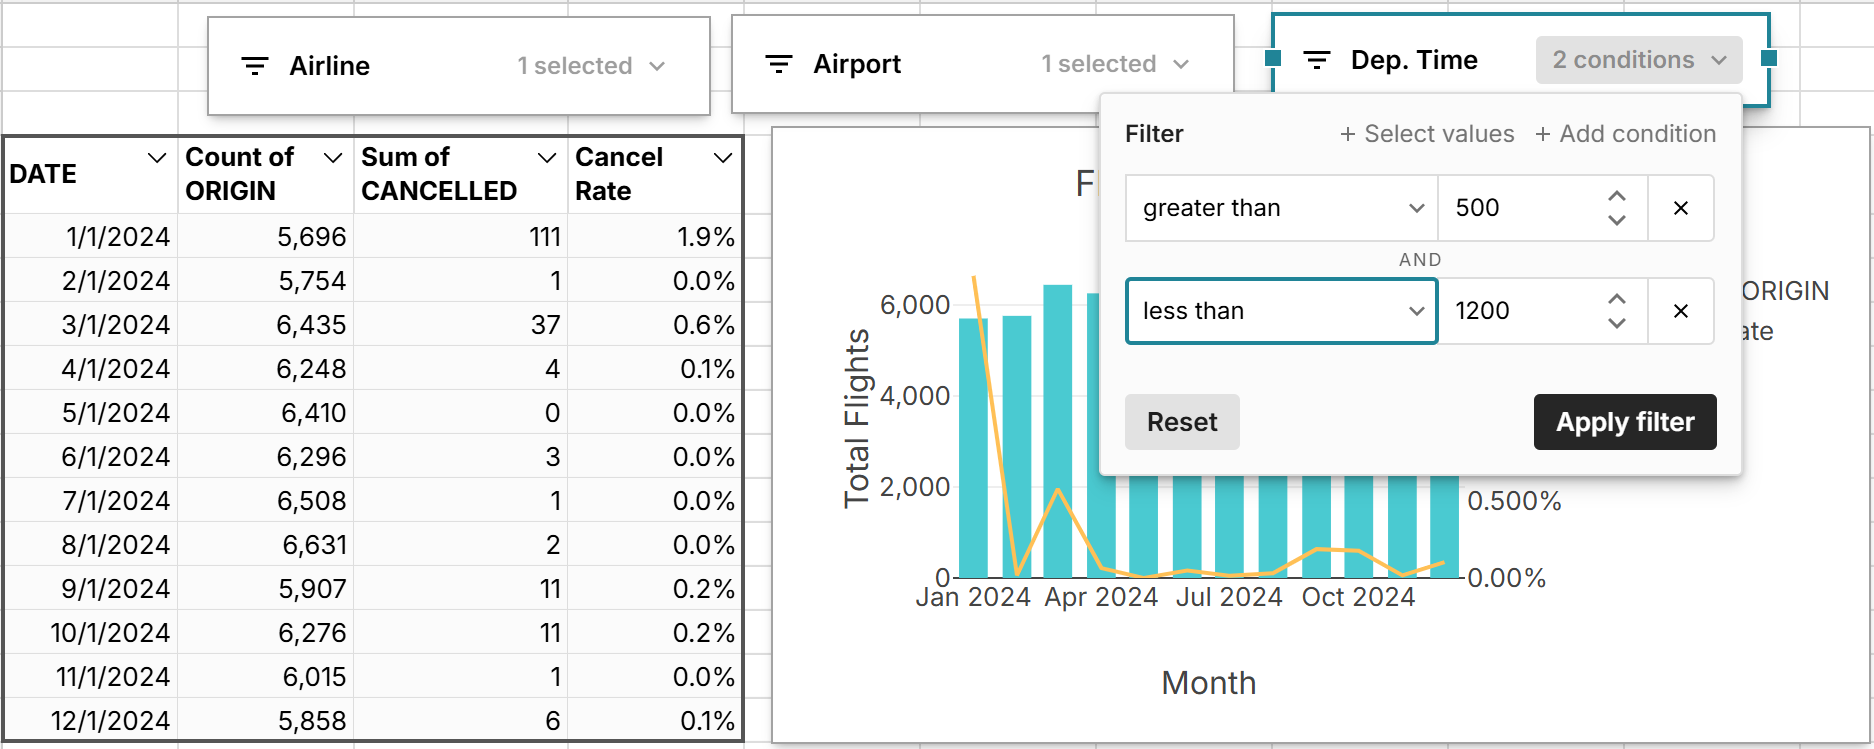
The only difference between slicers and filters is slicers can be moved anywhere in the workbook. As a result, slicers are typically placed on dashboards or next to pivot tables and charts to provide an easy way to control the filters of source data elsewhere in the workbook.
Note, because slicers are connected to their source filters, if you go to the source data and attempt to adjust the filter, you'll see a message that says "This column's filters are controlled by a slicer".  You'll need to delete the slicer to use the filter again at its source.
Replacing deleted slicer columns
If you remove the underlying column your slicer relies on, your slicer will show an error state. Double-click on the slicer to pick a different column. 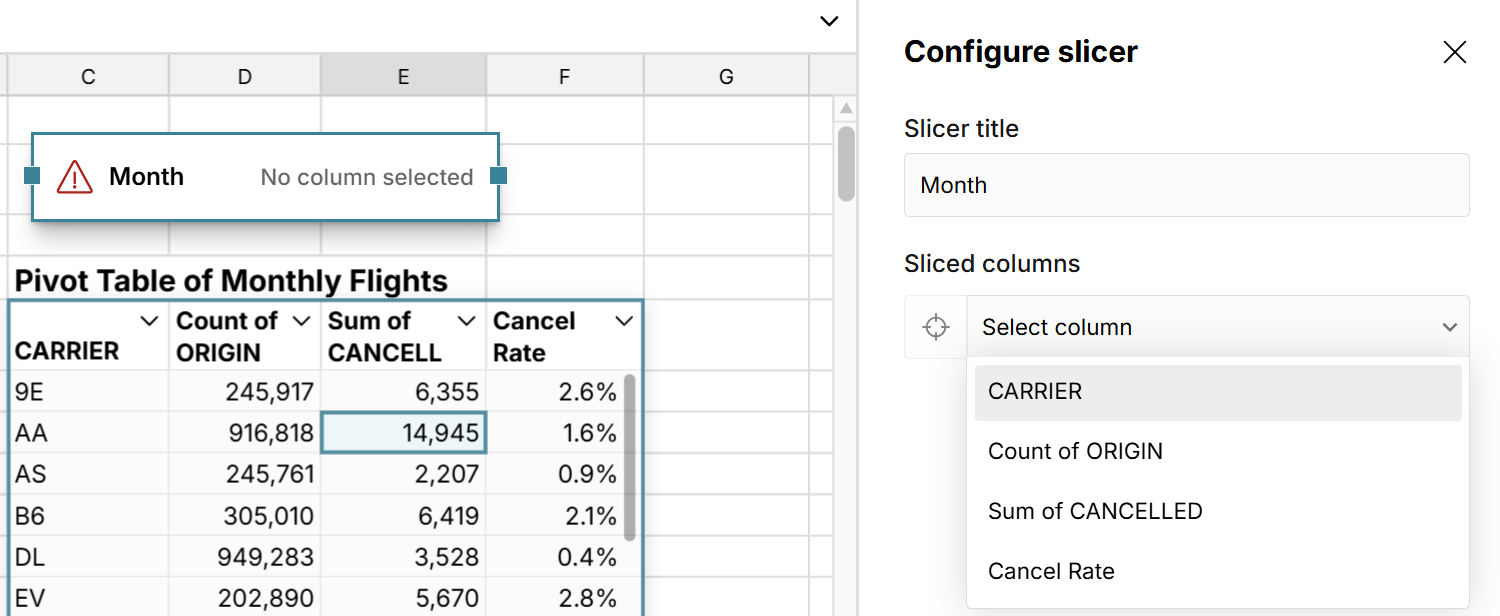
Slicers video tutorial
Here's a tutorial of how to create slicers connected to multiple pivot tables and charts that share the same source data: