Table of Contents
- Connect Row Zero to PostgreSQL
- Write a query to import data
- Build out your connected spreadsheet
- Schedule auto-refresh
- Share connected data
- Export spreadsheet data to Postgres
Connect Row Zero to PostgreSQL
Row Zero supports two ways to authenticate to PostgreSQL; Use whichever fits your security posture:
- Password-based Authentication
- AWS IAM Role-based Authentication (via AWS IAM / RDS IAM DB auth)
Below is a detailed flow for each option.
In a Row Zero workbook, click on the 'Data' icon in the upper right-hand corner and then click the button to 'Add connection.'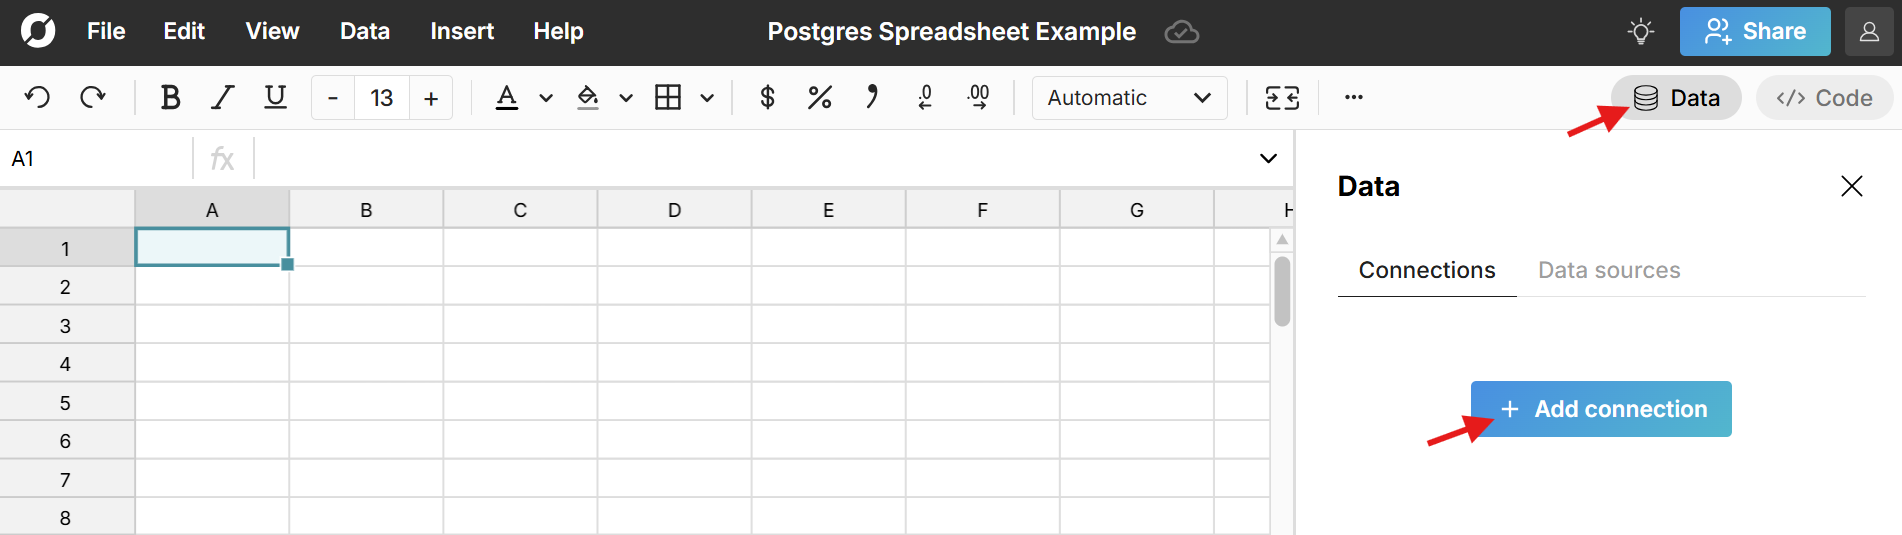
The Postgres connector requires a few pieces of information defined below.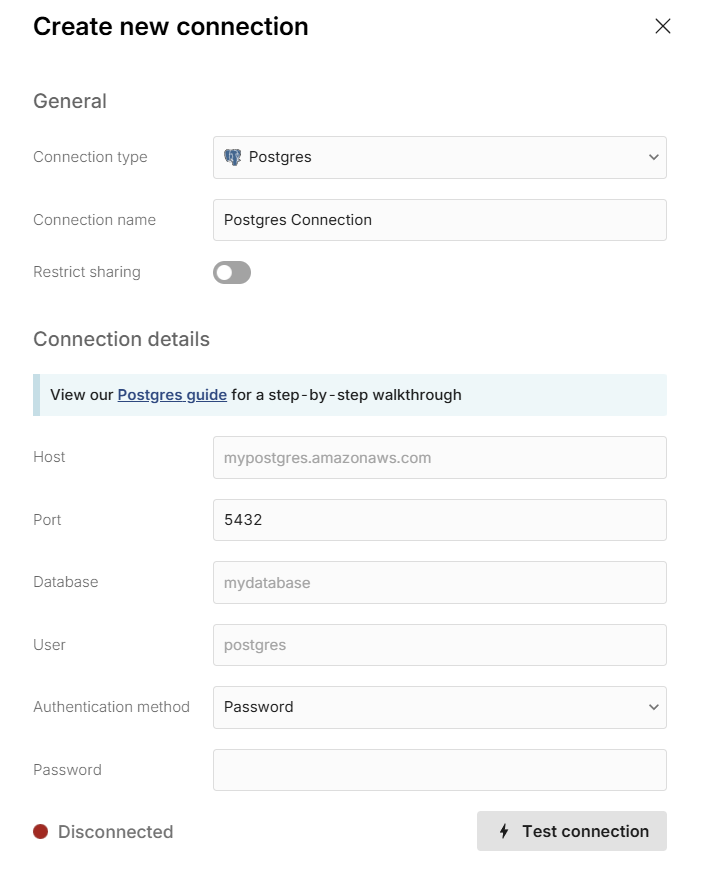
- Connection name - This field can be anything that helps identify the data source being connected. (e.g. "Production Data" or "Product Metrics")
- Host - This is the PostgreSQL address that typically takes the form of a string like 'database.mydomain.com'.
- Port - This is often 5432.
- Database - The name of the PostgreSQL database being connected to.
- User - This is the username for your PostgreSQL database.
Password-based Authentication
For password-based authentication, populate the following:
- Authentication method — Password
- Password — The password used to log into your PostgreSQL Database.
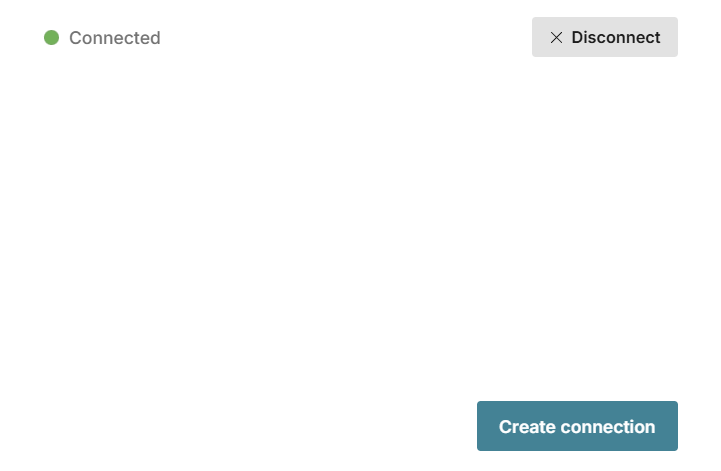
Once all the information is entered, hit 'Test connection' to ensure the information is correct. If the test connection icon turns green and says 'Connected', proceed by clicking on 'Create connection'
*Note - If your database is behind a VPN or firewall, you'll need to allow the Row Zero IP addresses: 18.217.97.112 and 18.224.119.220.
AWS IAM Role-based Authentication (AWS IAM / RDS)
For AWS IAM-based authentication, populate the following:
- Authentication method — AWS IAM
- Role ARN — the ARN of the role to connect to RDS PostgreSQL that can connect to RDS and assume a role (see below for instructions to setup).
- AWS Region — The AWS region your RDS Postgres instance is located in.
- External ID - This is a value will be populated by the Row Zero application and must be included in your AWS IAM role trust policy (see below for instructions to setup).
Once all the information is entered, hit 'Test connection' to ensure the information is correct. If the test connection icon turns green and says 'Connected', proceed by clicking on 'Create connection'
*Note - If your database is behind a VPN or firewall, you'll need to allow the Row Zero IP addresses: 18.217.97.112 and 18.224.119.220.
AWS IAM Role-based Authentication Setup Instructions
Create an AWS IAM Role for Postgres Access that will be assumed by Row Zero via STS in order to connect to your database.
- Create a new IAM Role in the same account as your PostgreSQL / RDS instance.
- Attach a trust policy that allows Row Zero's IAM principal (or account) to assume this role, with an External ID condition.
- Attach permission policies allowing it to call
rds-db:connectto your target DB user. - Configure the RDS / PostgreSQL instance to have IAM authentication enabled.
- Create a PostgreSQL database user that your IAM role will connect as and grant the rds_iam role to that user (
GRANT rds_iam TO <username>;). This enables the user to authenticate using AWS IAM tokens.
Sample trust policy (you must substitute in the External ID that Row Zero provides during setup):
{
    "Version": "2012-10-17",
    "Statement": [
        {
            "Effect": "Allow",
            "Principal": {
                "AWS": [
                    "arn:aws:iam::732940336628:role/DataSourceProxyRole"
                ]
            },
            "Action": "sts:AssumeRole",
            "Condition": {
                "StringEquals": {
                    "sts:ExternalId": "<EXTERNALID_FROM_ROW_ZERO>"
                }
            }
        }
    ]
}
Permissions policy example (scope to your DB instance / user):
{
    "Version": "2012-10-17",
    "Statement": [
        {
            "Effect": "Allow",
            "Action": "rds-db:connect",
            "Resource": "arn:aws:rds-db:<region>:<account-id>:dbuser:<db-resource-id>/<database-username>"
        }
    ]
}
Write a query to import Postgres data
Now that Postgres is connected to your spreadsheet, click the "+" sign next to your Postgres connection to insert a connected table.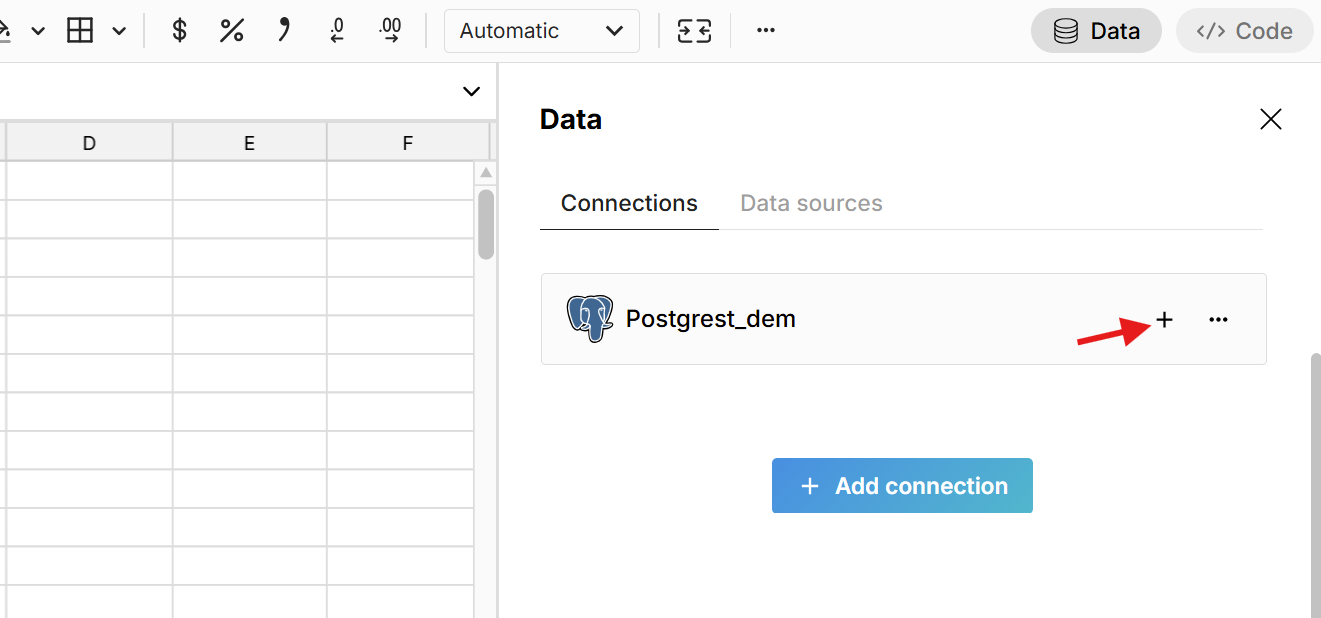 This adds a data table to your spreadsheet that is connected to Postgres and opens a query editor. Select the 'Schema' and then write a SQL query. The easiest query to write is a 'select *' statement, which pulls in the entire table. For example:
select * from table_name
Click 'Run' to execute the query and import the queried Postgres data into your spreadsheet. The data imports directly into a connected table in the spreadsheet, which provides a dynamic, condensed view of the data and makes it easy to filter, sort, format, pivot, chart, etc. You can also add calculated columns and reference the data in formula functions throughout your workbook. Double-click on the connected table to re-run your Postgres query for the latest data or schedule auto-refresh and everything built on connected data automatically updates and stays in sync.
Build out your Postgres connected spreadsheet
Once connected to Postgres, you can build out your connected spreadsheet or use Row Zero as a powerful postgres GUI to dynamically filter, sort, chart, and pivot Postgres data. Row Zero works like Excel and Google Sheets - just a lot more powerful.
You easily add calculated columns to your connected table by entering a formula in the first column to the right of your table.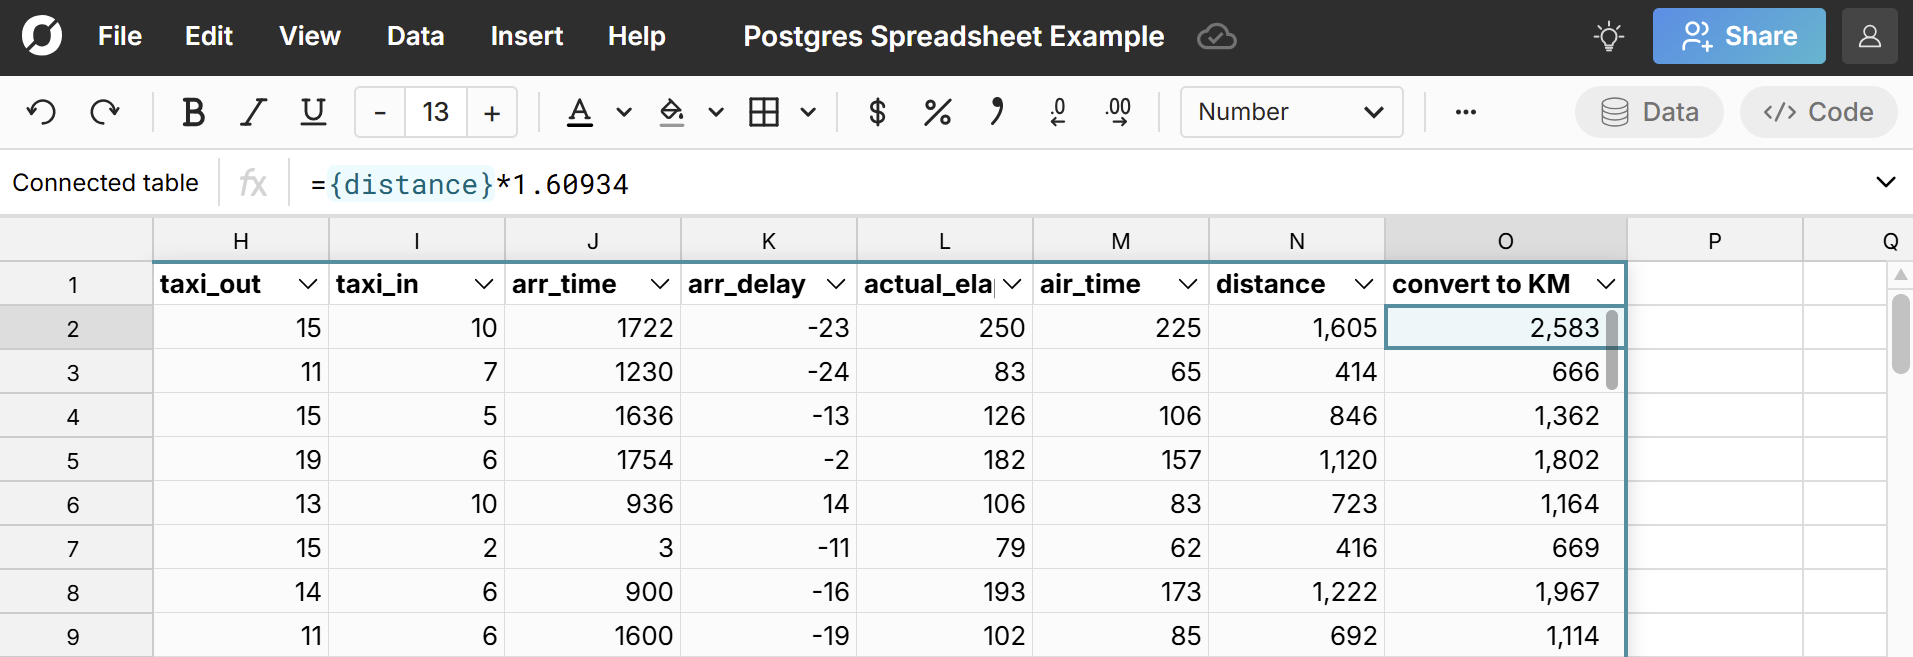 You can also reference the connected data in formula functions throughout your workbook.
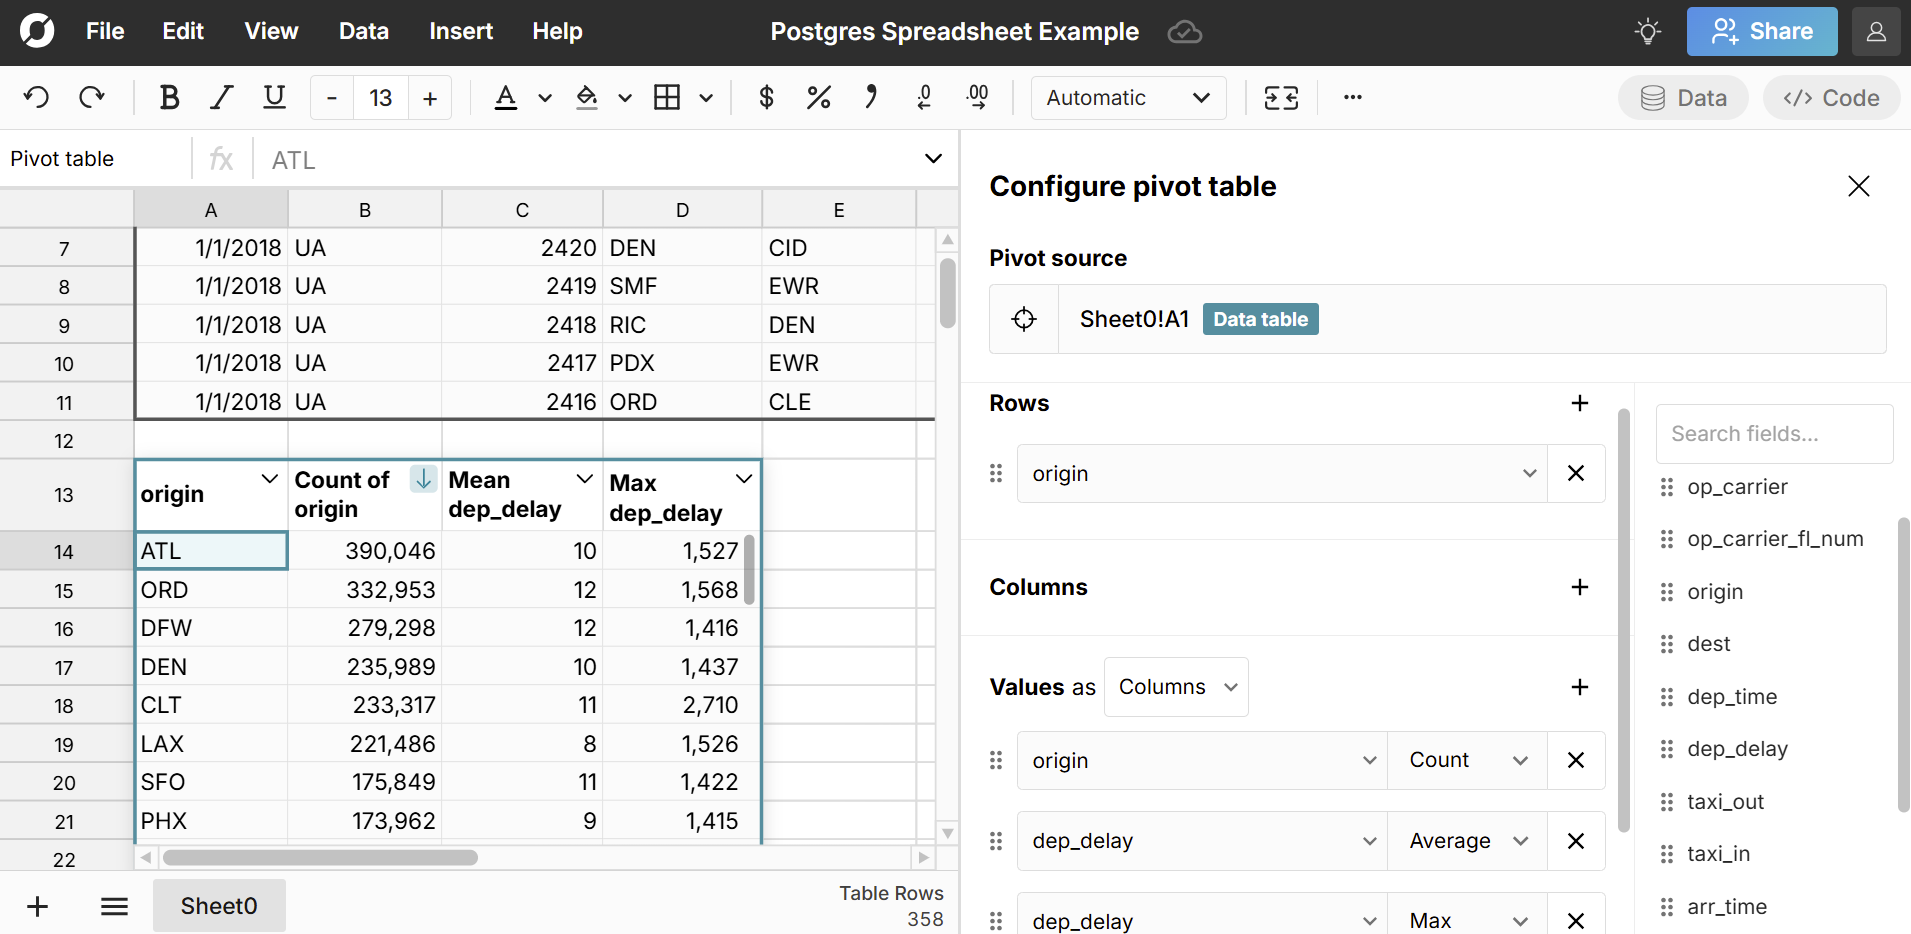
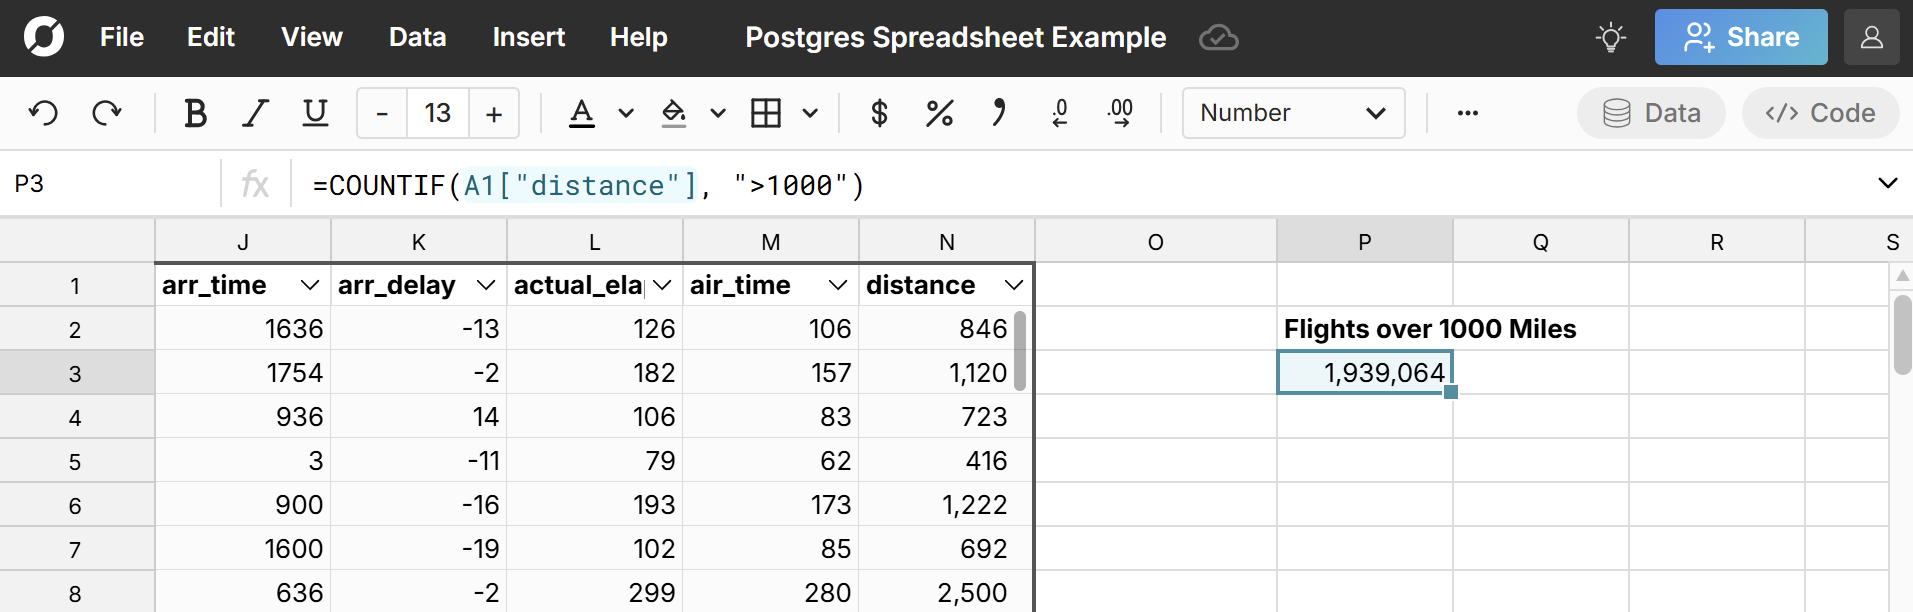 Right-click on the connected table to open a context menu with additional options. You can manage columns, cut, copy, create pivot tables, etc.
 Easily create connected charts by selecting cells in your connected table or pivot table and going to 'Insert', 'Chart' in the header navigation.
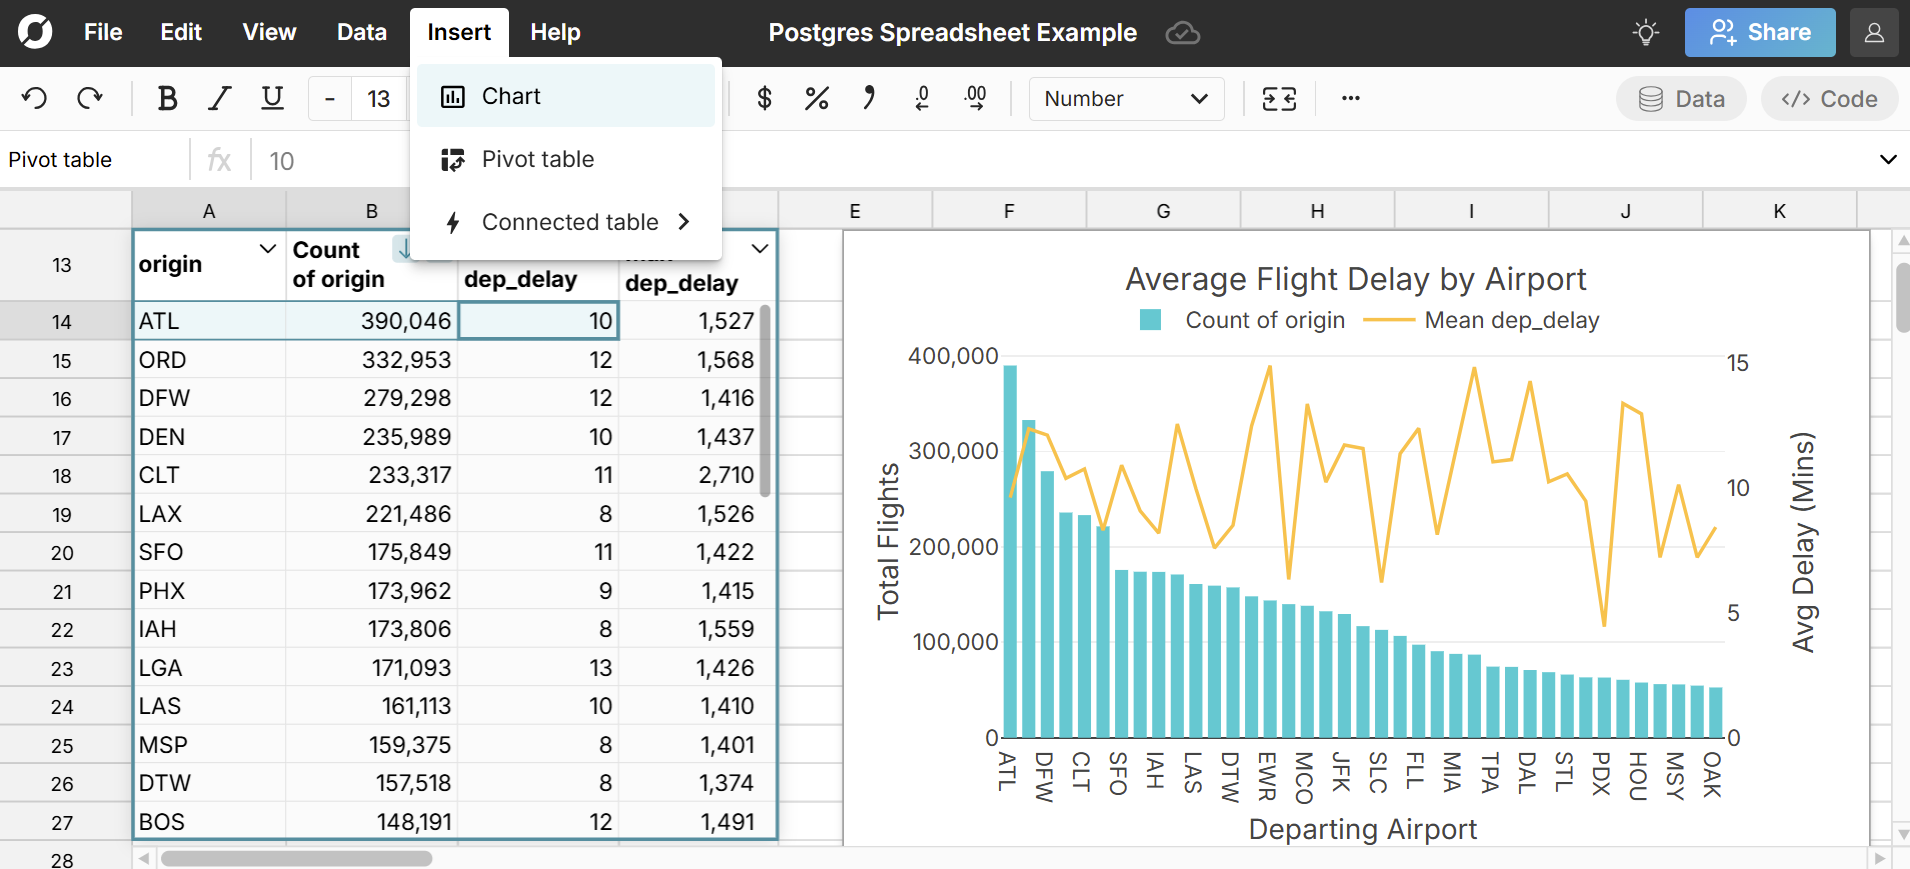 Once you've built out your spreadsheet, you can double-click on the connected table to re-run your Postgres query for the latest data or schedule auto-updates. This updates everything built on your connected data and keeps your whole spreadsheet in sync with the latest data.
Note, at any point, you can right-click on your connected table and select "Explode table" to expand your data table fully into cells. This allows you to fully edit and delete any cell in the dataset. However, this breaks that data's connection to Postgres, so you won't be able to re-run your query with new data when exploded.
Schedule auto-refresh
To schedule auto-updates, double-click on your connected table to open the editor and click the calendar icon in the top right. Select 'Refresh daily at' and select your time. This is an easy way to automate spreadsheet updates. When your source data updates, everything built on your connected table updates automatically. You can also re-run your Postgres query at any time to get the latest data.
Share connected data
You have multiple options for sharing Postgres connected data in Row Zero. Click the blue 'Share' button in the top right of the workbook to share your connected spreadsheet with teammates and collaborate in real-time. You can also publish your Postgres query as a shared data source to give teammates one-click access to run your Postgres query in their own spreadsheet. This is an easy way to give non-technical users easy access to governed Postgres data.
Export to Postgres
Row Zero also makes it easy to export your spreadsheet to Postgres. To export a sheet or range of cells, simply select the cells you'd like to export, right-click, select Export to, and select your Postgres database.

Select your Postgres database, schema, and name your table. Note, tables must start with "rz_". This is to prevent accidentally overwriting existing tables in your database.

To export a data table, connected table, or pivot table, simply right-click in the table and select Export to. Check out our video tutorial below to see exporting to postgres in action, or view our post for how to use Row Zero to import CSV files to postgres.
Ready to get started?
Connect to Postgres and build Postgres connected spreadsheets that auto-update as source data changes.