Connect S3 to Row Zero
Import data directly from S3 to a Row Zero workbook using presigned URLs or by connecting an S3 bucket directly to Row Zero. Row Zero supports a variety of file formats including CSV, Parquet, JSONL, TXT, XLSX, and .gz.
Import from S3 Presigned URL
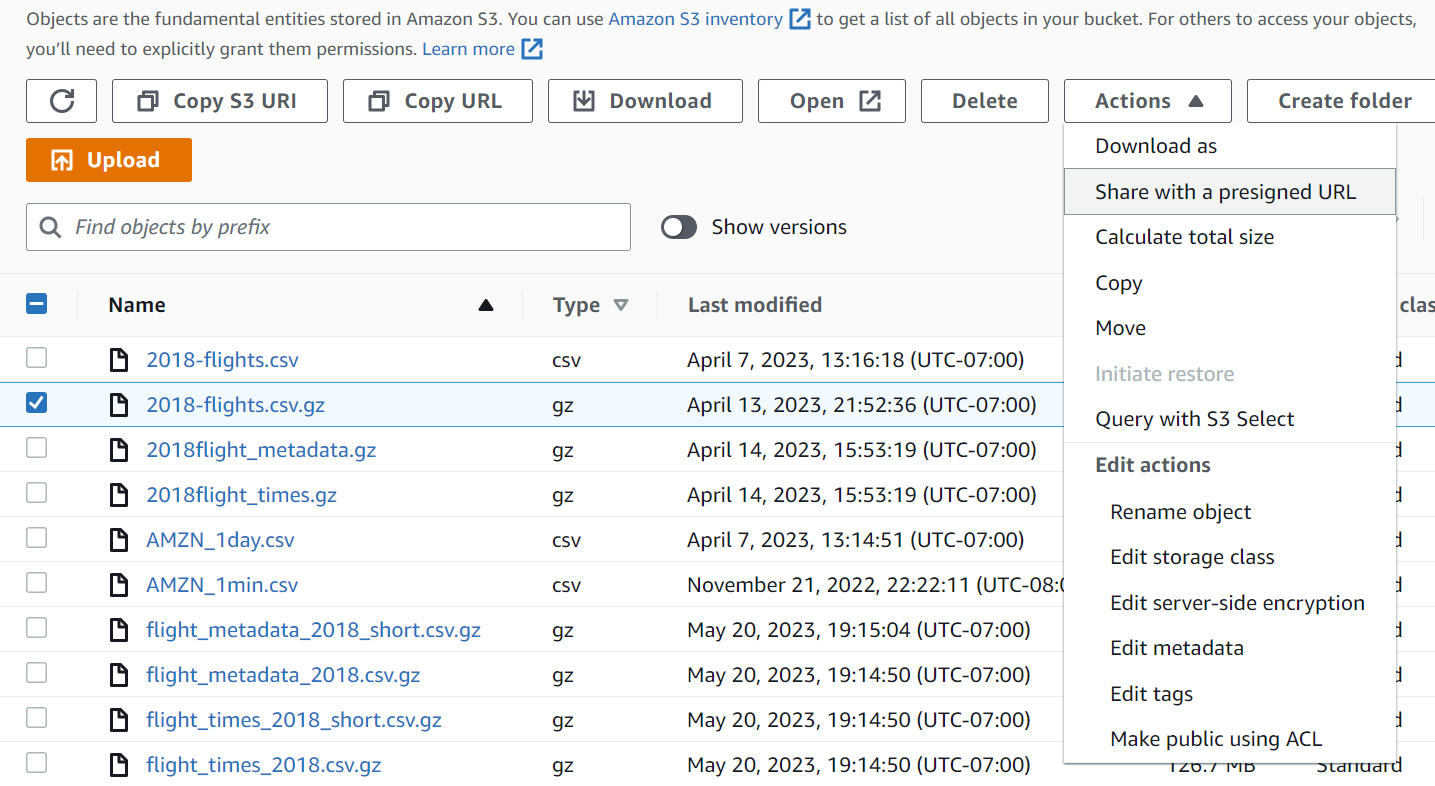
To import from S3 using a pre-signed URL, visit your S3 console and select the bucket containing the file you want to import. In the bucket, select the check box next to the bucket, then choose 'Actions' and 'Share with presigned URL.' On the next screen, enter the amount of time (minutes or hours) you would like the link to be accessible. Next click the orange 'Create presigned URL' button. You will be taken back to your S3 bucket and the presigned URL will automatically copied to your clipboard.
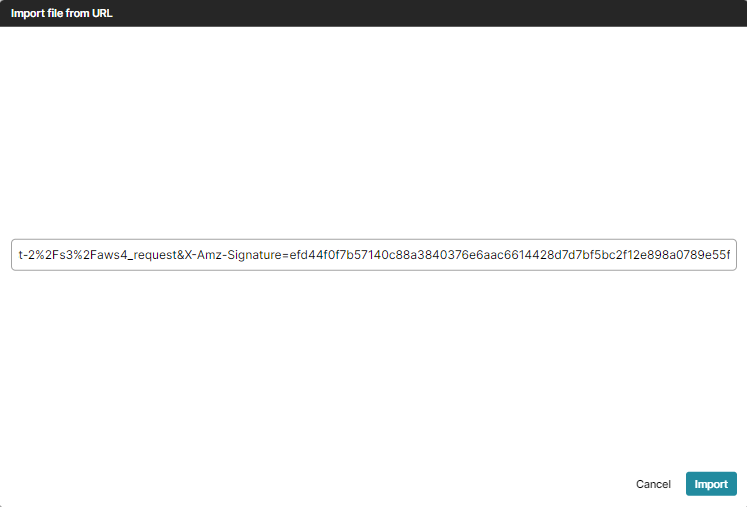
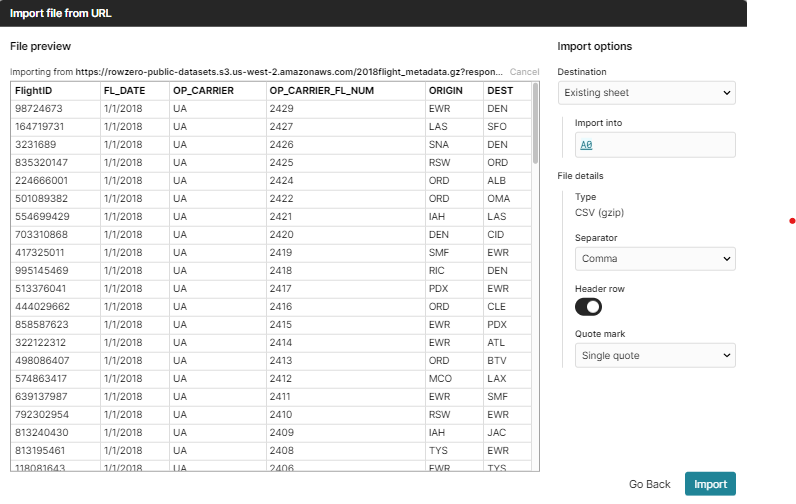
Next, open a workbook in Row Zero, click on Data > Import > Import from URL, paste your presigned URL into the text box and click 'Import.'
Connect an S3 bucket to browse S3 directly from the spreadsheet
For users who are regularly exploring and analyzing data from S3, a more efficient option is to connect S3 directly to Row Zero. Once complete, the connected S3 bucket will display in the Row Zero Data Import window, making it easy to select and import S3 files.
Connect an S3 bucket
The following instructions explain how to create an IAM role in AWS S3 and grant permissions for a Row Zero workbook to connect a specific S3 bucket and ingest data.
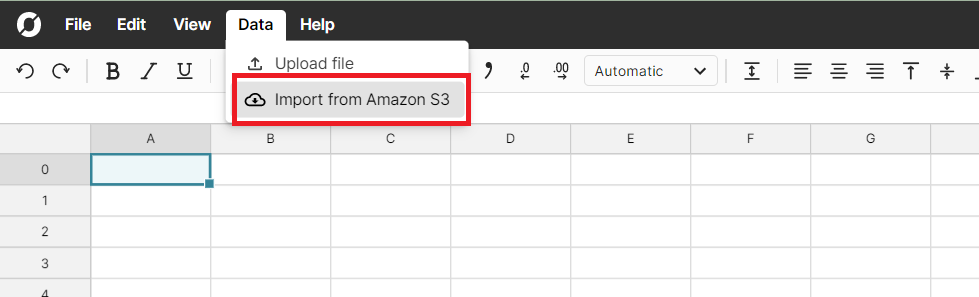
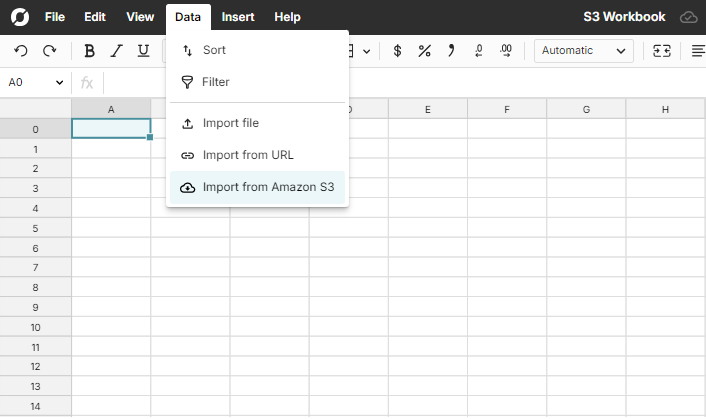
From any workbook, select Import from Amazon S3 from the 'Data' menu.
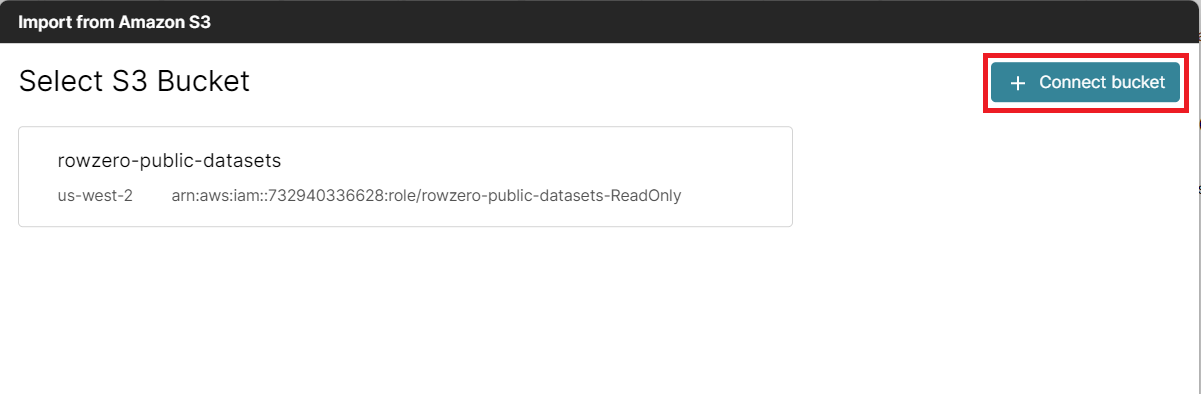
You will see a link to the public datasets S3 bucket and a button in the upper right hand corner that says + connect bucket. Click the button to connect a new bucket. The public datasets bucket is available to demo the integration and Row Zero features.
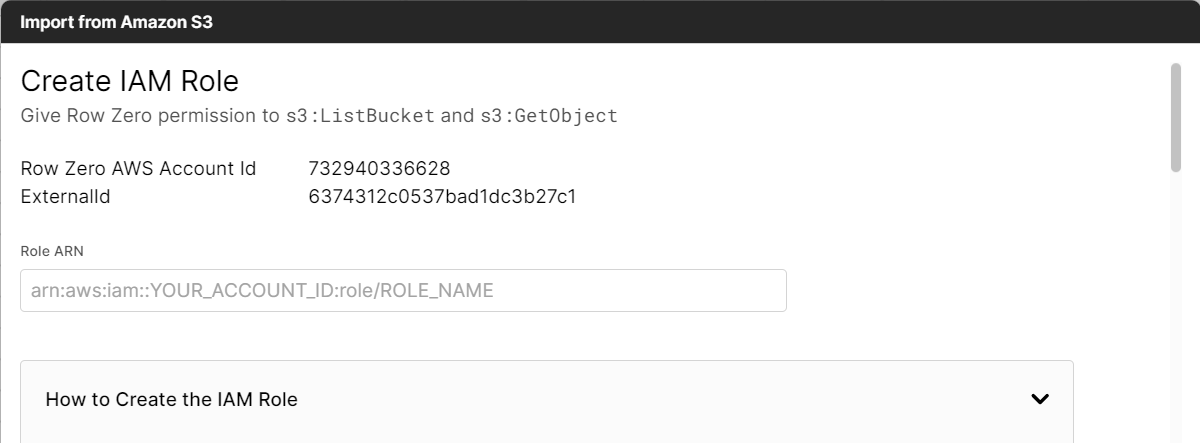
The first step is identifying the bucket name you intend to connect to Row Zero and entering the name in the provided text box.

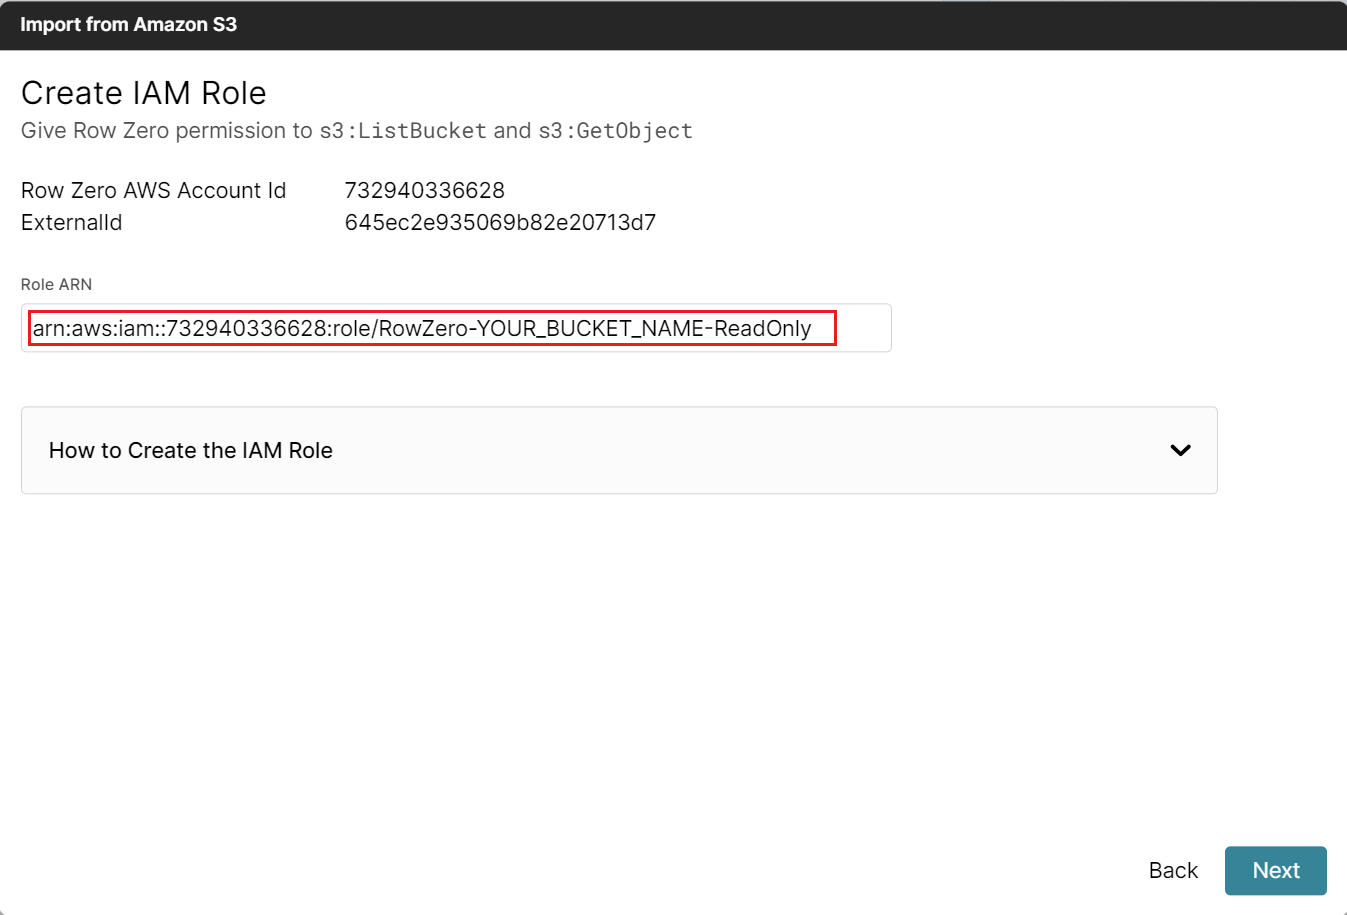
Provide the Amazon Resource Name (ARN). To identify the name, follow the instructions below to create an IAM role for Row Zero and grab the ARN from the AWS console. At the top of the screen your Row Zero AWS Account ID and your External ID will be visible. Both will be needed to create the IAM role.
Create an IAM Role
- Log in to the AWS Management Console
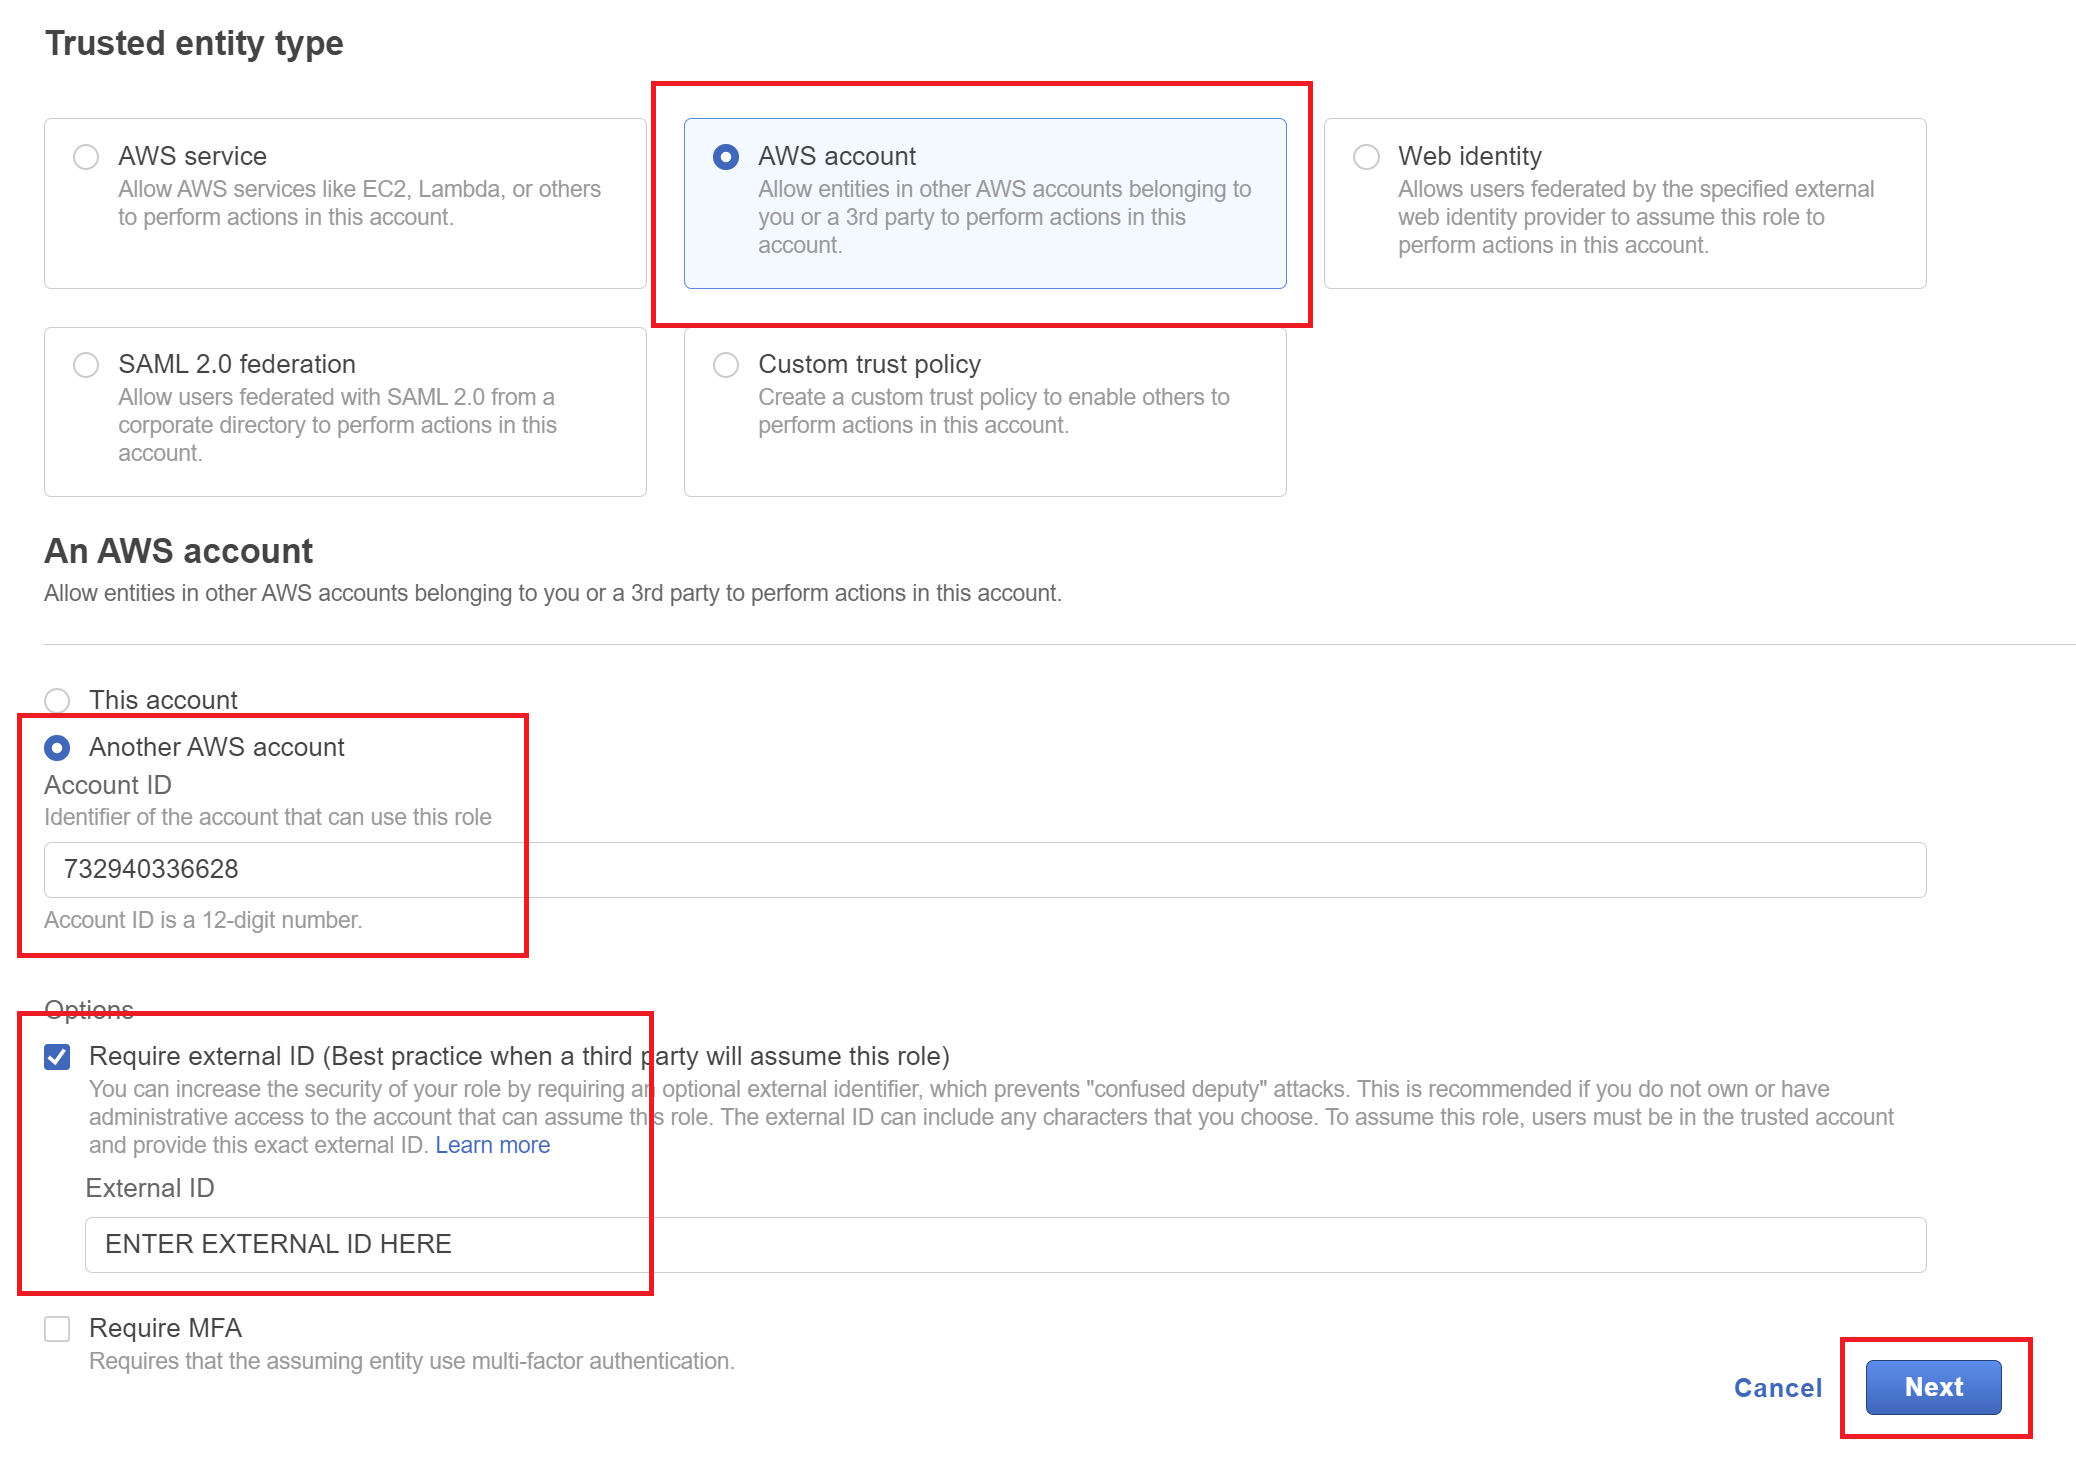
- Select AWS Account
- Select Another AWS Account and enter 732940336628 as the account ID
- Select Require External Id and enter Your Account ID
- Click Next
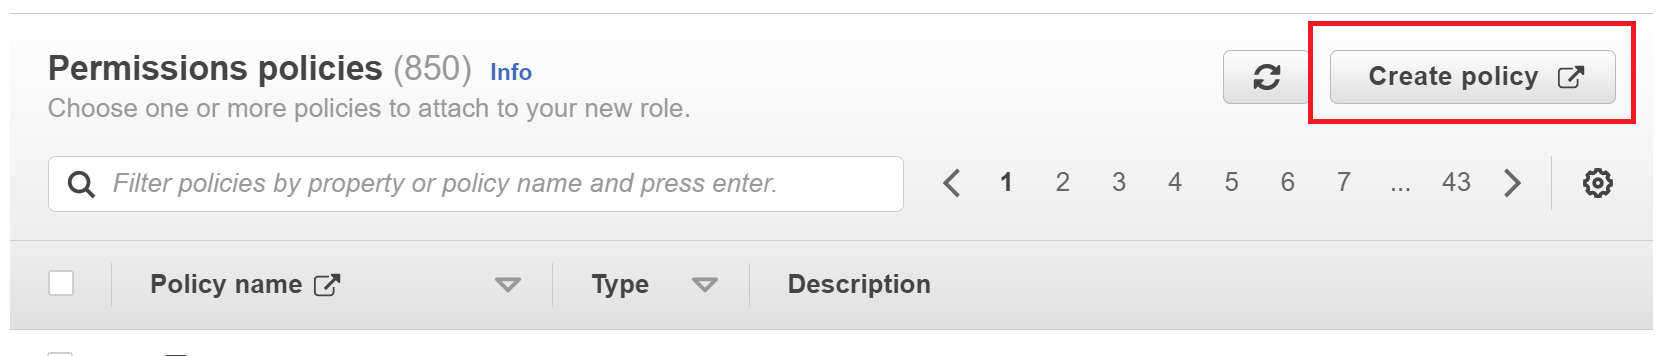
- Select Create Policy (this will open a new tab)
- Select the tab that says JSON and replace the text with this:

- Click Next: Tags
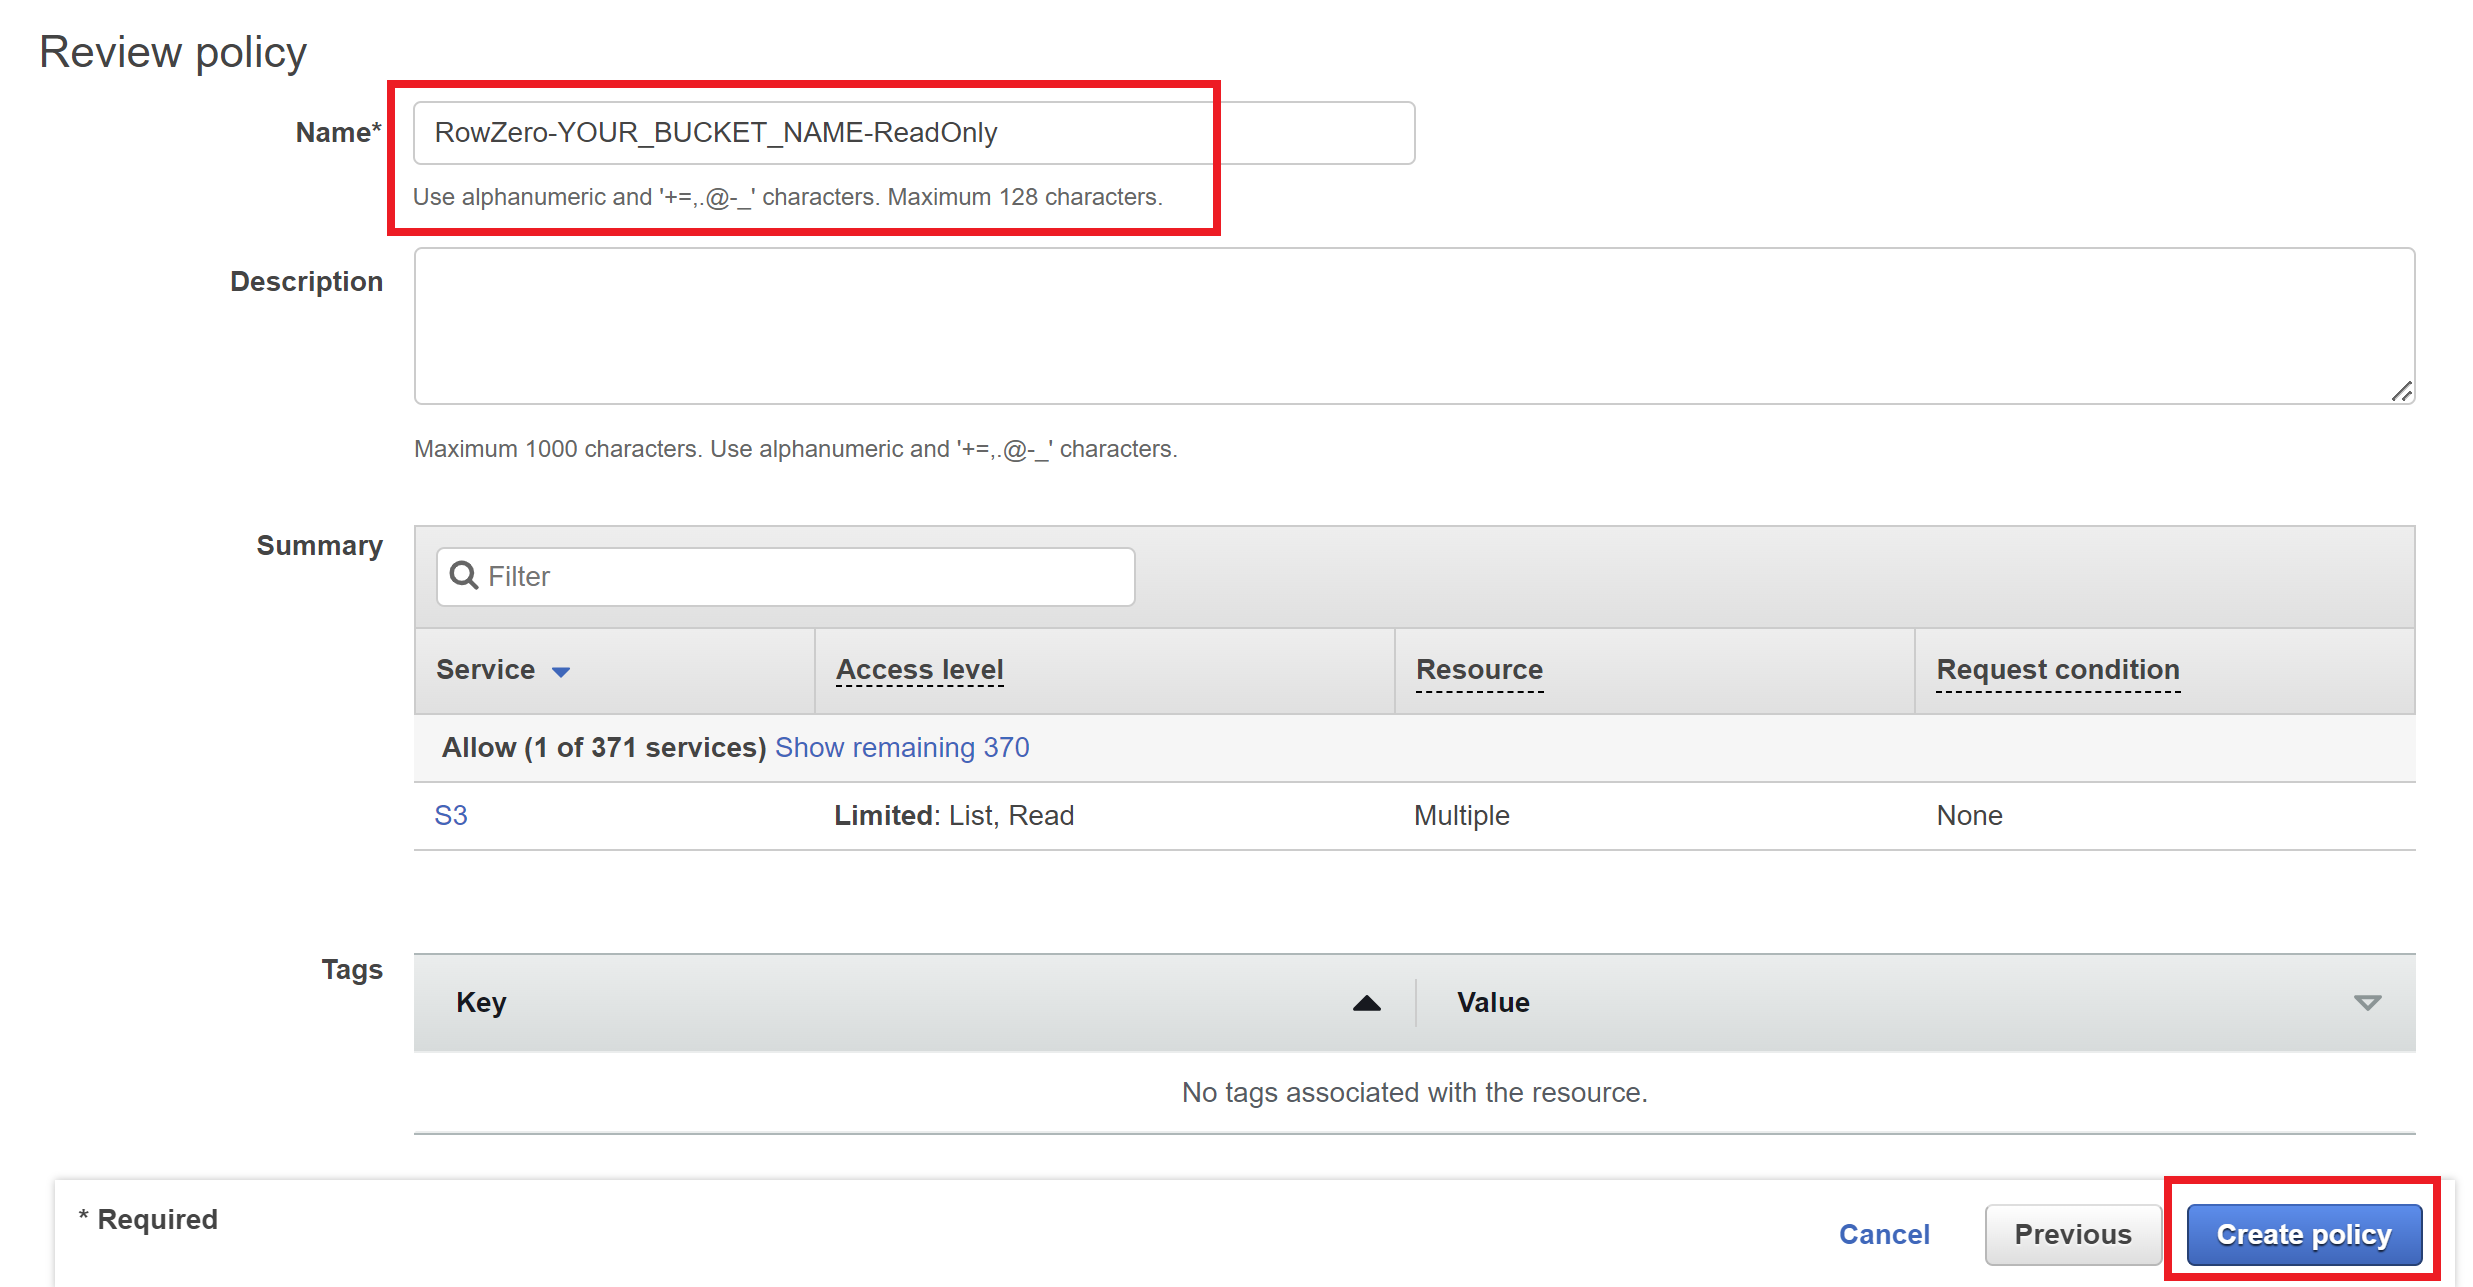
- Click Next: Review
- Give the policy a name like 'RowZero-myS3bucket-ReadOnly'
- Click Create policy and close this browser tab
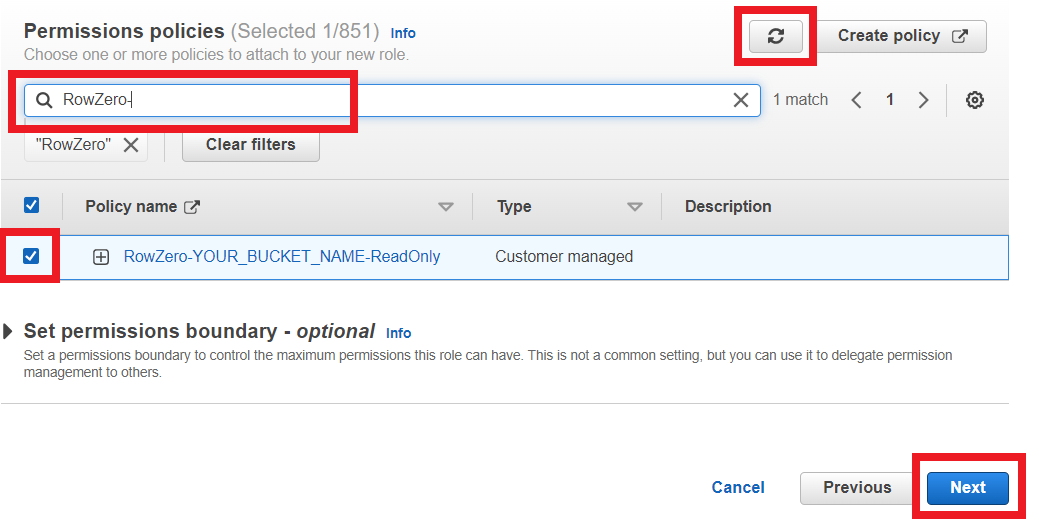
- On the first browser tab, refresh the list of policies
- Search for the policy you just created (e.g. RowZero-myS3bucket-ReadOnly), click the checkbox to its left, and click Next
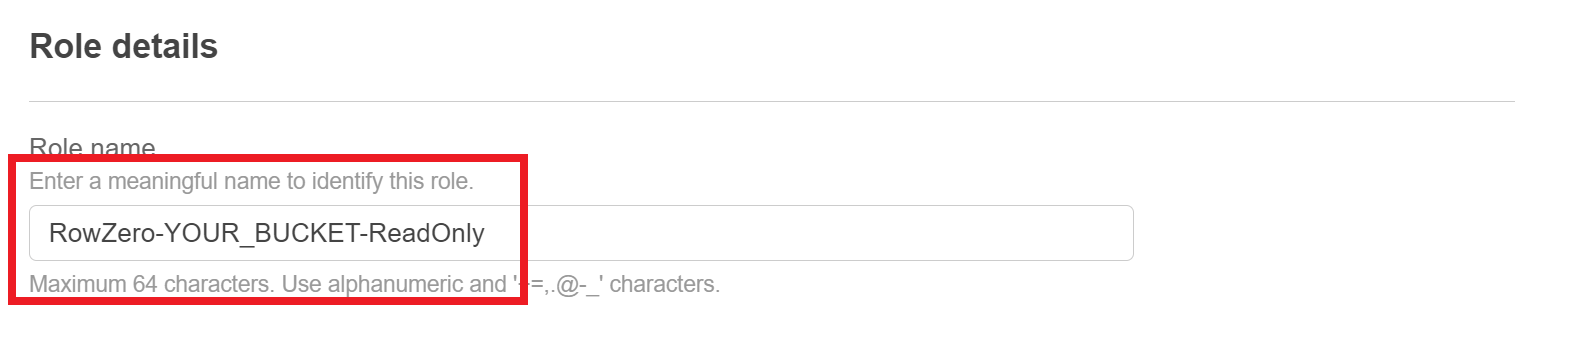
- Give the role a name, like RowZero-myS3bucket-ReadOnly
- Scroll to the bottom of the page, and click Create Role
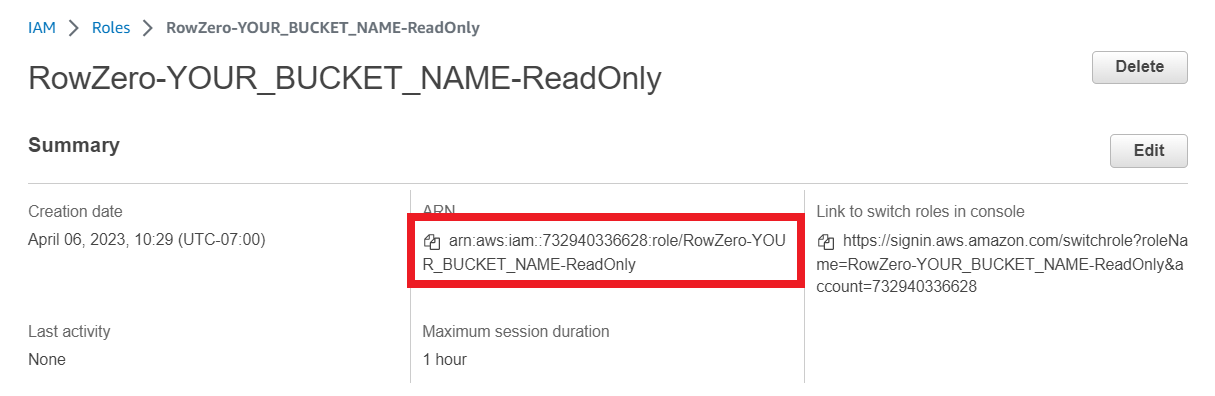
- Click View Role at the top of the screen and copy the role ARN and paste it in the text box at the top of the window. Click Next.

Import data from S3
Once your S3 bucket is connected, you can import data from any workbook.
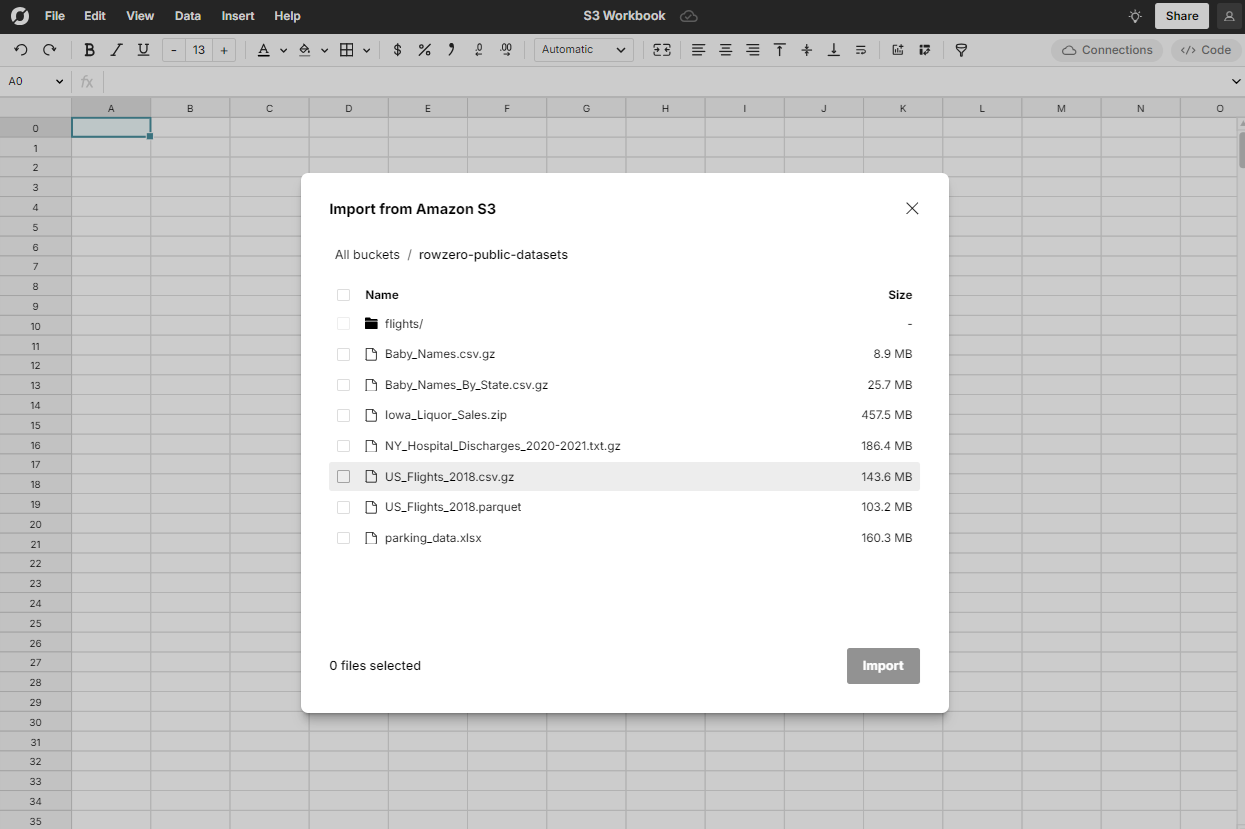
- Select 'Import from Amazon S3' from the 'Data' menu.
- Select your file(s) and click "Import".
- Preview your data and configure import settings, if needed.
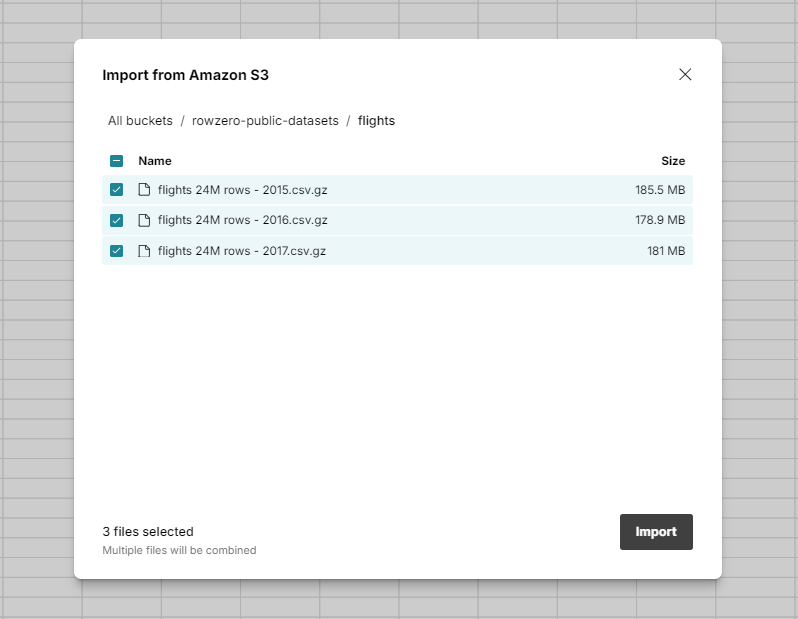
Open and combine multiple S3 files
For users with multiple related files in one folder, Row Zero can combine, merge, and concatenate S3 files into one spreadsheet, making the data easier to analyze. One your S3 bucket is connected, navigate to any folder and select the files you would like to combine. Then use the import window to verify whether your data has headers and hit 'import.' Row Zero will merge the S3 files and concatenate them into one worksheet.
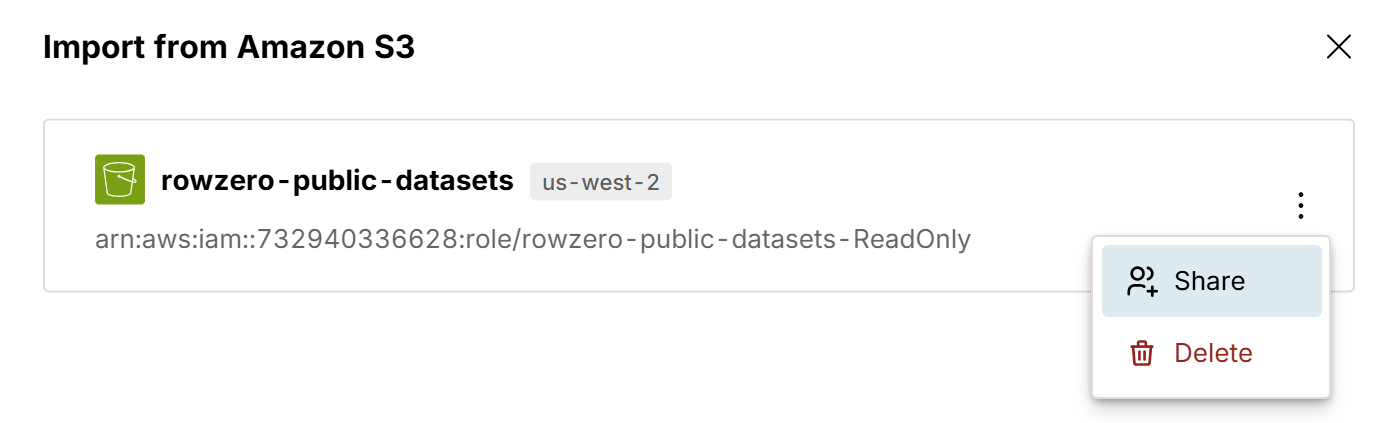
Sharing S3 connections
You can easily share S3 connections with teammates by clicking the 3-dot icon on your S3 bucket and selecting 'Share'.