Single Sign-On OIDC Integration - JumpCloud
If you have an Enterprise account in Row Zero, you can configure single sign-on (SSO) in JumpCloud using OpenID Connect (OIDC).
Row Zero is configured to use the OpenID Connect implicit flow for single sign-on with JumpCloud. We request the openid profile email scopes and assume email_verified = true for all users logging in through JumpCloud enterprise integrations.
Here is the information that you will need to configure a new Row Zero OIDC application in JumpCloud:
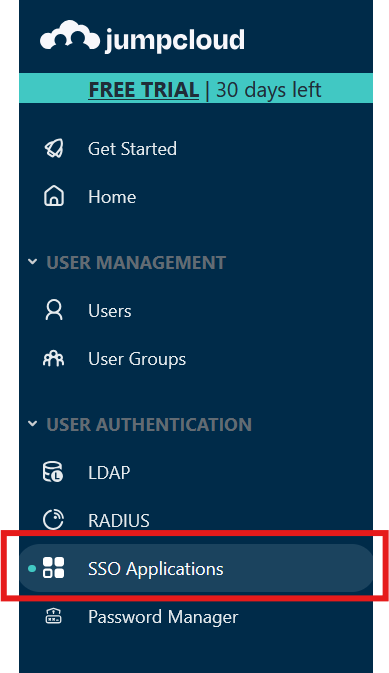
- In the JumpCloud console, click on the "SSO Applications" link in the left hand panel:
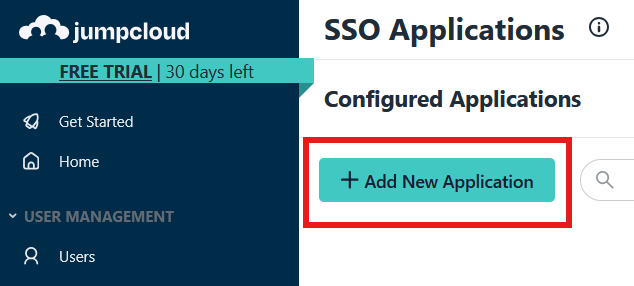
- Click on the "+ Add New Application" button towards the top left:
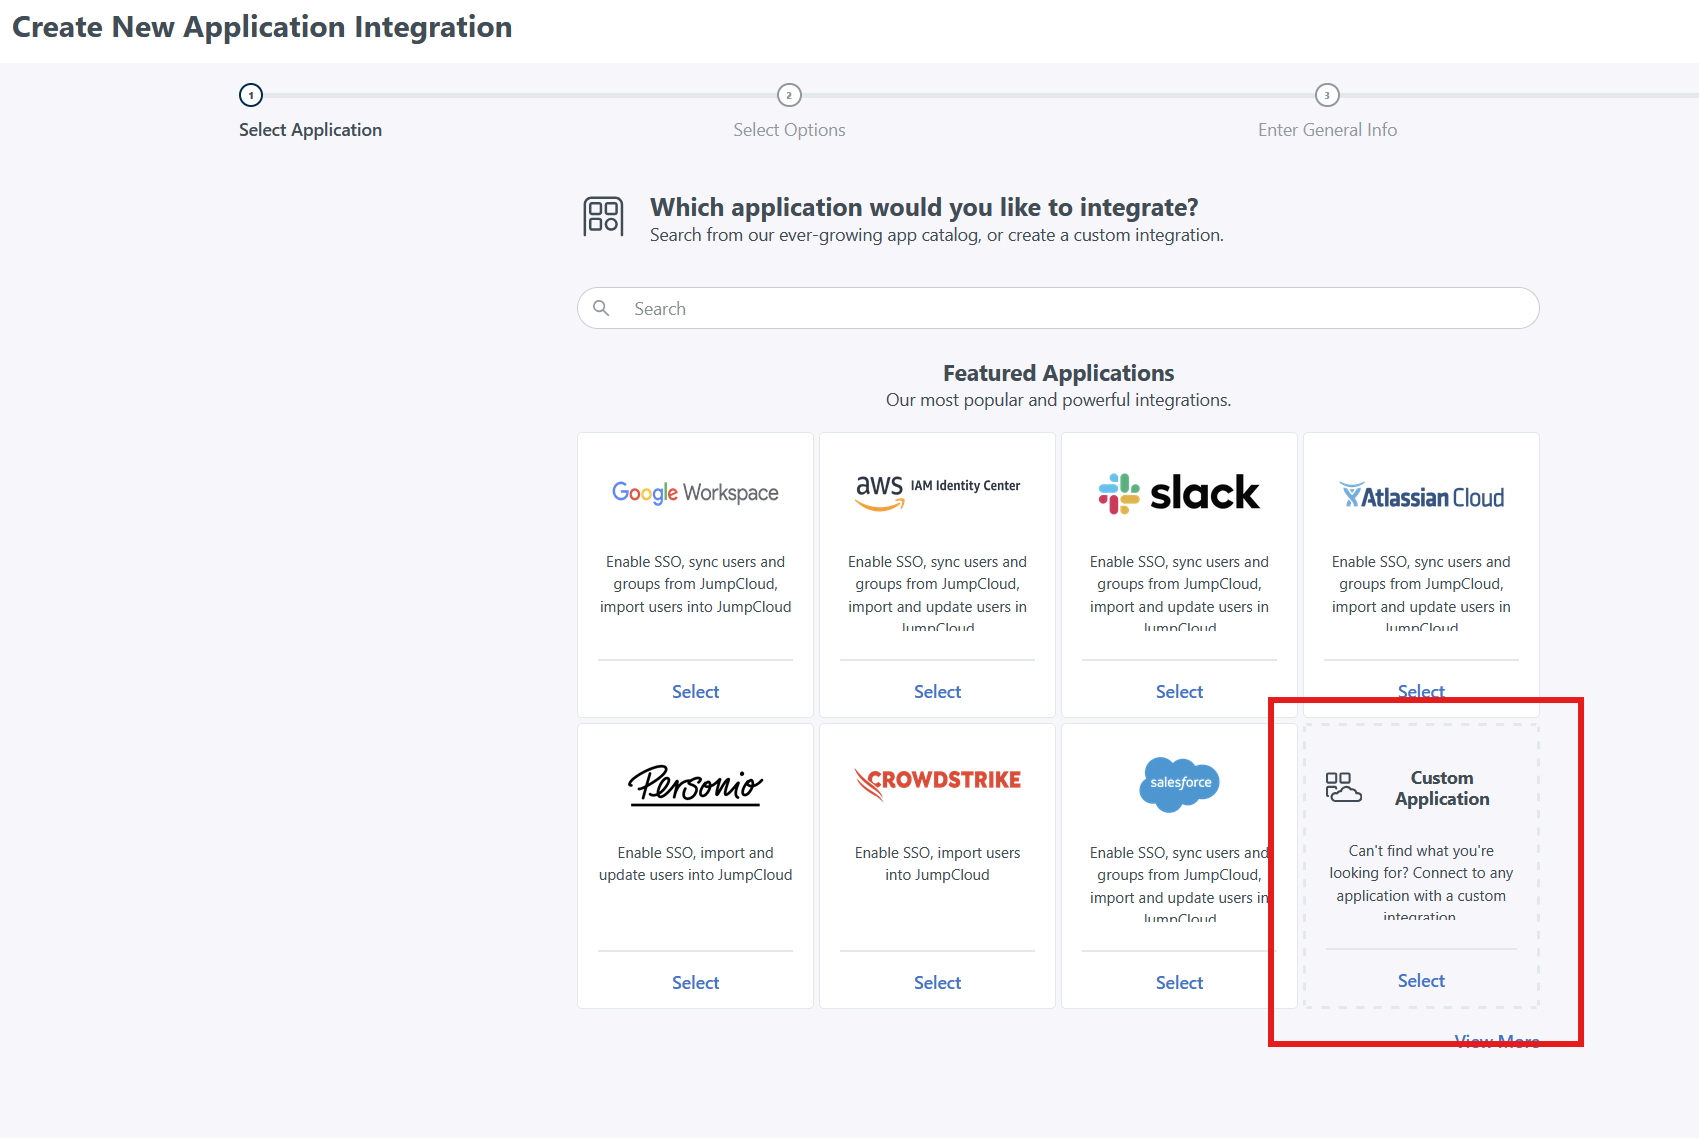
- On the new "Create New Application Integration" screen, press the "Select" link under "Customer Application":
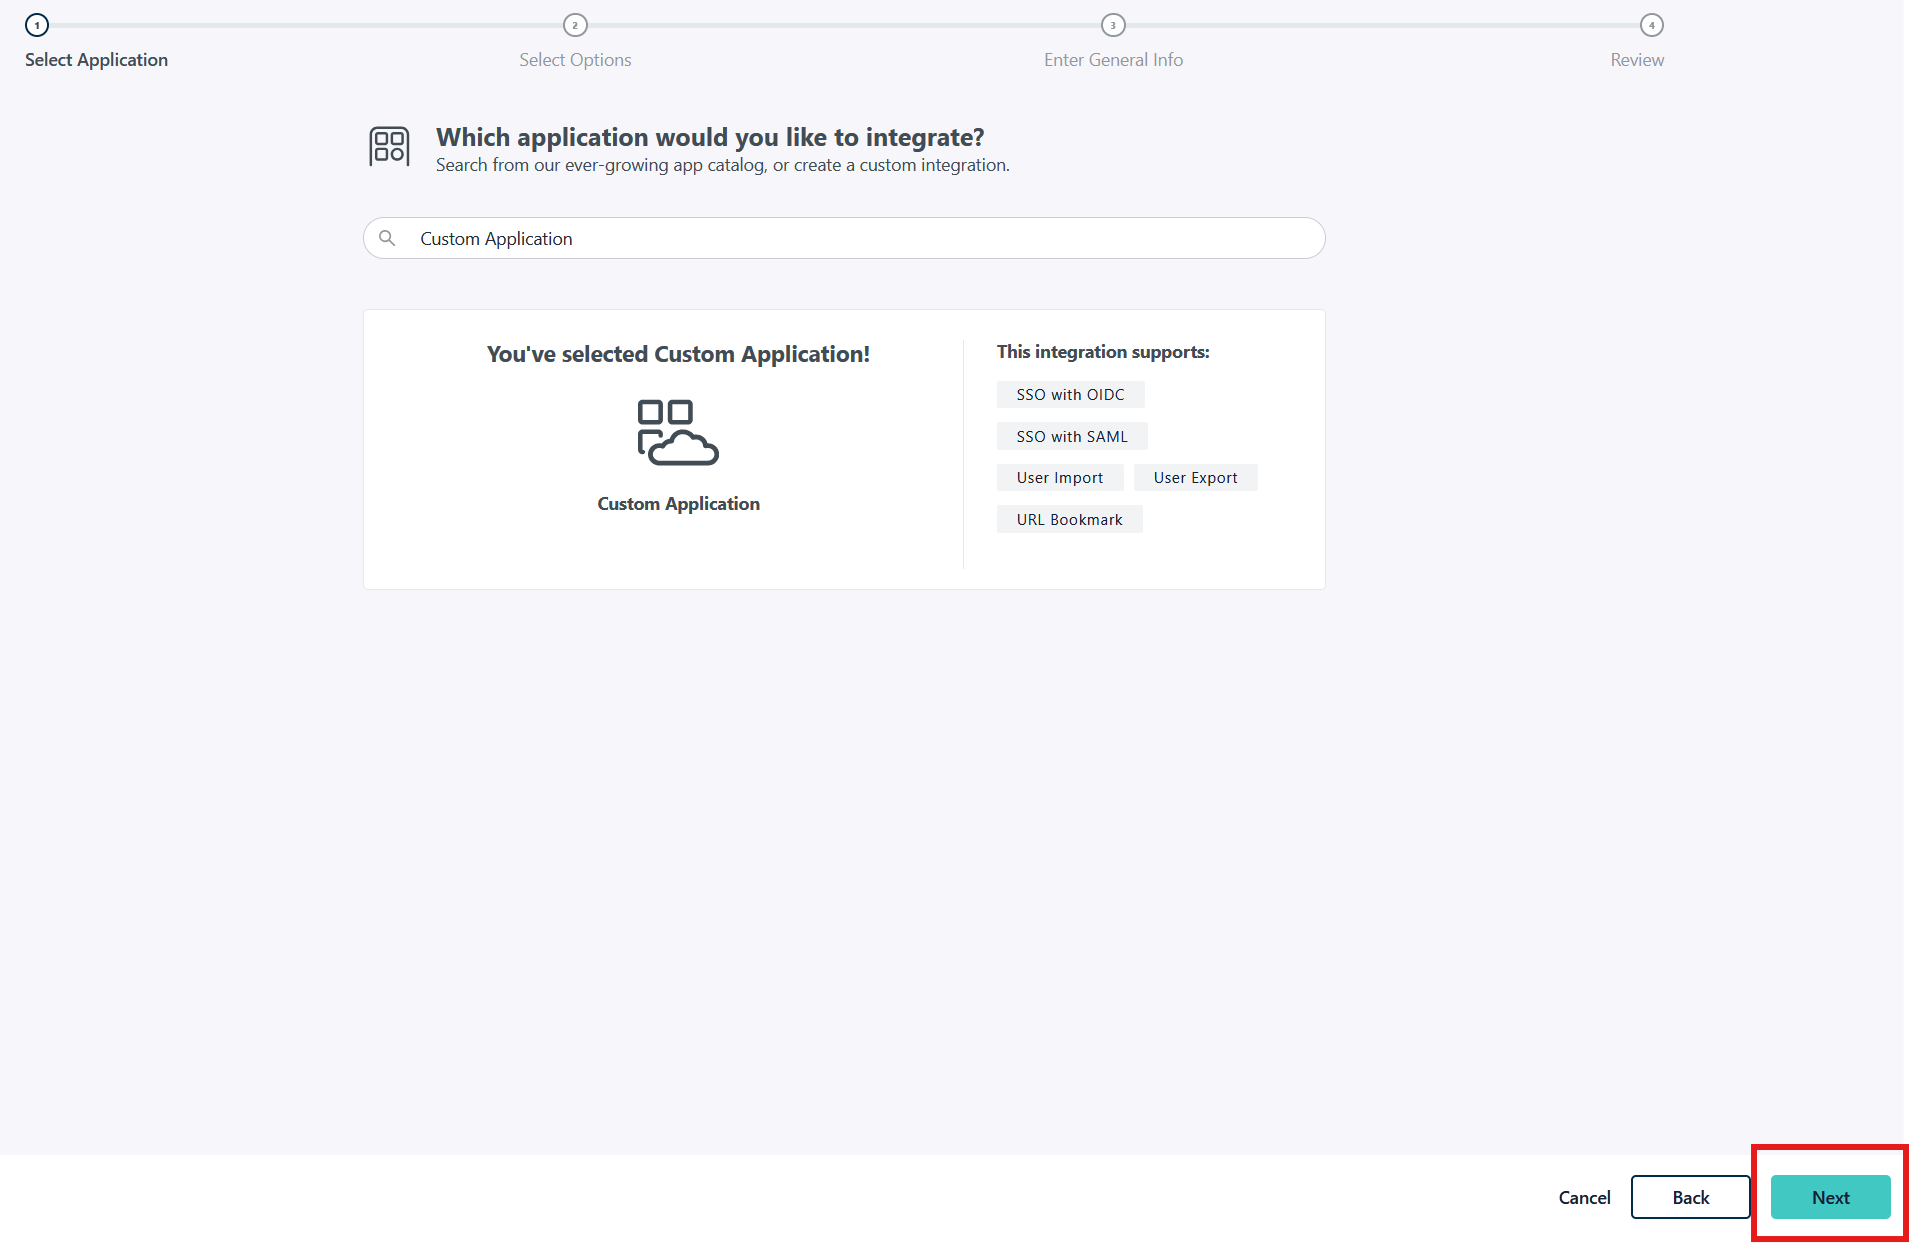
- When prompted for "Which application would you like to integrate?", click the "Next" button in the bottom right hand corner:
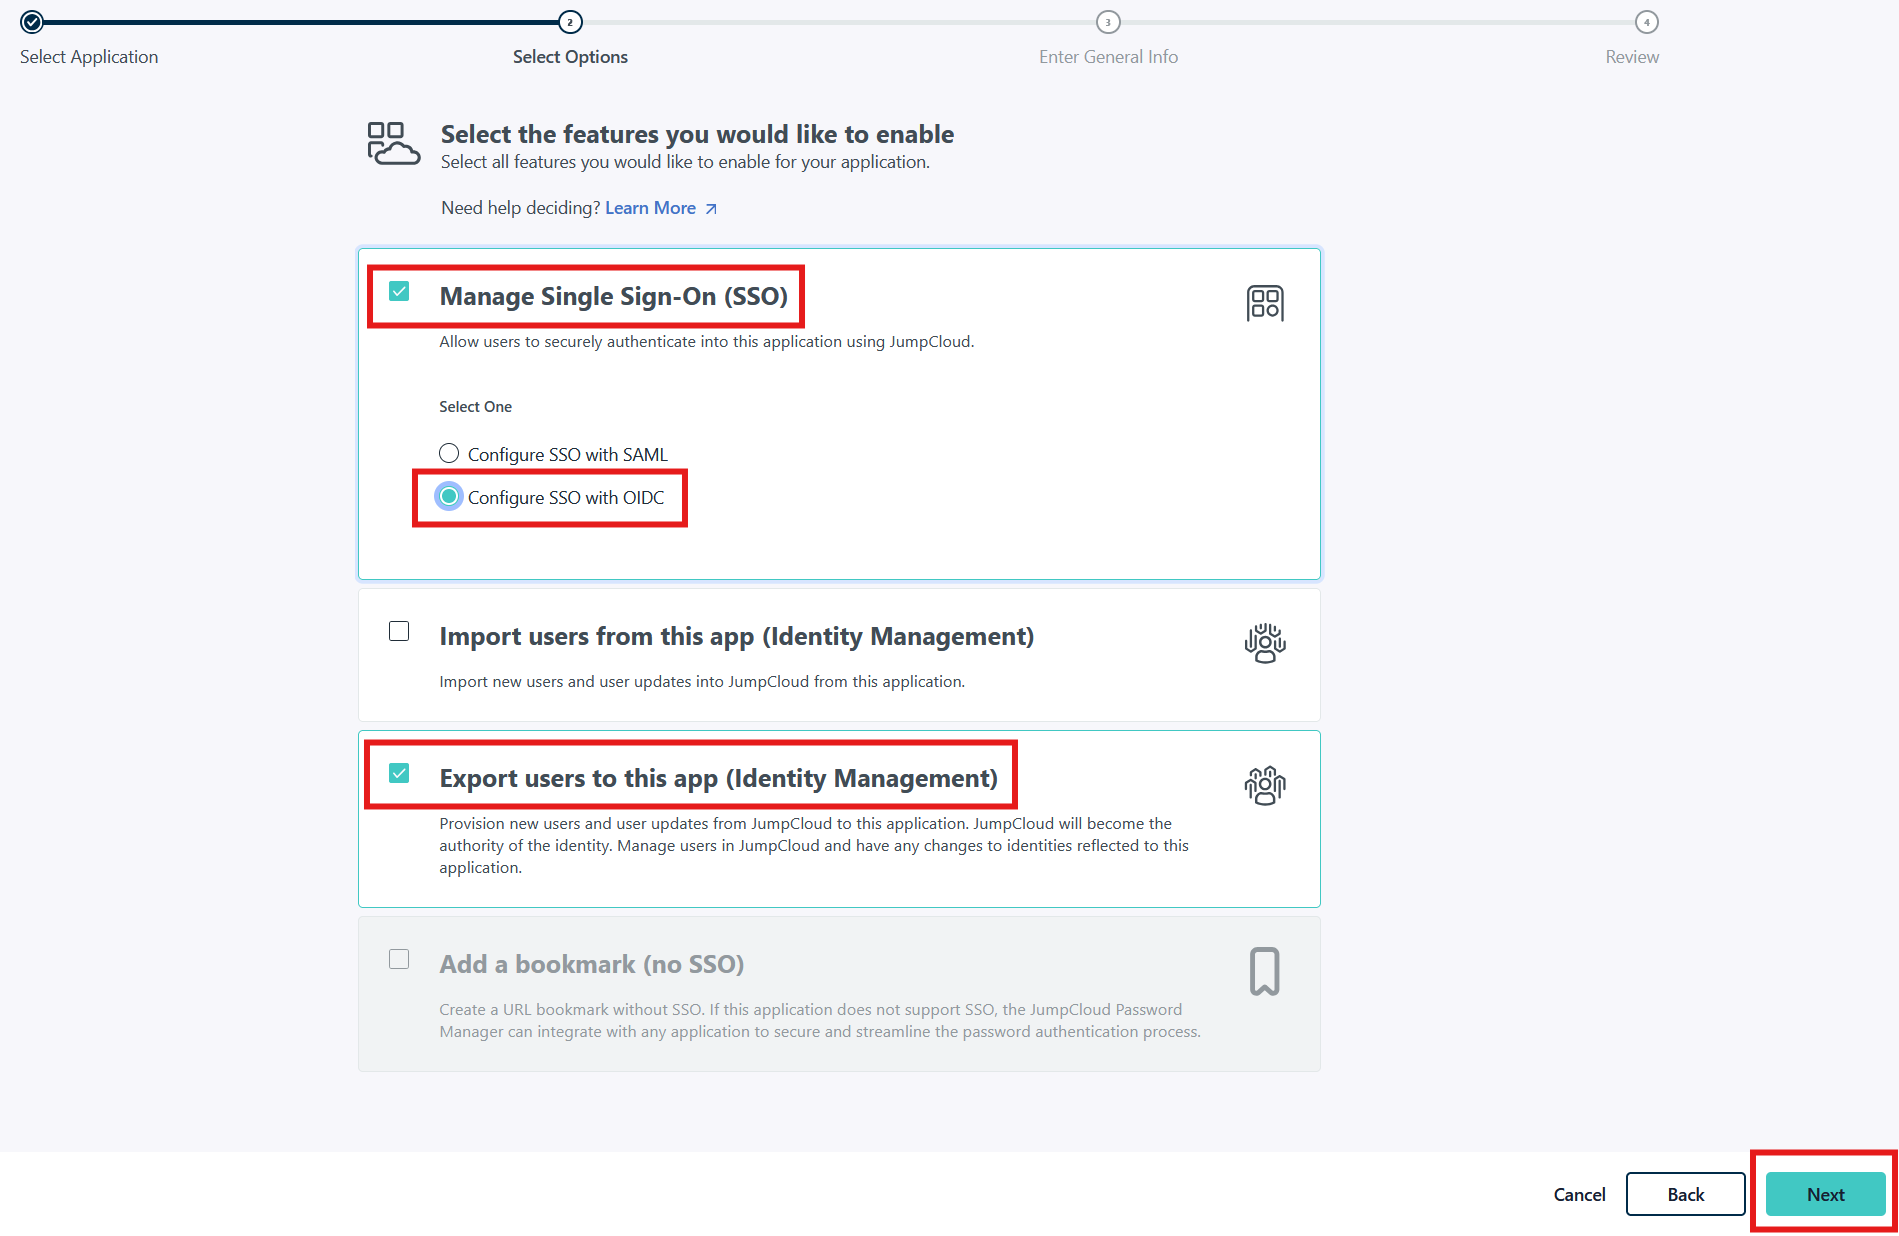
- When prompted for "Select the features you would like to enable", check "Manage Single Sign-On (SSO)", "Configure SSO with OIDC", and "Export users to this app (Identity Management)"; then click "Next":
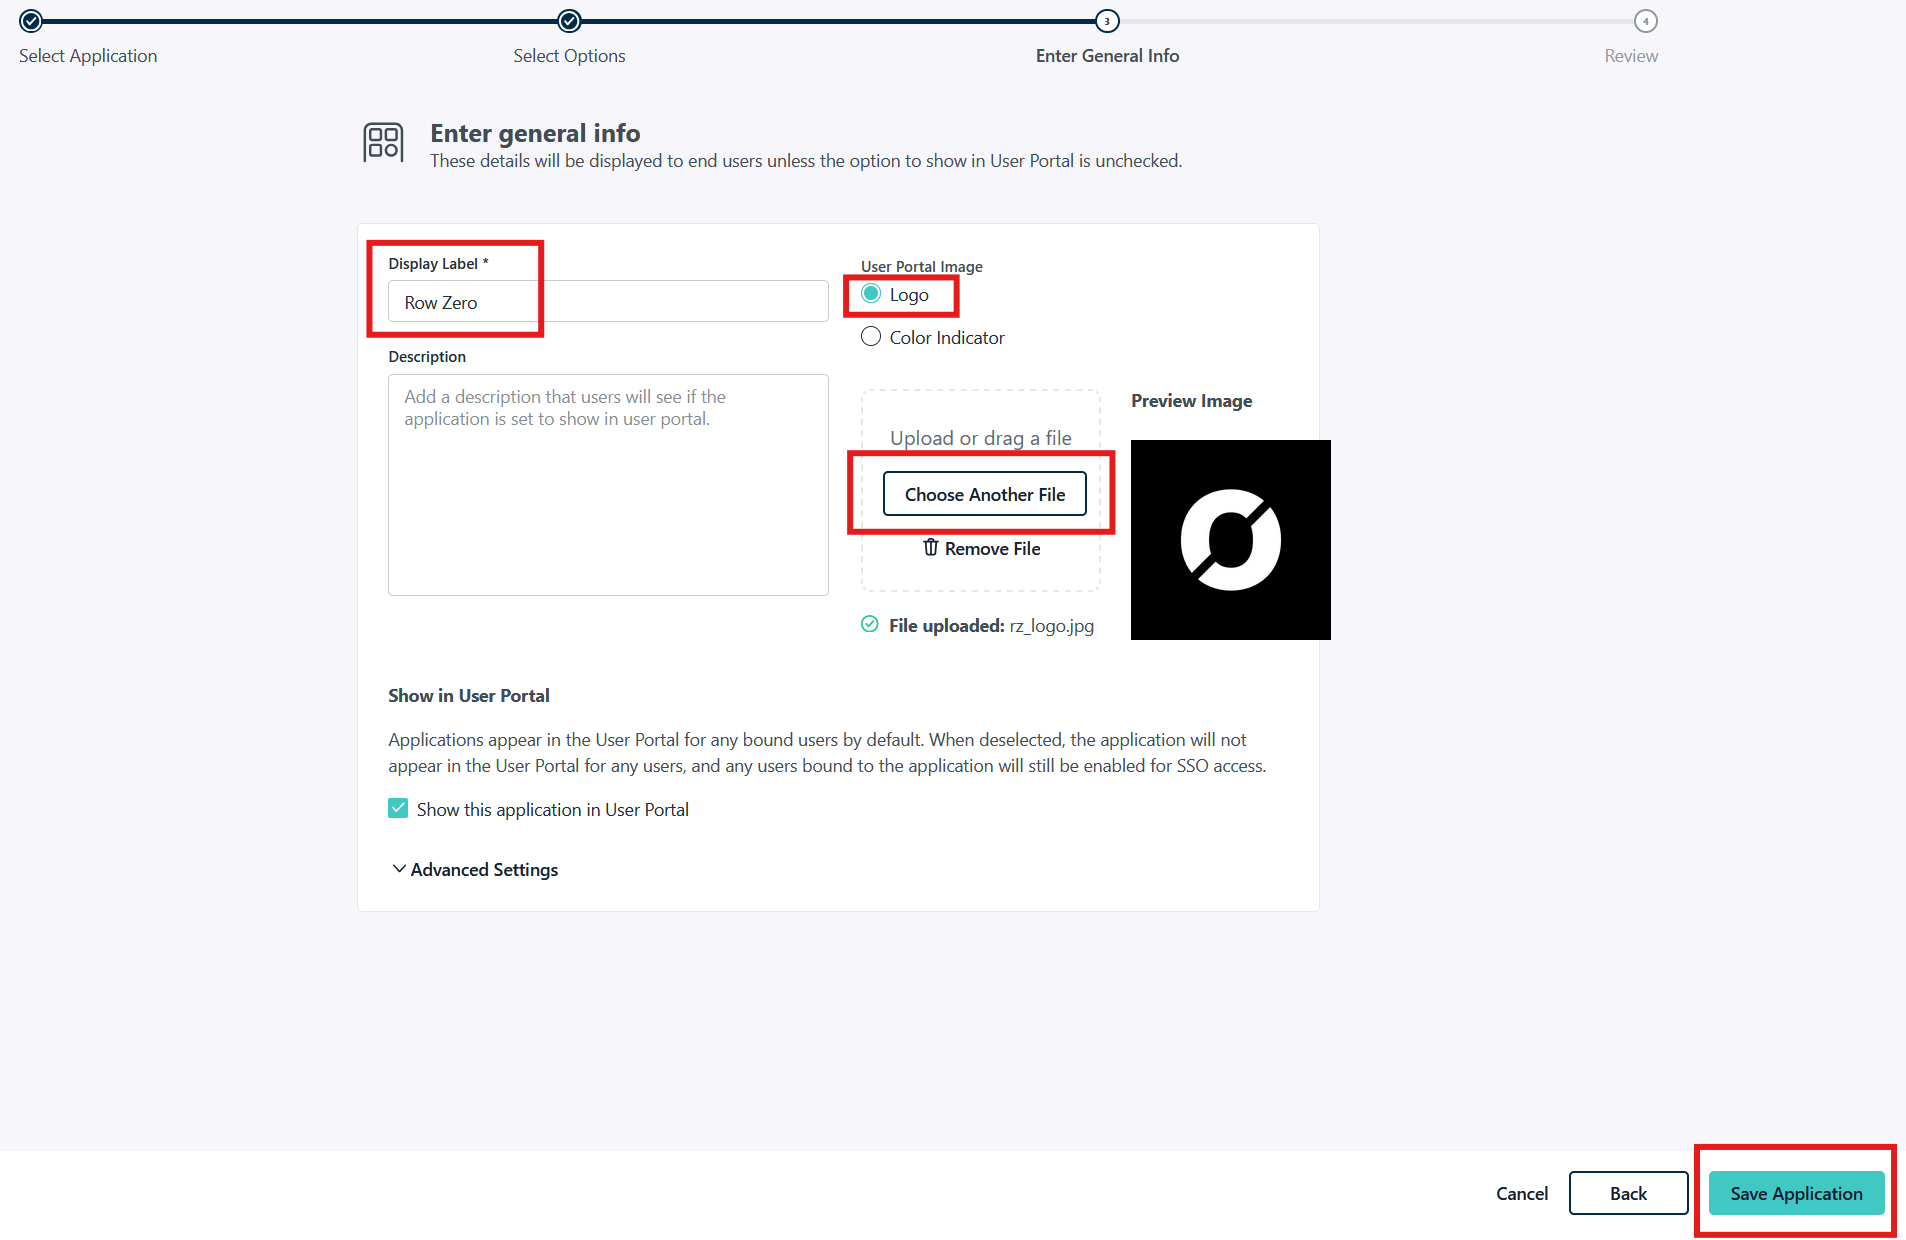
- When prompted for "Enter general info":
- For Display Label type "Row Zero"
- Click the Logo radio button
- Dowload the Row Zero log by clicking this link
- Click Choose a File and upload the Row Zero logo
- Click the Save Application button
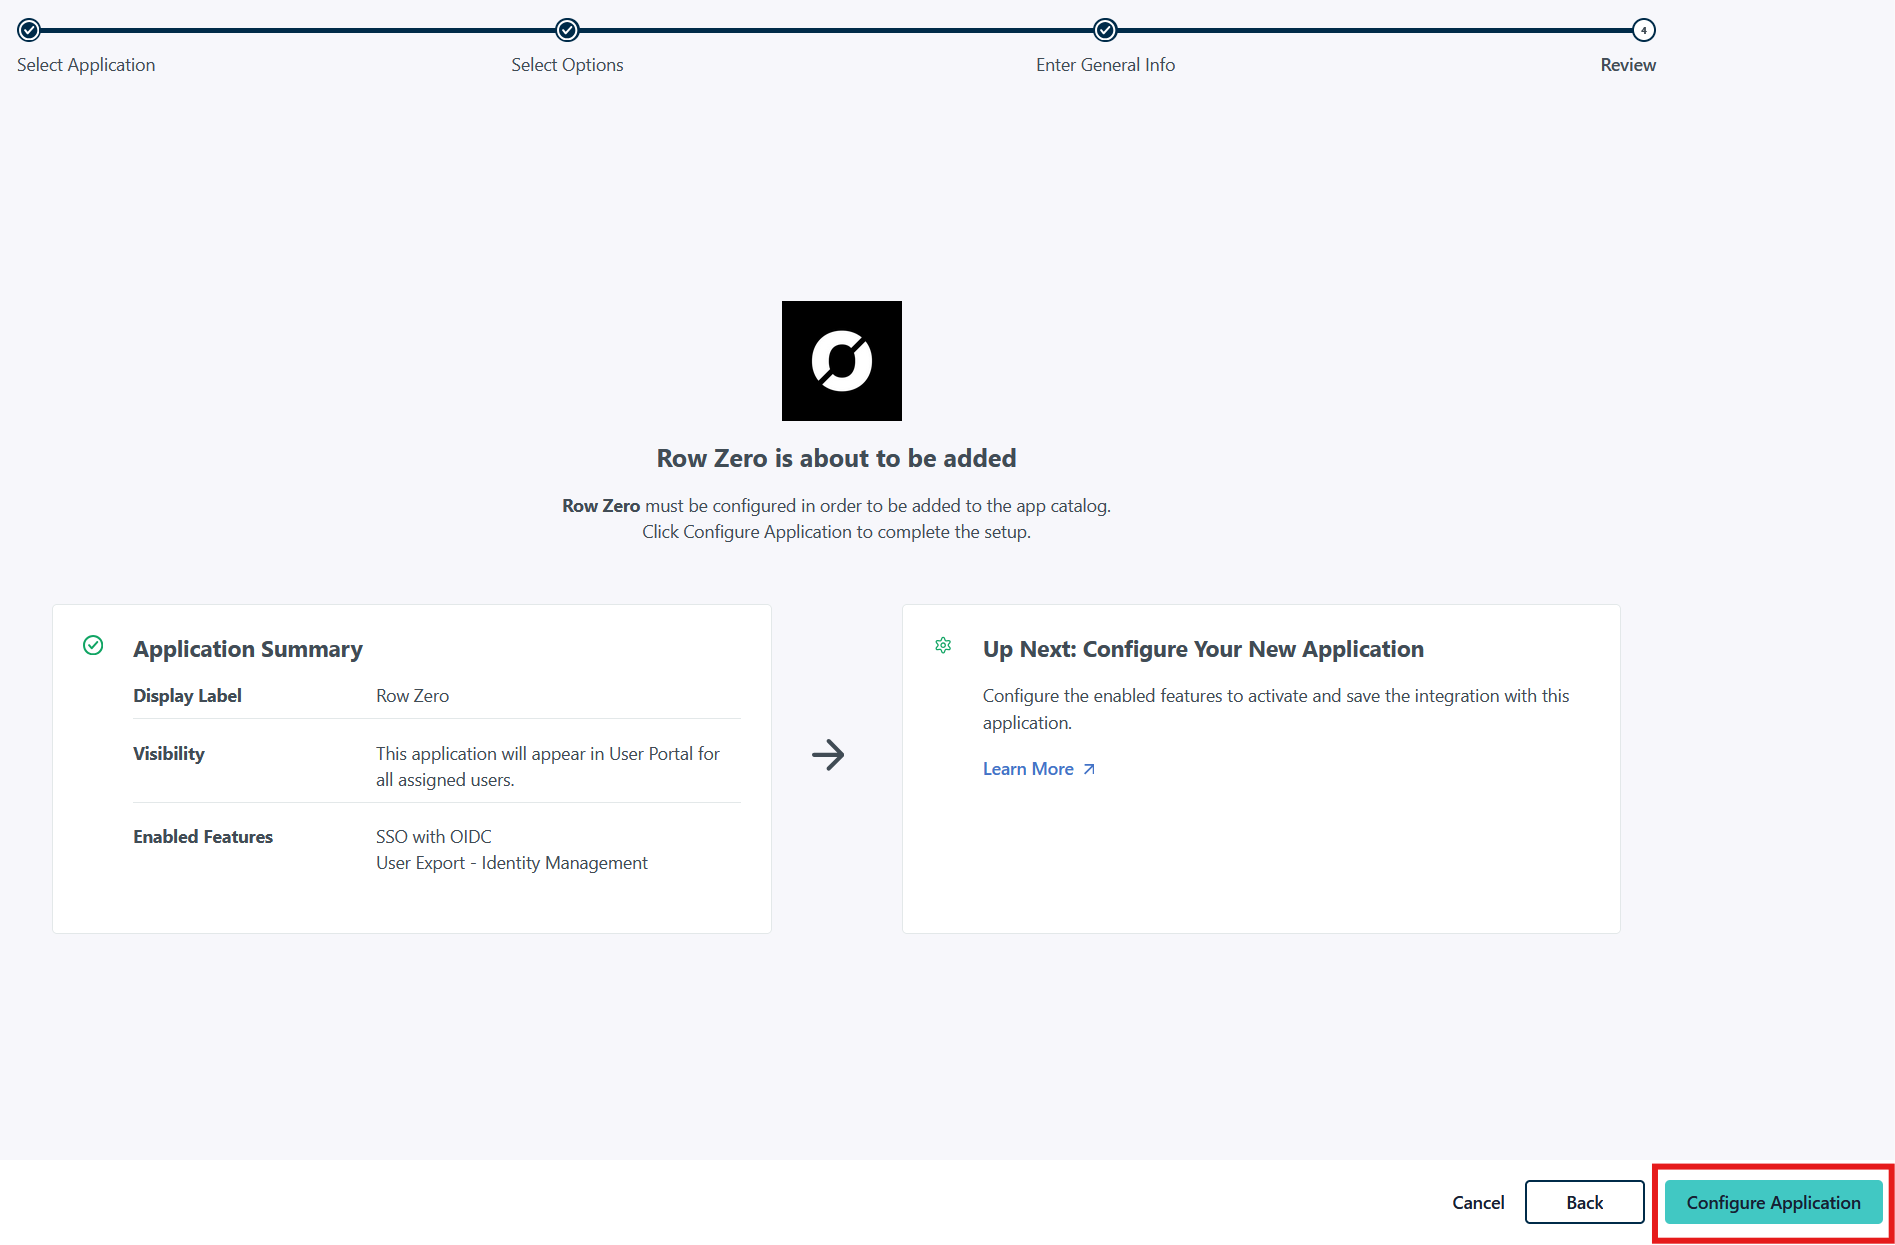
- Once the Row Zero application was successfully added, click on the "Configure Application" button:
- In the "OpenID Connect" page under the "Endpoint Configuration" section:
- For Redirect URIs enter
https://auth.rowzero.io/login/callback - For Client Authentication Type select
Client Secret Post - For Login URL type
https://rowzero.com/startlogin?connection=<CONNECTION_NAME>- Note: You will need to replace CONNECTION_NAME above with an identifier that Row Zero will provide. Contact us when you are setting up your SSO integration and we will give you the CONNECTION_NAME to use.
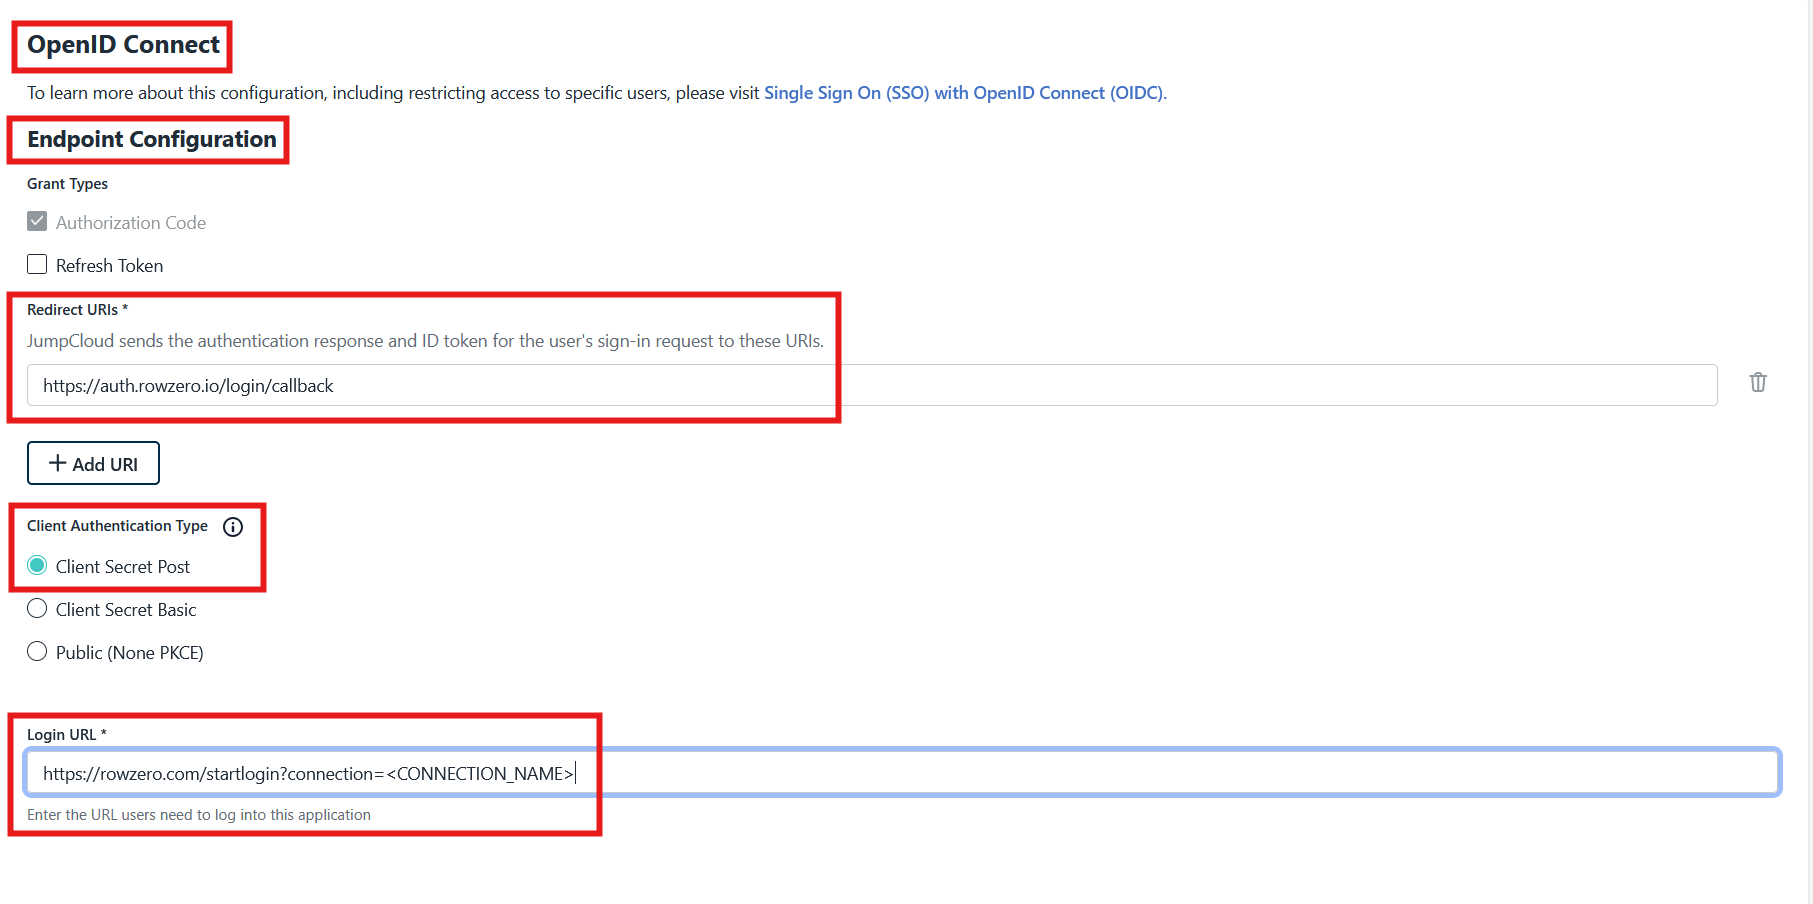
- Note: You will need to replace CONNECTION_NAME above with an identifier that Row Zero will provide. Contact us when you are setting up your SSO integration and we will give you the CONNECTION_NAME to use.
- For Redirect URIs enter
- In the "OpenID Connect" page under the "Attribute Mapping (optional)" section:
- For Standard Scopes select
EmailandProfile jumpcloud-sso-oidc-attribute-mapping
- For Standard Scopes select
- In the "OpenID Connect" page under the "Attribute Mapping (optional)" section, verify that the "Constant Attributes" contains the
email_verified-->trueattribute (if not add it); once complete click the "Activate" button: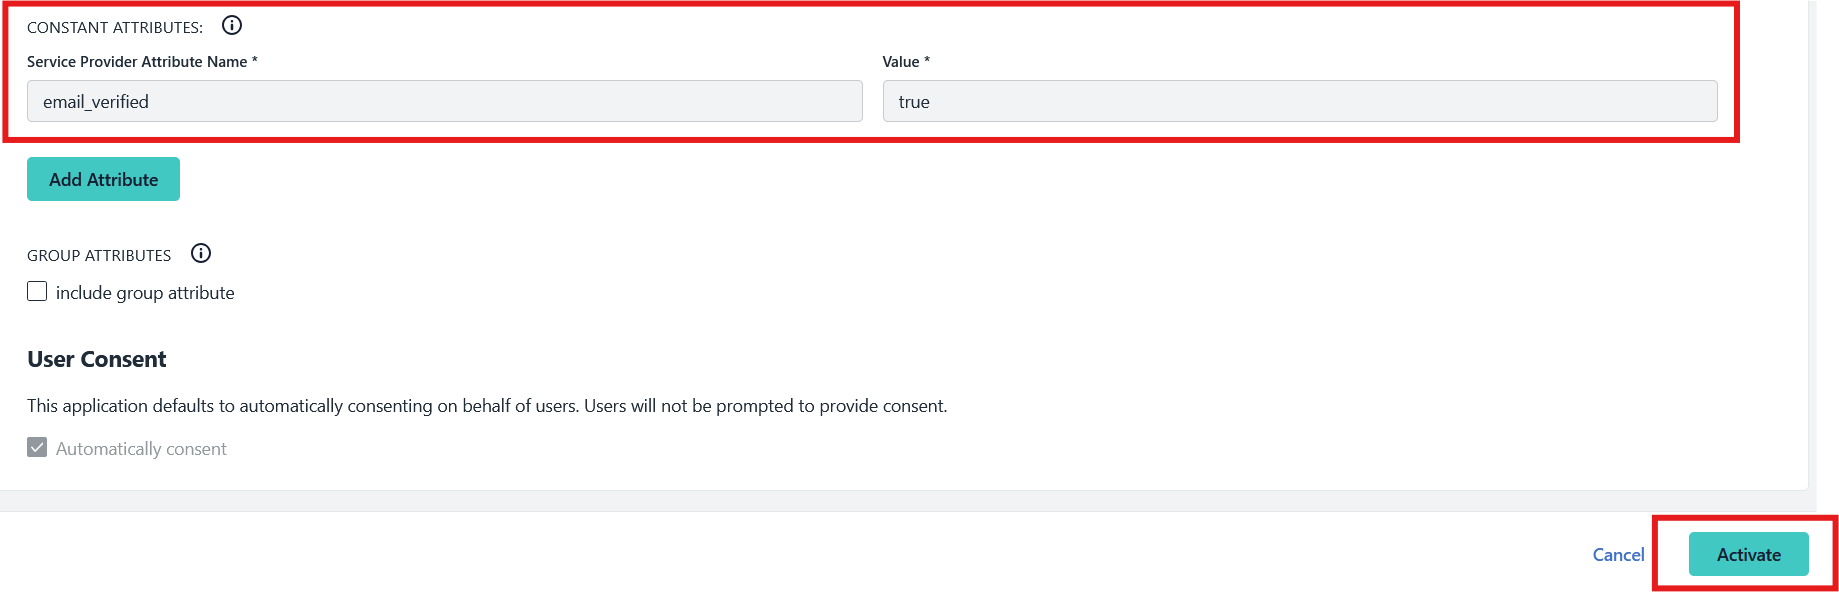
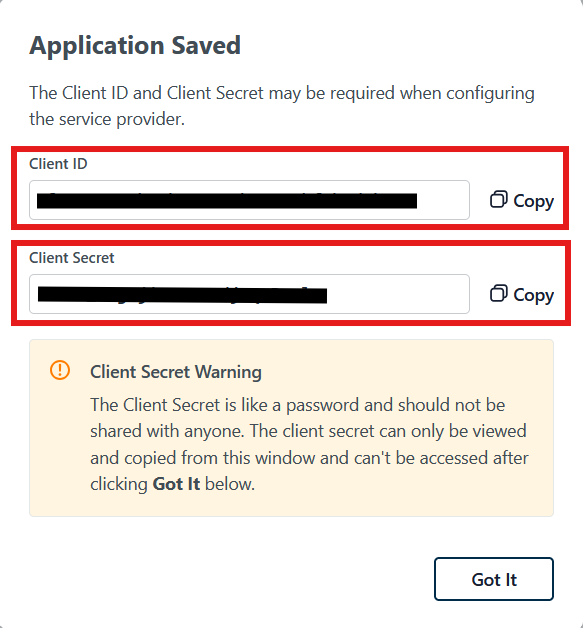
- When the "Application Saved" dialogue box appears, save the "Client ID" and "Client Secret" to later provide to Row Zero:
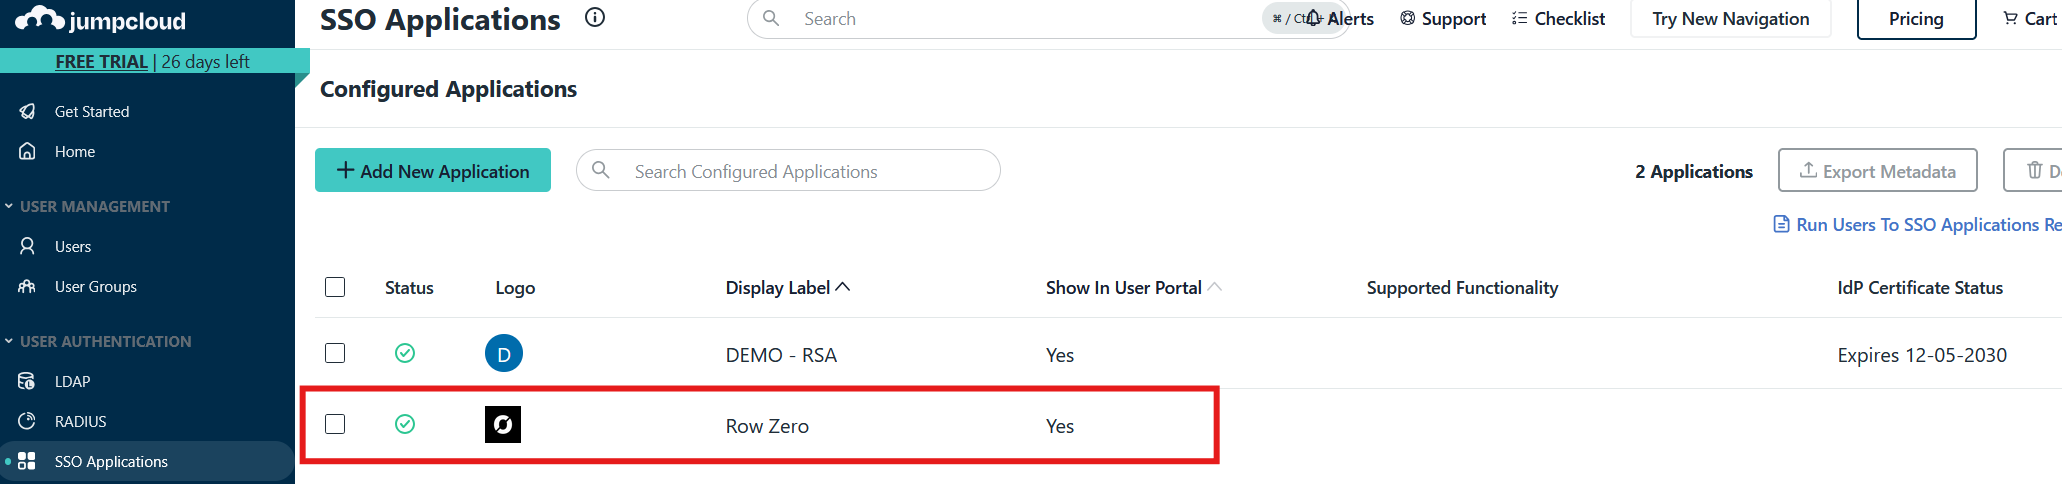
- In JumpCloud under the "SSO Applications" tab, click on the "Row Zero" application:
- On the "SSO" tab, under the "Attribute Mapping (optional)" section, update the mappings to the following:
- Under User Attribute Mapping:
preferred_username-->emailname-->displaynameemail-->email
- Under Constant Attributes:
email_verified--> true
- Click the "Save" button

- Under User Attribute Mapping:
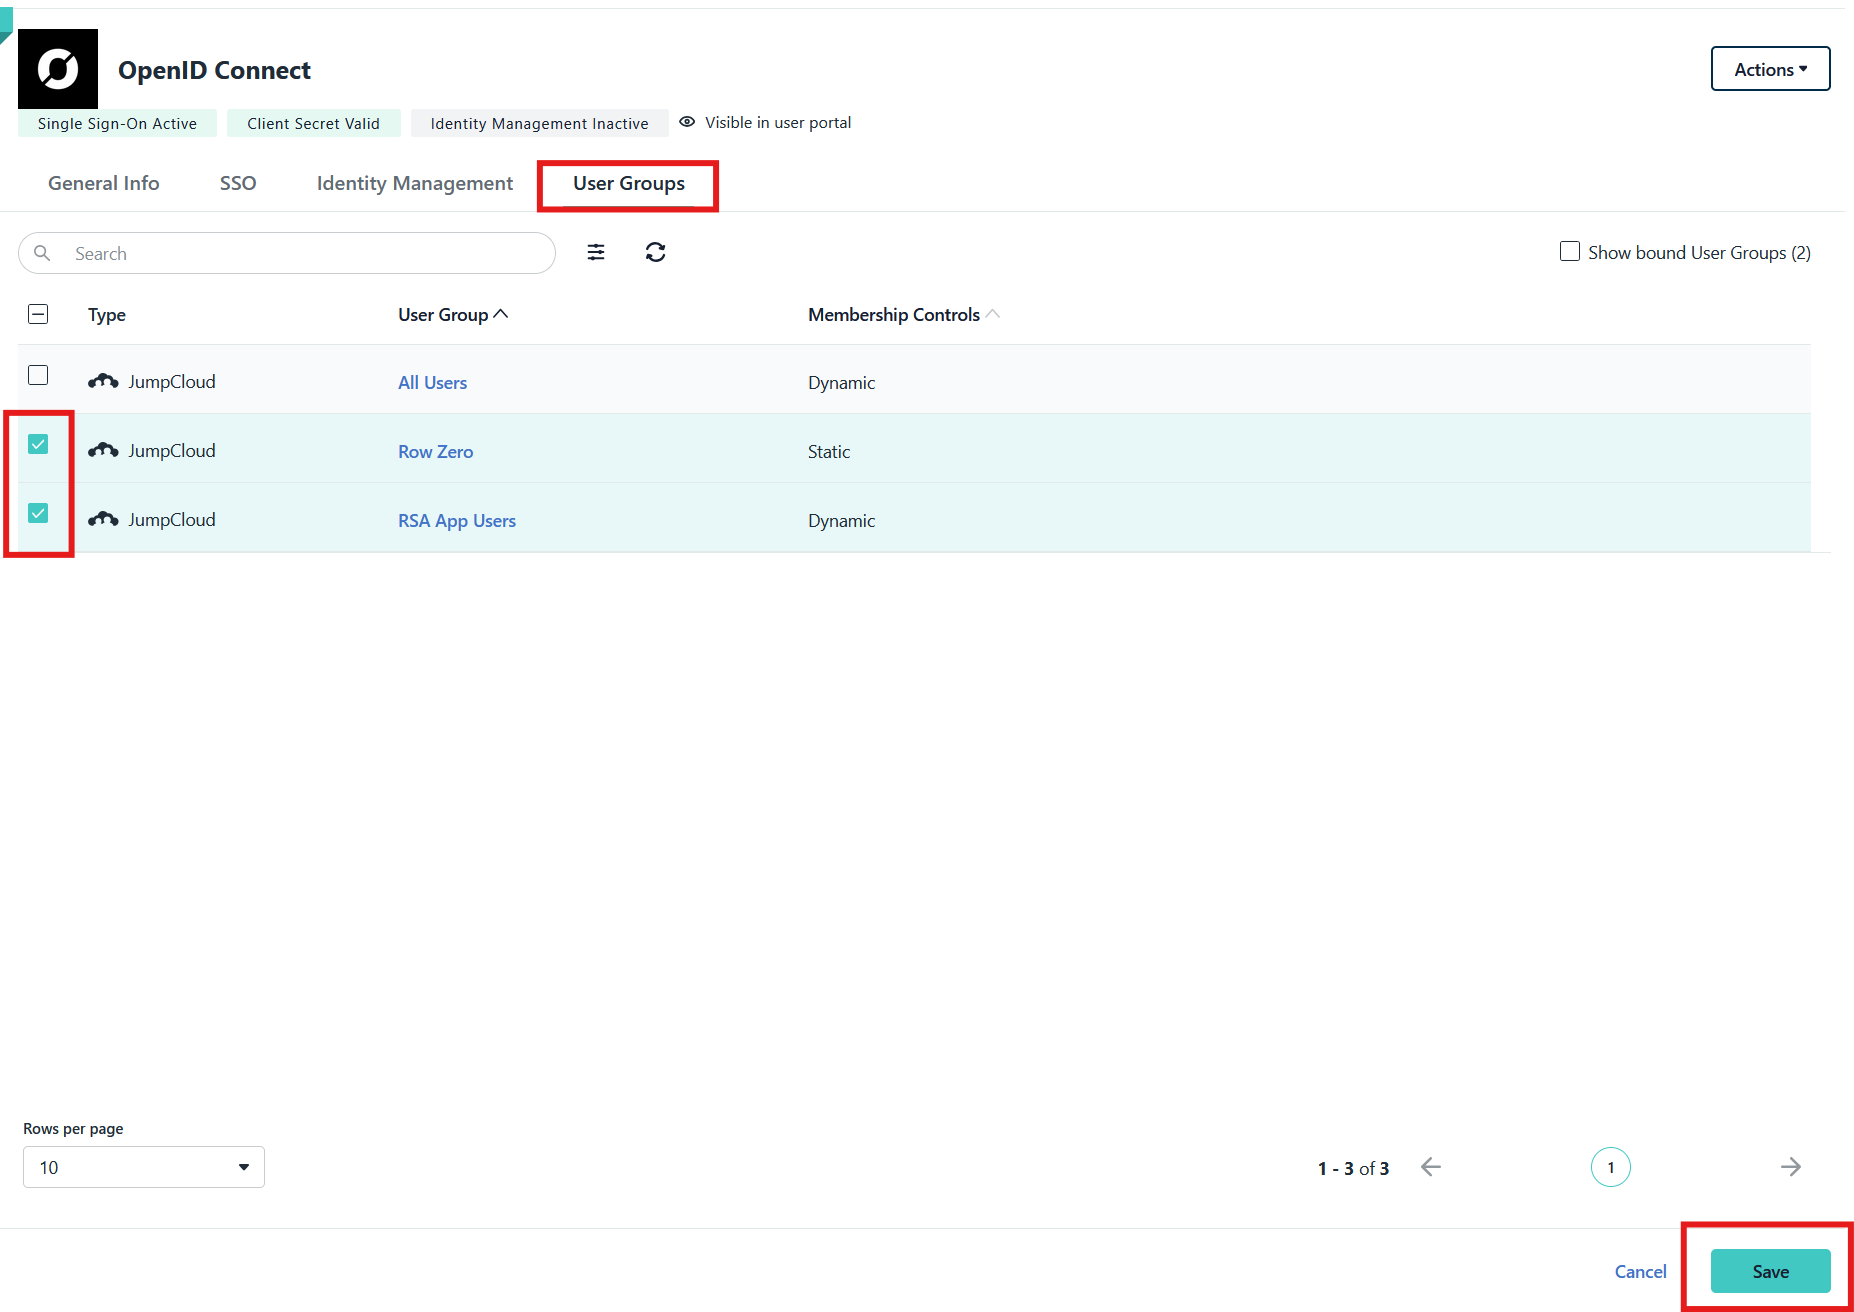
- Click on the "User Groups" tab and select any users or groups you wish to allow access to Row Zero and click the "Save" button.
Once you have configured a Row Zero OIDC application in JumpCloud, contact us at Row Zero so that we can finish configuring the SSO integration on our end. This is the information that we will need from you:
- Client ID
- Client Secret